Use this to add new orders or to view/change an existing open orders.
- From the Main Menu, select Orders -> Fulfillment Orders -> Edit Order.
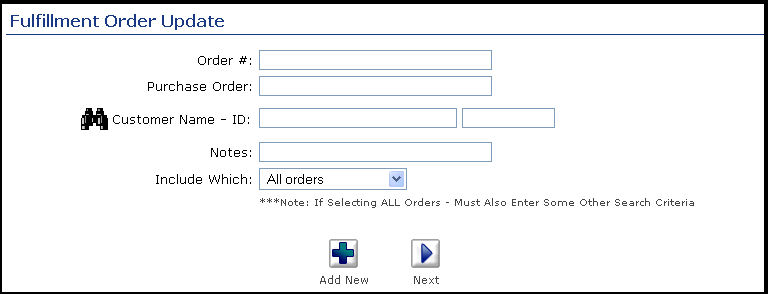
- Your screen should look similar to this:
- To Add a new order, click on the
 Add button, then view Help for New Fulfillment Orders. Add button, then view Help for New Fulfillment Orders.
- To select an existing order to update, enter any known data into the following categories (NOTE: The more information you fill in, the shorter the list of possible matches will be):
- Order Number:
- Purchase Order:
- Customer Name ID: Enter the customer name in the first box (or any portion of the name) to bring up a drop-down of possible matches. Or, you can enter the customer number directly into the box on the right. If you want to search by phone, zip code, etc., use the
 Lookup button for detailed searches. Lookup button for detailed searches.
- Notes: Enter any notes or key words for your search.
- Include Which: Select STATUS of orders to be included in list (All Orders, Open Orders Only, Closed Orders Only, or Pending Quotes).
- Click the
 Next button. If there is more than one possible match, you must select the right one from the list, which should look similar to this: Next button. If there is more than one possible match, you must select the right one from the list, which should look similar to this:
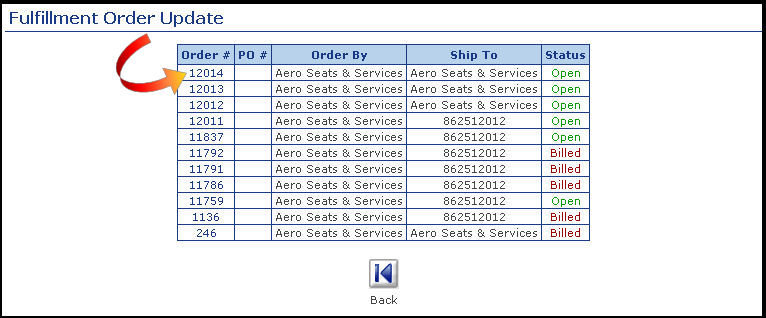
- Click on the
 Back button to return to the previous screen. Back button to return to the previous screen.
- Click on the Order Number you would like to view or change. In the status column you can see if the order is Open, Partial (some items shipped), Complete (fully shipped) or Billed (had an invoice created in Receivables).
- Your screen should look similar to this:
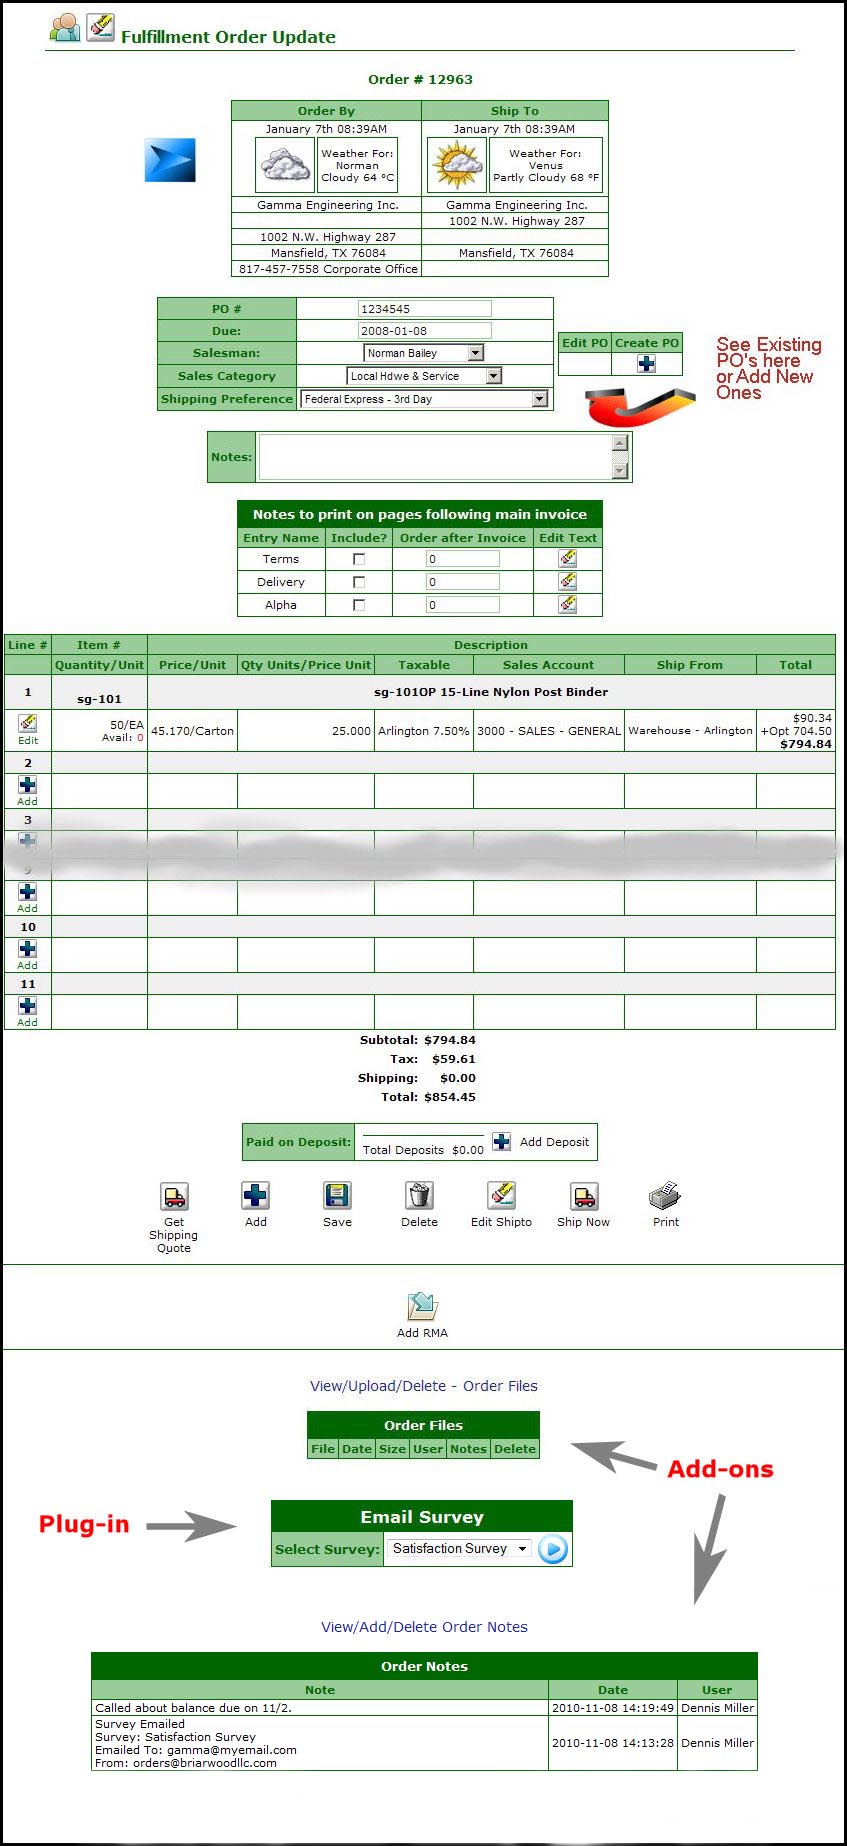
NOTE: If you selected a Completed or Billed order, you can only PRINT the order, not edit it. To edit a Completed order that has not been Billed, you must cancel a shipment first.
- Edit any information desired. For instructions on entering Line Items, see the Adding Line Items (Parts) to an Order topic in the Related Topics section at the bottom of this Help screen.
- Add a Deposit. At anytime you can add a deposit by clicking on the Add Deposit Button. That will bring up the following:
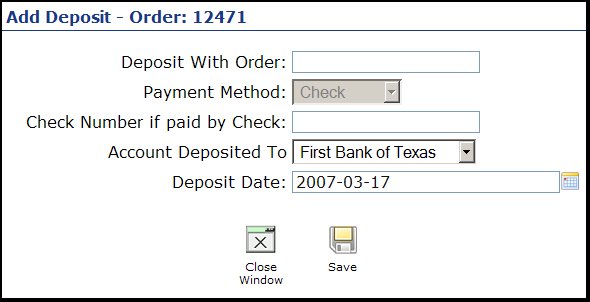
- Deposit With Order: Enter the amount of the deposit.
- Payment Method: Select payment method from the drop-down list.
- Check Number if paid by Check: Enter the check number if payment is by check to facilitate tracking in reports.
- Account Deposited To: Checking Account (or petty cash) where the payment received will be deposited.
- Deposit Date: This will default to the current date, but if you happen to be applying the deposits after the fact, you may need to change the date to keep accounting straight.
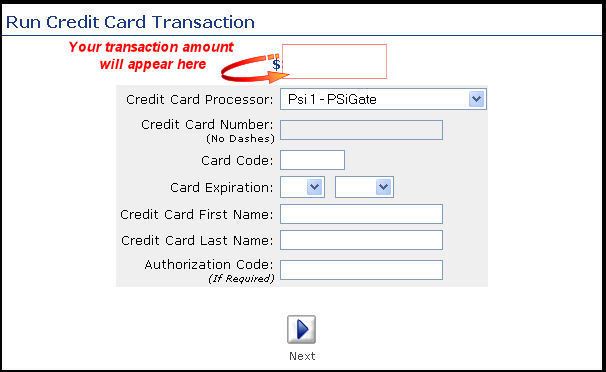
- When you have entered the information on this screen, click on the
 Save button to continue. If the payment was NOT by credit card, the transaction will now be complete. However, if the payment WAS a credit card, then the standard credit card information screen will appear: Save button to continue. If the payment was NOT by credit card, the transaction will now be complete. However, if the payment WAS a credit card, then the standard credit card information screen will appear:
- To get a shipping quote, click on the
 Get Shipping Quote button. This calls the shipper web interface to find current shipping data, or you can simply enter your own shipping figures. Get Shipping Quote button. This calls the shipper web interface to find current shipping data, or you can simply enter your own shipping figures.
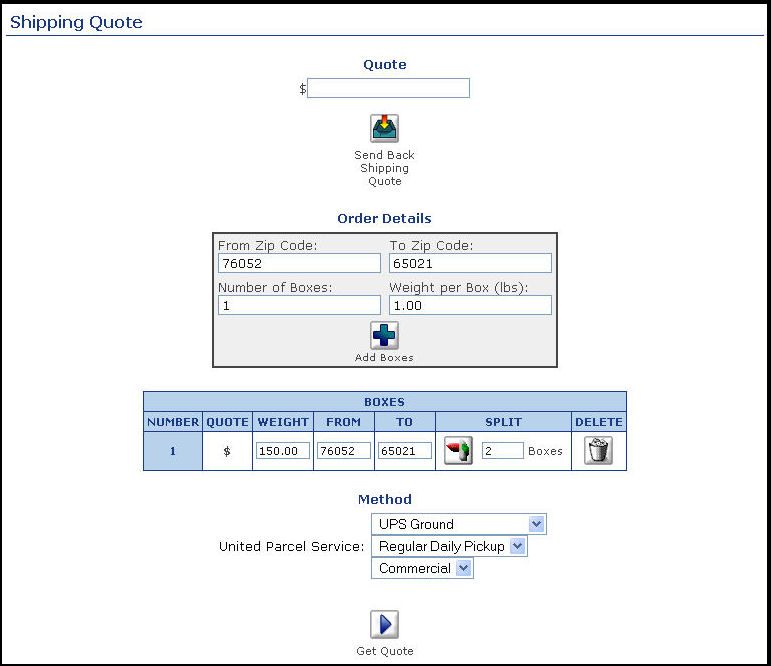
- Quote $: If you want to enter your own shipping costs, simply enter in this box, then click on the
 Send Back Shipping Quote button. Send Back Shipping Quote button.
- From and To Zip Codes: These should already be filled in with your company zip code as the "From" and the ship-to location of the customer as the "To" zip code. You can change these if you want.
- Number of Boxes: Enter the number of IDENTICAL weight boxes here.
- Split: By using the SPLIT button and/or the ADD BOXES button, you can create multiple boxes to be shipped and can indicate different weights per box and different ship-to and from zip codes for each box.
- Ship Method: Pick the method of shipment for this group of boxes.
- Get Quote: When all data about the boxes is entered, click on the Get Quote button. This will query the shipper web-site and return the cost of the shipping.
- When you have the shipping costs you want, click on the Send Back Shipping Quote button at the top to pass these shipping costs back to the order.
- Click on the
 Edit Shipto to change the ship-to address. This may also change the taxes being charged, so double-check these after changing your ship-to information. When clicking on the edit button your screen will appear as follows: Edit Shipto to change the ship-to address. This may also change the taxes being charged, so double-check these after changing your ship-to information. When clicking on the edit button your screen will appear as follows:
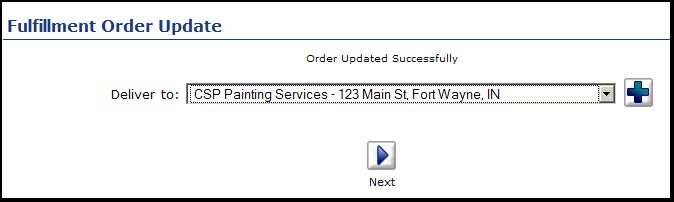
Select Shipto from drop-down (or use the Add button) then click on the next button to return to the order details.
- At the bottom is an area where you can attach documentation about this order (an agreement, a picture of the piece you are to produce, etc.).
- To add a new attachment, click on UPLOAD. To see how this entire process works, click on the link below for ATTACHING FILES.
- Below the attachments, if you have Order Notes Add-on activated, you can add dated notes about the order.
- Click the Save button to save the changes.
- Click on the
 Delete button to delete this order. NOTE: The Delete button will not display if a Customer Deposit is entered on this order. You must void the Customer Deposit in order to delete the order. Delete button to delete this order. NOTE: The Delete button will not display if a Customer Deposit is entered on this order. You must void the Customer Deposit in order to delete the order.
- Click on the Add button to increase the number of line items on the order.
- Click on the Ship Now button to open the Enter New Shipment screen and ship the order.
- Click the
 Print button to print a copy of the order, a Order PickList, Order Confirmation, or email an Order Confirmation. Use this same link to print a confirmation of the order, or to email a confirmation. (For sample tickets, scroll to the bottom of the HELP section and use link for NEW FULFILLMENT ORDER, ORDER CONFIRMATION, or PICK TICKET. Print button to print a copy of the order, a Order PickList, Order Confirmation, or email an Order Confirmation. Use this same link to print a confirmation of the order, or to email a confirmation. (For sample tickets, scroll to the bottom of the HELP section and use link for NEW FULFILLMENT ORDER, ORDER CONFIRMATION, or PICK TICKET.
- Click on the
 Add RMA button to create or edit an RMA for this order. You must have made shipments before RMA's can be created. See RMA section for details on how this process works. Add RMA button to create or edit an RMA for this order. You must have made shipments before RMA's can be created. See RMA section for details on how this process works.
NOTE: At the very bottom is an area where you can attach documentation about this order (an agreement, a picture of the piece you are to produce, etc.).
To add a new attachment, click on UPLOAD. To see how this entire process works, click on the Attaching Files link below in the Related Topics Section of this Help screen.
Also at the bottom of the screen you can add dated notes about this order if you have Order Notes Add-on activated.
If you have the Survey Manager Plug-in installed and have an active survey, it will also display at the bottom. For more information about setting up and completing surveys, click on the Survey Manager link below in the Related Topics Section of this Help screen. Survey information will also display in the Order Notes Add-on if you have it activated.
|