|
|
Create RMAs, Receive RMAs, Edit RMAs (Return Material Authorization).
- From the Main Menu, select Orders -> Item Orders -> Process RMAs.
- Your screen should look similar to this:

- Enter Data in any of the following categories that you know. If only one order matches, you will go directly to RMA information. If more than one could match, you will see a list from which to select the order you want:
- Order #: Order number.
- Purchase Order: Purchase order number.
- Shipment ID: Shipment ID.
- RMA Number: RMA number.
- Customer Name: Enter Customer Name (or any portion of the name) to bring up a drop-down of possible matches. If you want to search by phone, zip code, etc., use the
 Lookup button for detailed searches. Lookup button for detailed searches.
- Location: Select a location from the pull-down list. NOTE: If you have only one location, you will not see this option on your screen.
- To continue, click the
 Next button. Your screen should look similar to this: Next button. Your screen should look similar to this:
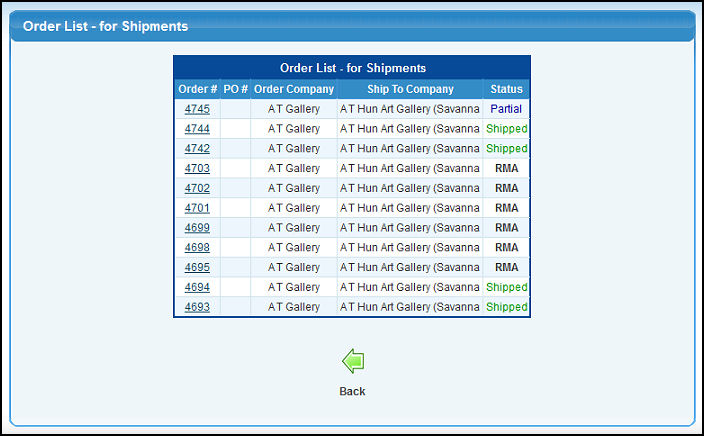
- To add or update an RMA, click on an Order Number. Your screen should look like this:
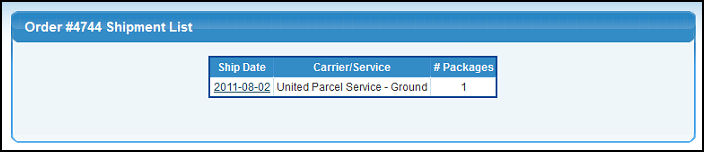
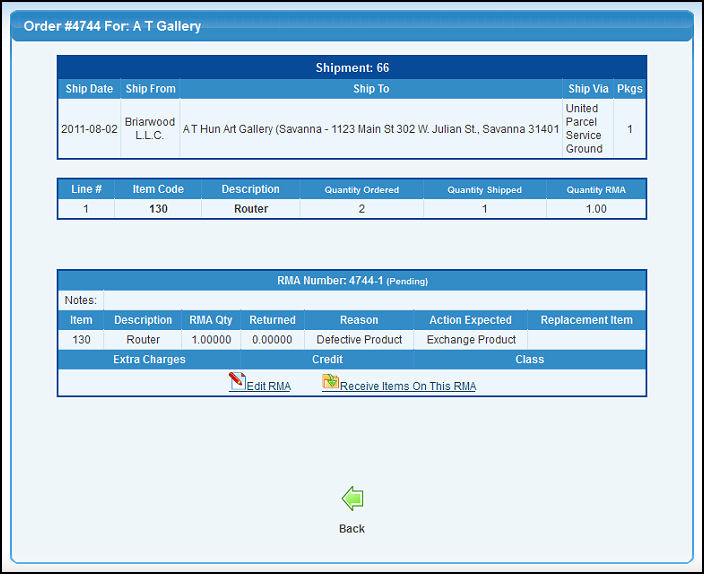
- Click on the Ship Date for the shipment that needs an RMA and your screen should look like the following:
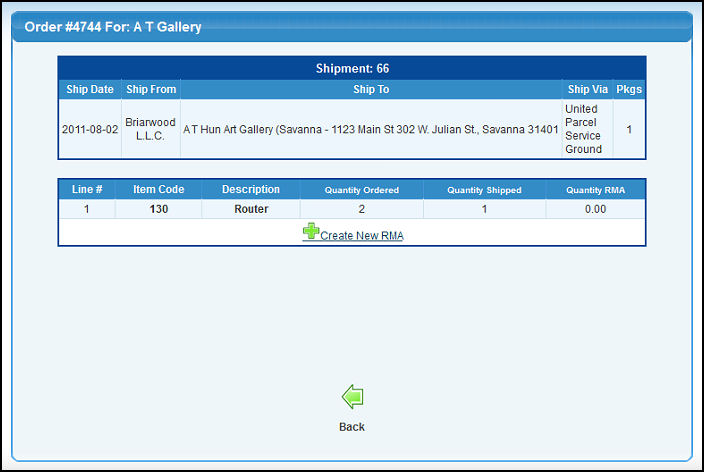
- You will see a shipment id for this order, followed by the items that were shipped. If there are any existing RMAs for this shipment, those will be listed below. To create a new RMA, click on the
 Create New RMA Button. This will bring up a new screen: Create New RMA Button. This will bring up a new screen:
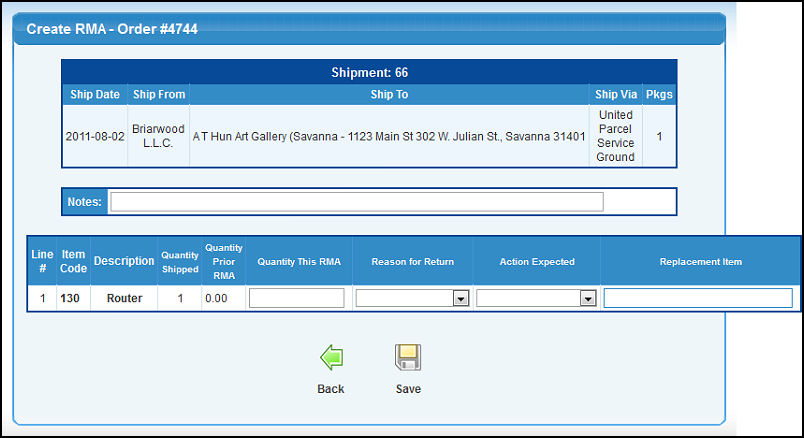
- Quantity This RMA: Enter the quantity of items being returned next to each line item that will be returned.
- Reason For Return: Select a reason from the drop-down list. NOTE: These reasons are created under Admin -> Setup - Service -> RMA Setup.
- Action Expected: The action selected will determine how the RMA will act when the items are returned. If the item is being replaced with another item, it will generate a credit invoice for any difference due and also generate a new order for the new item to be sent. If the item is being returned, then just a credit invoice will be generated. A restocking fee may be subtracted from the price of the item if one is set up in the billing section.
- Replacement Item: If the item is to be replaced with a similar (or even the same) item, you can enter the item here AND make sure that you select the right ACTION setting for replacements.
- When complete, click on the
 Save button to finish the RMA. Save button to finish the RMA.
- To Edit or Receive an RMA, you will go through the same lookup process as above. Your screen might look similar to this:
 Edit: Click the edit button on the RMA you wish to change. The screens will look like the ADD RMA screens. Edit: Click the edit button on the RMA you wish to change. The screens will look like the ADD RMA screens. Receive: Click on the receive button on the RMA for which the returned products have arrived. Your screen will now look like this: Receive: Click on the receive button on the RMA for which the returned products have arrived. Your screen will now look like this: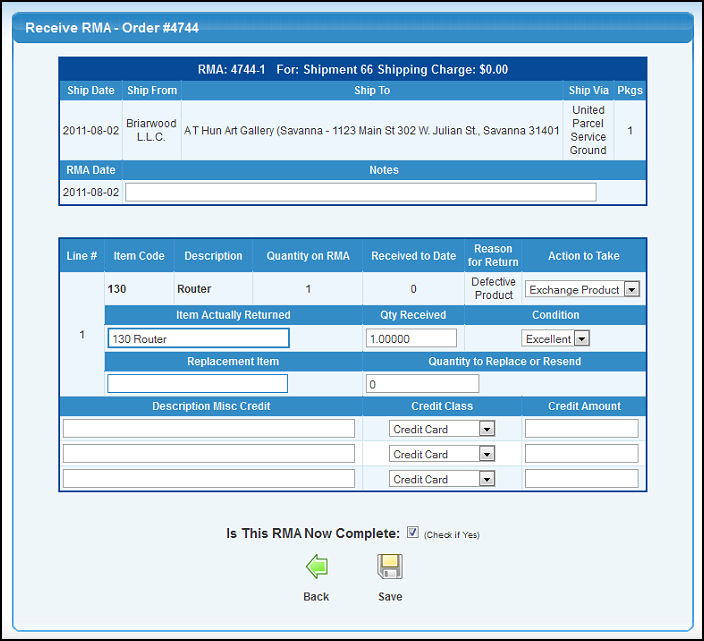
- The items will now be displayed with the expected return quantity already filled in.
- Item Actually Returned: This will auto-fill with the item that was expected to be returned, but it can be changed if the customer ACTUALLY returned something else.
- Qty. Received: This will auto-fill with the expected return quantity, but can be changed if some other number of items was returned.
- Condition: Select a condition from the drop-down list. NOTE: Conditions can be added to the drop-down list in Admin -> Setup - Service -> RMA Setup.
- Action to Take: The action expected was originally selected when the RMA was created, but can be changed when the item is received back.
- Replacement Item: If a replacement was expected, and entered when the RMA was created, this will auto-fill with that item information. However, you can change the item, or put in a replacement item (making sure you change the action statement to replacement).
- Quantity to Replace or Resend: If you are sending new (to replace damaged) or replacing (wrong item received by customer), you will need to enter the quantity to send here.
- Description Misc. Credit: If you need to issue some kind of additional credit to the customer, enter a description of the credit here.
- Credit Class: Select a TYPE of credit from the drop-down list.
- Credit Amount: Enter the amount of the misc. credit.
- Is This RMA Now Complete? If you need to keep this RMA open for some reason (the customer sent multiple boxes back, but not all have arrived yet), then be sure to uncheck this checkbox.
- When done, press the Save button to finalize the receipt. Your screen will now look similar to this:

- Click
 View RMAs to return to the main Process RMAs screen. View RMAs to return to the main Process RMAs screen.
 Print Ticket and/or Confirmation: Click on this button to create a pick ticket or confirmation for the new order (if there was a resend/replace required on the RMA). Print Ticket and/or Confirmation: Click on this button to create a pick ticket or confirmation for the new order (if there was a resend/replace required on the RMA). Print Credit: Click on this button to view the credit invoice that was created (if there was one needed). Print Credit: Click on this button to view the credit invoice that was created (if there was one needed).
| |
|