Edit Purchase Orders. A Purchase Order is the written authorization for a vendor to ship merchandise and bill the customer (your company) for it.
- From the Main Menu, select Payables -> Purchasing -> Edit Purchase Order.
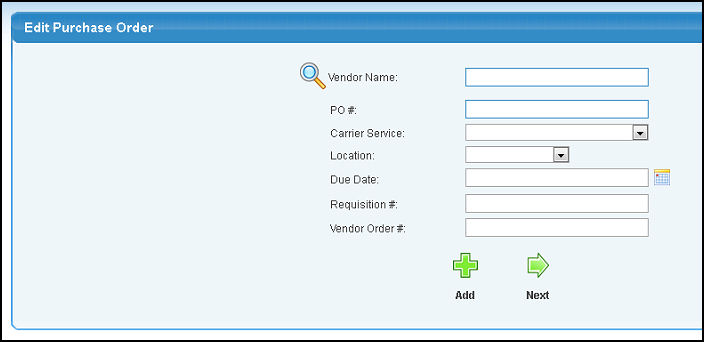
- Your screen should look similar to this:
(To ADD a new Purchase Order, click on the  Add button. Please see the New Purchase Order topic in the Related Topics section at the bottom of this Help screen.) Add button. Please see the New Purchase Order topic in the Related Topics section at the bottom of this Help screen.)
- Enter data in one or more of the following categories: (Note: the more fields you fill in, the shorter will be the list of matching PO's.)
- Vendor Name: Enter Vendor Name (or any portion of the name) to bring up a drop-down of possible matches. If you want to search by phone, zip code, etc., use the
 Lookup button for detailed searches. Lookup button for detailed searches.
- PO #: This is the Purchase Order number that you originally entered. NOTE: If you know the PO Number, you do not need to enter any other information, just click on the
 Next button. Next button.
- Carrier Service: Select the Carrier Service you would prefer to use from the pull-down list.
- Location: Where the items being purchased should be delivered. Select a location from the pull-down list.
- Due Date: Enter the date you expect to receive this purchase. You can either enter the date manually or click the
 Calendar button to select the date from a calendar. Calendar button to select the date from a calendar.
- Requisition #: Enter the Requisition Number your company has assigned to this Purchase as authorization to place the order (if known). NOTE: If you know the Requisition #, you do not need to enter any other information, just click on the Next button.
- Vendor Order #: Enter the Vendor Order # provided to you by your vendor (if known). NOTE: If you know the Vendor Order #, you do not need to enter any other information, just click on the Next button.
- To get a list of the Purchase Orders meeting your criteria, click on the Next button. If more than one Purchase Order matches your entries, the next screen should look similar to this:
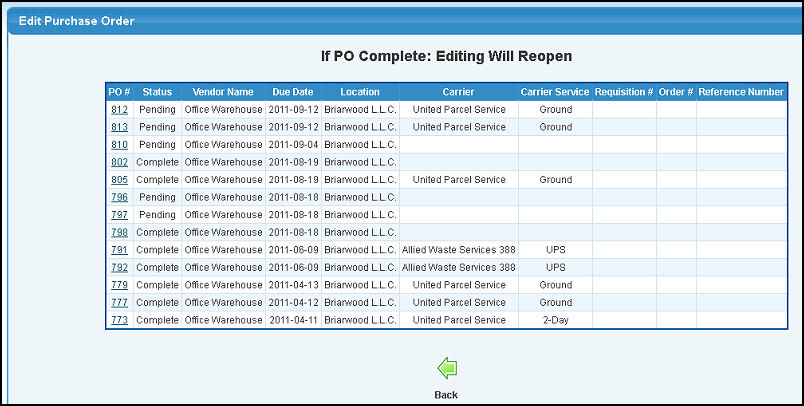
- To EDIT the Purchase Order, click on the PO# of the order you want to update. Your screen should look similar to this:
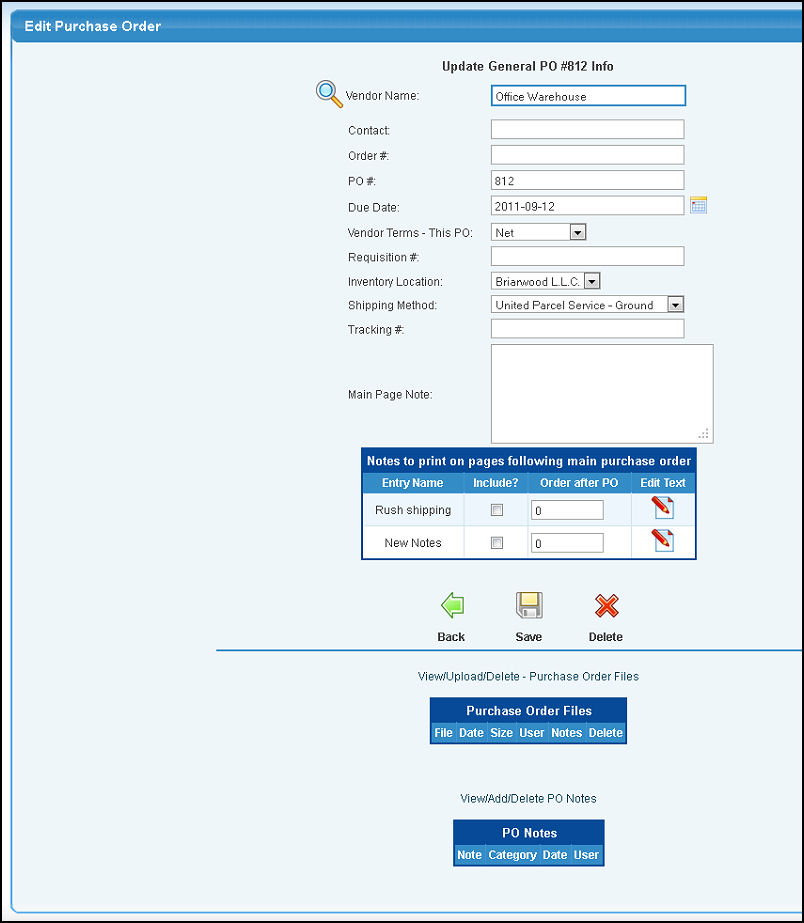
- Ente data into the following categories:
- Vendor Name: Enter Vendor Name (or any portion of the name) to bring up a drop-down of possible matches. If you want to search by phone, zip code, etc., use the Lookup button for detailed searches.
- Contact: Name of contact person at the vendor's place of business.
- Order #: Enter the Vendor-assigned order number.
- PO#: If you need to change the Purchase Order #, enter the new Purchase Order#.
- Due Date: Select the date when the items should be delivered. You can either enter the date manually or click the Calendar button to select the date from a calendar.
- Vendor Terms - This PO: This will display the default vendor terms, but it can be changed for this particular PO.
- Requisition #: Enter the Requisition Number(if any) your company has assigned to this Purchase as authorization to place the order.
- Inventory Location: Where the items being purchased should be delivered. Select a location from the pull-down list.
- Shipping Method: How the items should be shipped - select from the pull-down list.
- Tracking Number: If the vendor provides the shipment tracking number you can enter it here.
- Main Page Note: Enter any notes you wish to appear on the main page of the purchase order. These notes appear above the line items.
- Notes to Print on pages following Main Purchase Order: If you have entered standardized notes, you can select any or all of those notes to appear on the Purchase Order. After you have selected one of these notes, you will be able to click on an EDIT button to change any of the text for just THIS transaction. The standard text will remain the same. The ORDER AFTER PO box indicates which text appears first, which next, etc.
- To return to the previous screen, click on the
 Back button. Back button.
- To delete this Purchase Order, click on the
 Delete button. Delete button.
- To continue editing the line items on this Purchase Order, click on the
 Save button. Save button.
- You can attach files/pictures/documents (or delete previously attached files) by clicking on the View/Upload/Delete Purchase Order Files text to bring up the standard add/update of files screens.
- If you have the PO Notes ADD-ON, You can attach notes (not seen by the customer) to your PO by clicking on the View/Add/Delete Purchase Order Notes text to bring up the standard add/update of notes screens.
- Your screen should look similar to this if you clicked SAVE:
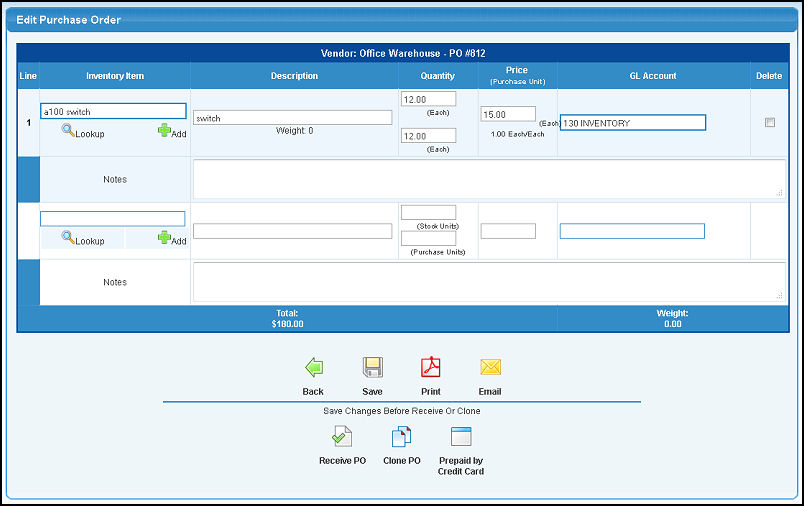
For INVENTORY items being ordered, you ONLY need to enter the item code and quantity and press the SAVE button. The other information will fill in. If the price is not the current price, you can then over-ride it with the current price. For NON-INVENTORY items, you will need to enter ALL information EXCEPT item code before pressing the SAVE button.
- Enter data in the following categories:
- Inventory Item: NOTE: NO item code entered means that this is an order for a non-inventory item. However, you must fill in the description field in this instance. For Inventory Items, enter the Item Name in the first box (or any portion of the name) to bring up a drop-down of possible matches. Alternately, you can enter the Item number directly into the box below the description. If you want to search by description, type of item, vendor, category, etc., use the Lookup button for detailed searches. If you need to ADD an Item to Inventory before ordering, click on the Add button to the right of the Item Code. See Item Add/Update for instructions on adding new inventory items.
- Description: Only fill this in for NON-inventory items. For inventory items, once you ADD the entry, it will pull the description from the item file.
- Quantity(in Sell Units): How many of the item you would like to order. NOTE: This quantity should be of the same units as the PRICE UNITS(i.e. if the price unit is BOXES, be sure to enter the number of boxes, not the number of pieces or cases).
- Price per Purchase Unit: Price at the unit size shown. NOTE: Price and unit name will pull from the inventory when you SAVE the information, but can then be over-ridden manually.
- GL Account: The Inventory account that should be adjusted in General Ledger. NOTE: This account will fill in automatically for any Inventory item (once you click SAVE).
- Delete: Checking the Delete box for a line item will remove any PENDING quantity for that item from the Purchase Order.
- Notes: Use this area to enter any extra information that will be needed by the supplier in order to fill your order correctly.
If you add another line item, click on the Save button and another blank line item will appear.
- To return to the Purchase Order List WITHOUT SAVING your entries, click on the Back button.
- To save your changes, click on the Save button.
- To email a copy of this Purchase Order, click on the
 Email button. For details on using the Email Center, see the Email Center topic in the Related Topics section at the bottom of this Help screen. Email button. For details on using the Email Center, see the Email Center topic in the Related Topics section at the bottom of this Help screen.
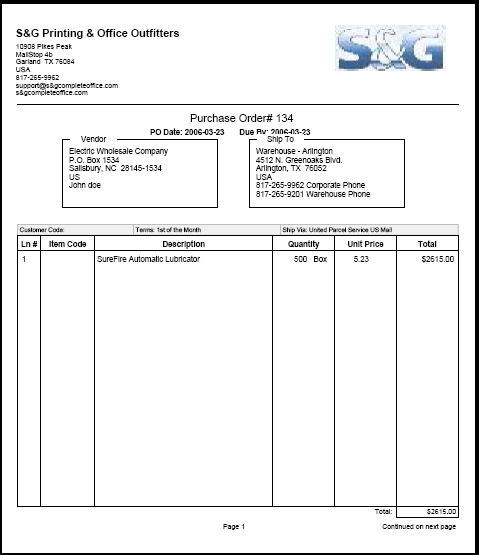
- To print this Purchase Order in Adobe Acrobat Reader®(.PDF) format, click on the
 Print button to print this Purchase Order. See SAMPLE PURCHASE ORDER below to view an example of the printed output. Print button to print this Purchase Order. See SAMPLE PURCHASE ORDER below to view an example of the printed output.
- To jump into receiving for this PO, click on the
 Receive PO button. Receive PO button.
- To clone (make an exact copy) of this PO, click on the
 Clone PO button. Clone PO button.
- If you have Credit Card Purchase Tracking add-on, and want to record a credit card payment made for this PO, click on the
 Prepaid by Credit Card button to pop up a payment screen. Prepaid by Credit Card button to pop up a payment screen.
|