|
Edit Vendors for use in Payables, Purchasing and Inventory.
- From the Main Menu, select Contacts -> Vendors -> New Vendor or Edit Vendor.
- If you selected Edit Vendor, your screen should look similar to this:
Note: If you selected New Vendor, please proceed down to the Edit section for field descriptions.

- Vendor Name: Enter Vendor Name (or any portion of the name) to bring up a drop-down of possible matches. If you want to search by phone, zip code, etc., use the
 Lookup button for detailed searches. Lookup button for detailed searches.
- To ADD a new vendor, click on the
 Add button. Add button.
- To EDIT, select a vendor and click on the
 Edit button. Edit button.
- If EDITING, your screen should look similar to this:
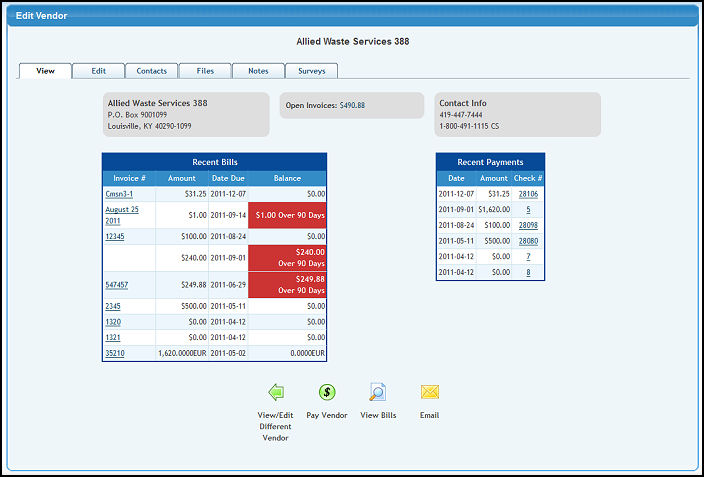
- The View tab appears by default and provides a useful summary of vendor information including their balance and recent activity.
- Clicking the Edit tab or adding a new vendor will display a screen similar to this:
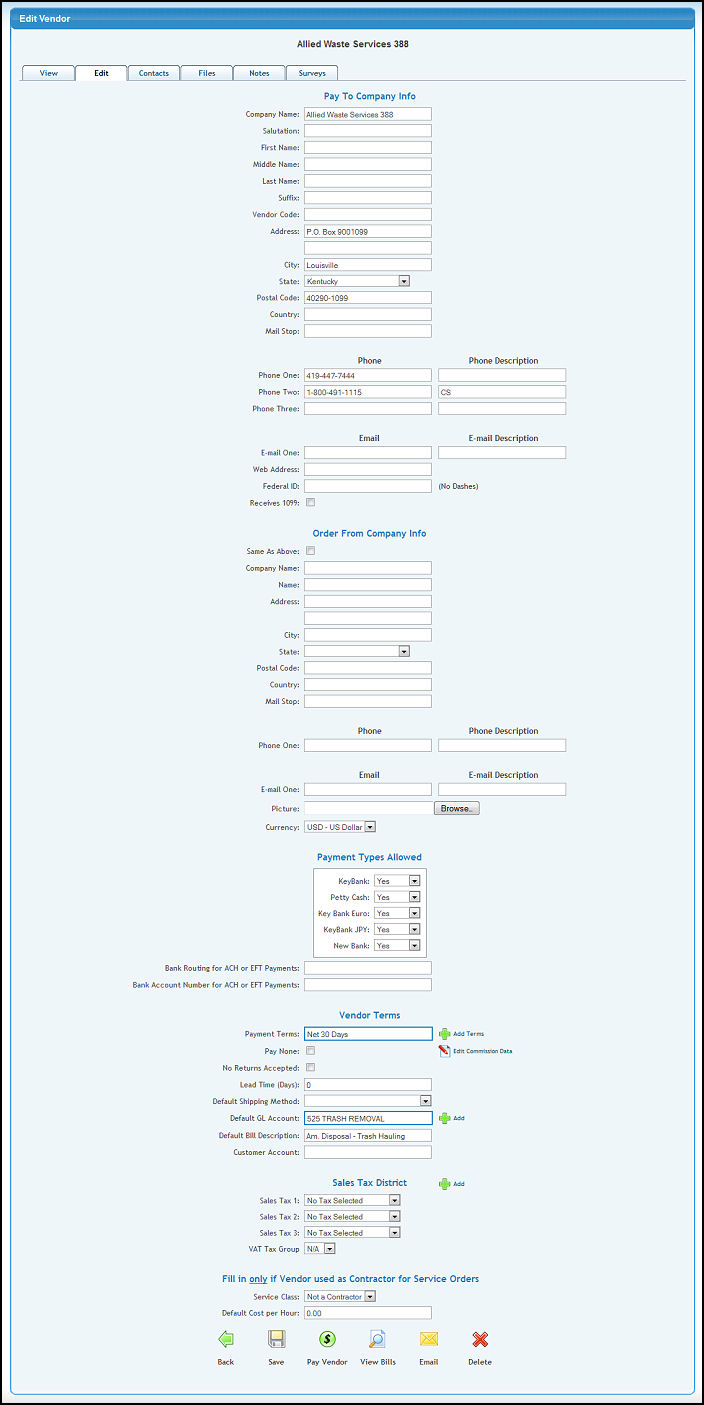
- Enter or modify data in the following categories:
- Company Name: Enter the corporate name of this vendor. This is the name you will see on your reports and use to identify this vendor in the NolaPro system.
- Salutation, First, Middle, Last Name, Suffix: Enter a Contact Name for this company.
- Vendor Code: Enter a code to identify this vendor. Especially useful if you are moving into NolaPro from another system that uses codes, and your people are familiar with these codes.
- Address: Two lines are provided for the complete address.
- City: Enter the city where this vendor is located.
- State: Select a state from the drop-down menu.
- Postal Code: Zip code or Postal Code.
- Country: Enter the country where this vendor is located.
- Mail Stop: If the vendor is a large concern that uses internal mailing, you may need to include a mail stop in order for mailings to reach the right person.
- Phone and Description: Three(3) phone numbers can be entered for this vendor. Because of that, a description field is provided for each phone so you can tell what its use is (warehouse, office, fax, etc.)
- E-mail and Description: Vendor email address and a description about WHO the email address belongs to.
- Web Address: If the vendor has a web-site, enter that here.
- Federal ID: For tax information you will need the vendor federal tax ID number. Do NOT enter any dashes.
- Order From Company Information: If this is to be the SAME as already entered in the upper portion, check the "Order From same as above" box. If the name and address you order from is DIFFERENT from the PAY TO information, then enter that information here. Only ONE phone number entry is provided in this section.
- Picture: For the purposes of the SHOPPING CART you can attach a vendor BRAND image that can show on the Shopping Cart display. If you have entered one for this vendor, it will display towards the top of this screen. Use the BROWSE to find a copy of the image locally and upload it to your server.
- Vendor Type: Select the vendor type from the pull-down list.
- Currency: If the Multi-Currency add-on is activated this field will display allowing you to choose a currency for the vendor.
- Payment Types Allowed: This is for use with the Pre-approval process of bill payment. It limits which payment accounts or types can be used when paying bills for this vendor. Each Account must have either a YES or a NO next to it.
- Bank Routing for ACH or EFT Payments: If you are doing ACH type payments to this vendor, you will need the vendor's routing info. *Not currently functional
- Bank Account Number for ACH or EFT Payments: If you are doing ACH type payments to this vendor, you will need the vendor's account info. *Not currently functional
- Payment Terms: Select the USUAL terms extended to you by this vendor. These terms can be over-ridden during individual bills entry. If you need to a new Terms Code, click on the Add button.
- Pay None: This is a payables function. You can check this box if you want to place all of this vendors bills on HOLD - - not to be paid.
- Add Commission Data: If this vendor is a salesperson who will receive commission checks, you can tie the vendor to the salesperson file by clicking on this button.
- No Returns Accepted: Enter a checkmark if returns are not accepted.
- Lead Time(Days): Enter the number of days it takes between ordering from the vendor and arrival of the ordered items.
- Default Shipping Method: Select this vendor's usual Shipping Method from the pull-down list.
- Default GL Account: The USUAL GL Account used for indicating what expense type this purchase is. If you need to enter a new account, click on the Add button.
- Default Bill Description: The USUAL Description for this bill. Some people like to use the vendor name for this because then it shows on the journal entries.
- Customer Account: The account number assigned by this vendor to your company.
- VAT Taxes: If your company tracks VAT taxes rather than SALES taxes, these additional fields will appear at this point:
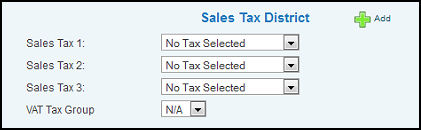
- Tax Districts: Select the tax districts that apply to this vendor.
- Consumption VAT Tax Group: Select group from the drop-down list if you have created groups for VAT Tax reporting.
- Service Class: This is for service order time worked. Pick the service order class of work for this person.
- Default Cost per Hour: This is for service order time worked. Enter the default COST per hour for this person.
- To save your changes, click on the
 Save button. Save button.
- To delete the vendor, click on the
 Delete button (only available if EDITING). Delete button (only available if EDITING).
- To return to the previous screen WITHOUT saving the changes, click on the
 Back button. Back button.
- To pay this vendor, click on the
 Pay Vendor button. This will take you directly to the check writing screen. For instructions on writing Accounts Payable Checks, see the Write Checks topic in the Related Topics section at the bottom of this Help screen. Pay Vendor button. This will take you directly to the check writing screen. For instructions on writing Accounts Payable Checks, see the Write Checks topic in the Related Topics section at the bottom of this Help screen.
- To send an email, click the
 Email button. For more information, see Email Center in the Related Topics section at the bottom of this Help screen. Email button. For more information, see Email Center in the Related Topics section at the bottom of this Help screen.
- To view unpaid bills for this vendor, click on the
 View Bills button. Your screen should look similar to this: View Bills button. Your screen should look similar to this:
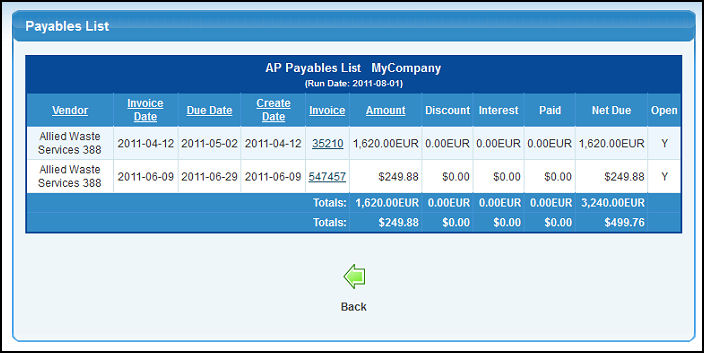
A list open invoices for this vendor will be displayed.
- To sort the report in another way, click on the Vendor, Invoice Date, Due Date, Create Date, Invoice or Amount column titles.
- To view more details on an invoice, click on the Invoice Number on the report.
- To return to the Vendor Add/Update screen, click on the Back button.
- Clicking the Contacts tab will produce a screen similar to this:
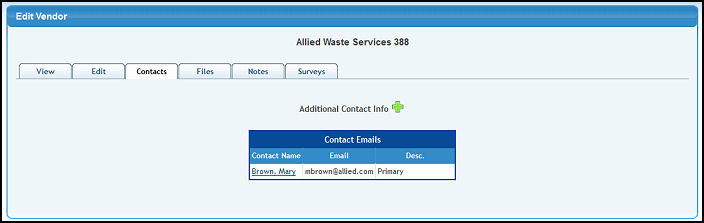
- Click an existing contact name to edit or click Additional Contact Info. Your screen should look similar to this:
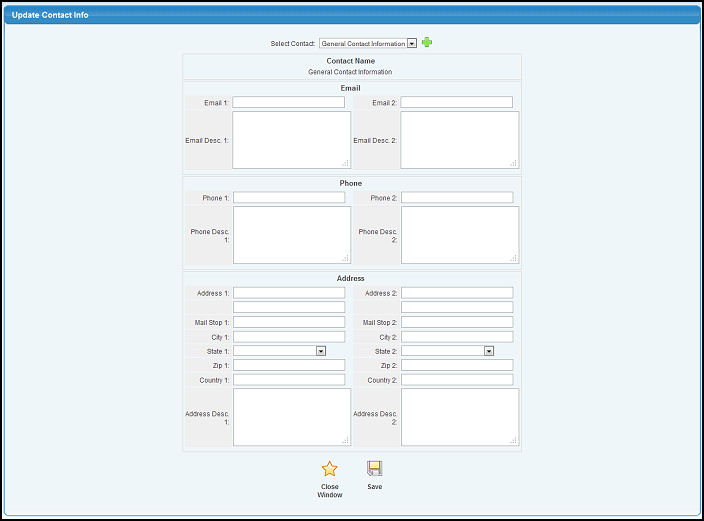
- Select Contact: Select the Contact record you wish to view from the pull-down list. The General Contact Information record is automatically displayed. To add additional contacts, click on the Add button to the right of the pull-down list.
- Enter the name, address and other contact information for up to two contacts per record.
- To save your contact information, click on the Save button.
- To return to the Vendor Add/Update screen WITHOUT SAVING your changes, click on the
 Close Window button. Close Window button.
- Clicking on the Files tab will display a screen similar to the following:
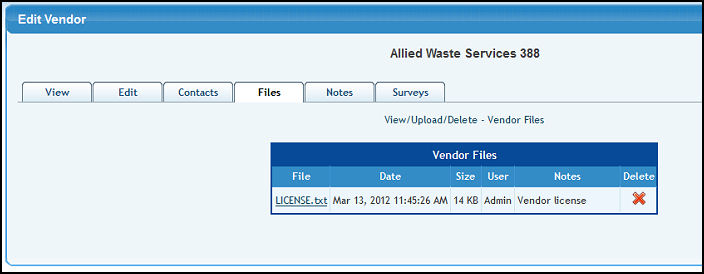
- For more information see Attaching Files in the Related Topics section at the bottom of this screen.
- Clicking on the Notes tab will display a screen similar to the following:

- The Vendor Notes Add-On must be activated to access this feature.
You can attach any number of dated notes concerning the vendor. The vendor will never see these comments. For more information see Attaching Notes in the Related Topics section at the bottom of this screen.
- Clicking on the Surveys tab will display a screen similar to the following:
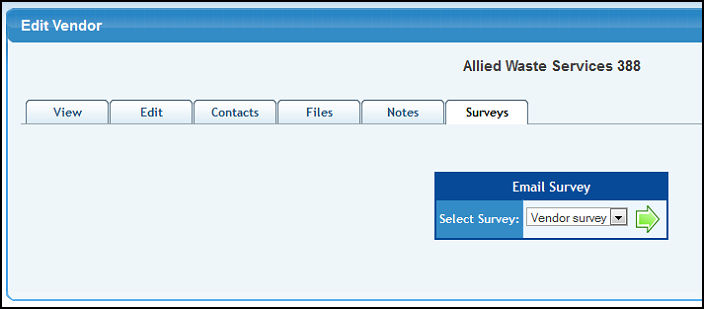
- The Survey Manager Add-On must be activated to access this feature.
If you have an active survey this box will display. For more information on creating surveys, click Survey Manager in the Related Topics section at the bottom of this screen.
|