This screen provides the secure access to your NolaPro system through a User Name and password created and maintained here. Each User must have a unique User Name. You can limit the user's access to a specific company or all companies and to specific modules within the company. Rights can vary for a single user between companies. Each user can have a specific "look and feel" unique to their style. See the Menu Style and Icon Group items below.
- From the Main Menu, select Admin -> Admin Setup -> User New/Edit.
- From this screen you can
 Add a new User, Add a new User,  Edit an Existing User or print a Edit an Existing User or print a  Barcode List for user badges. Barcode List for user badges.
- Your screen should look similar to this:
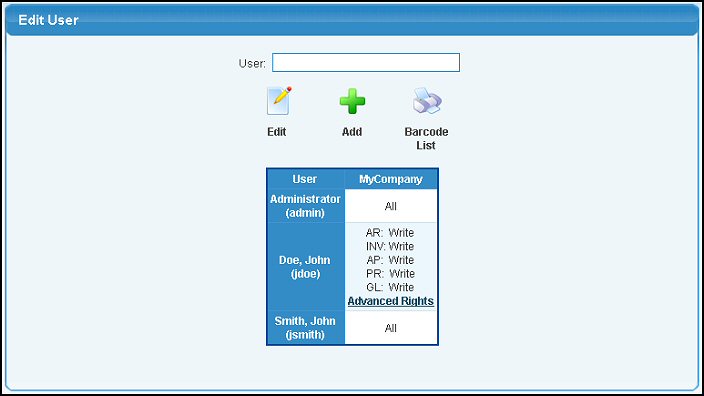
The listing shows which users have which access rights in which companies. ONLY active users will be displayed here.
Barcode List
- To print the barcodes, click the Print Barcodes button. A list of active employees and their associated barcodes are displayed on the screen. Your screen should look similar to this:
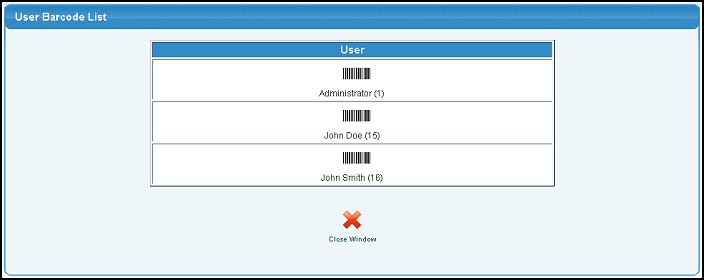
- To return to the User screen, click the
 Close Window button. Close Window button.
Add or Update a User
- To add a new User, click the Add button. To edit an existing User, enter a name (or partial name) in the User box to bring up a drop down of possible matches. Click on the Edit button (or click on the user name from the access rights display). Note: Only users with an asterisk(*) behind their names are assigned to this company. In either case your screen should look similar to this:
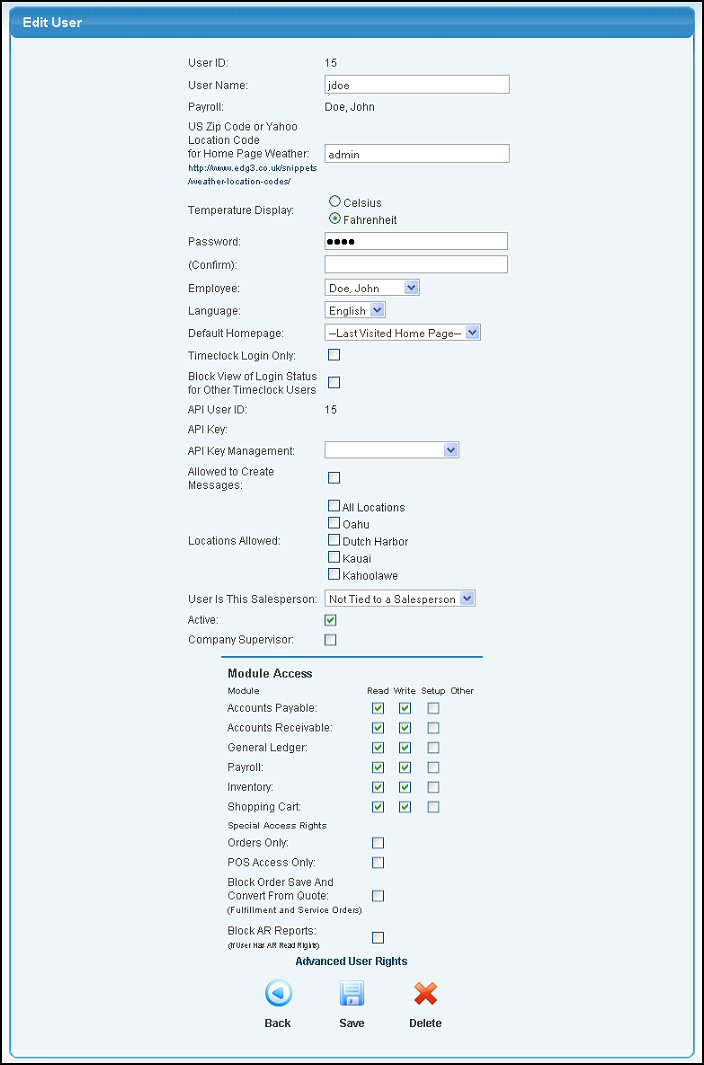
- User ID: This is the automatically assigned system ID for the user displayed for reference, if needed.
- User Name: The User Login Name that the person will use to access NolaPro. This is NOT the person's actual name. You can change this User Name if necessary without deleting and re-adding the original record.
- Payroll: If this user is also an employee their name will be displayed here.
- US Zip Code or Yahoo Location Code: Enter a valid US Zip Code or International Yahoo Location Code to display local weather on the User's Home Page.
To locate a Location Code, click the link to the http://www.edg3.co.uk/snippets/weather-location-codes/ website and select your country. A list of locations will be displayed along with the code. For example, Tokyo, Japan's code is JAXX0085.
- Temperature Display: Choose either Celsius or Fahrenheit for the temperature display on the dashboard, if enabled.
- Password: Enter the password here only if updating it. Otherwise the last password entered will be used.
- (Confirm): If the password is changed, the new password must be entered here to confirm the spelling is correct before updating the record.
- Employee: If this user is an employee of this company, select their name from the dropdown box.
- Language: Select the Language for this user from the dropdown box.
- Default Home Page: Select which home page should be this users default home page.
- Timeclock Login Only: If you have the timeclock add-on, then you can set users to only be able to access that section, not any of the rest of NolaPro.
- Block View of Login Status for Other Timeclock Users: Check this box to prevent this user from viewing the login status of other timeclock users.
- API User ID, API Key and API Key Management: These will only appear if you have the API plug-in for NolaPro. The API User ID and API key are not editable fields, only for display.
- Allowed to Create Messages: If you have the Internal Messaging add-on, then you can indicate here if this user can send messages or not. All users can receive messages.
- Locations Allowed: If you have the Tie User to Specific Locations add-on you can assign the inventory locations allowed. Inventory at un-checked locations will not be available to the user.
- User Is This Salesperson: If the user is a salesperson, select their name from the drop-down list. See Sales Personnel in the Related topics section at the bottom of this screen for more information.
- Active: If a user is checkmarked as ACTIVE, they can log onto the system. If this box is UNCHECKED, their account has been disabled. This only disables this user's access for this company.
- Company Supervisor: Check this field if the user should have supervisor access rights. Supervisor access gives access to EVERYTHING so grant it sparingly!
- Module Access: Access to each module is granted on three levels.
- READ is the lowest level - mostly involving only being able to run reports, but they can also enter orders.
- WRITE allows users to update data, but they cannot get into the setup sections, and they cannot do activities like void checks.
- SETUP is the maximum access for a module.
- Orders Only: This option only shows if you have the Order-Entry-Only add-on. Check this box if this user should only be able to add/update orders and customer.
- POS Access Only: This option only shows if you have the Order-Entry-Only add-on. Check this box if this user should ONLY be allowed into the POS system.
- Block Order Save And Convert From Quote: Check this box to allow the user to create quotes, but not convert them to an order.
- Block AR Reports: If the user has Accounts Receivable read access, checking this box will block them from viewing AR reports.
- Advanced User Rights: If you have this add-on a link will appear allowing you to set up page-specific access. See Advanced User Rights in the Related topics section at the bottom of this screen for more information.
To save your changes, click the  Save button.
To delete this user, click the Save button.
To delete this user, click the  Delete button.
To return to the previous screen WITHOUT saving your changes, click the Delete button.
To return to the previous screen WITHOUT saving your changes, click the  Back button. Back button.
|