Allows you to create user rights groups and then assign NolaPro users to these groups. You can grant page-specific access to anything in the NolaPro menu. Users will inherit the access rights of their group, but can also be given additional pages or have some taken away. This tool allows you to pull things off of any user's menu to narrow their interface down to just the modules that they need inside the system.
- From the Main Menu, select Admin -> Admin Setup -> Advanced User Rights.
- Your screen should look similar to this:
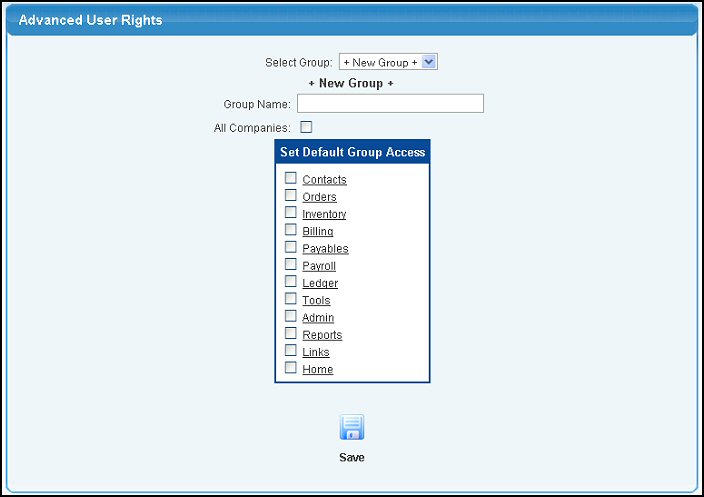
- Select Group: Select a previously created user group to edit.
- Group Name: If you are creating a new user group, enter the name here.
- All Companies: Place a check in this box if you have multiple companies set up and want the user rights to apply to all of them.
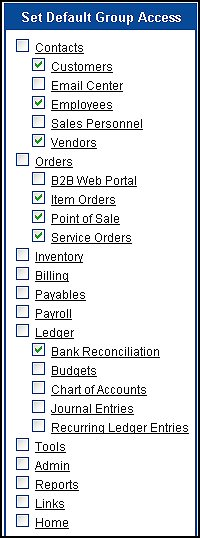
- Set Default Group Access: Place a check in the sections you want to allow the user group access. Clicking on a section name will expand the section so you can select individual items as seen in the following screen:
- Click on the
 Save button to save your selections. Save button to save your selections.
- Assign users to the group by going to Admin -> Admin Setup -> User New/Edit.
- Select the user and scroll to the bottom of the page. Your screen should look similar to the following:
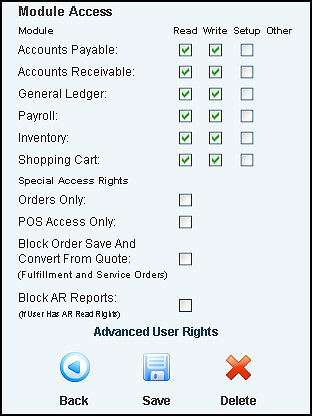
- Remove the checkmarks from all of the boxes in the Module Access section.
- Click on the Advanced User Rights link to bring up the following screen:
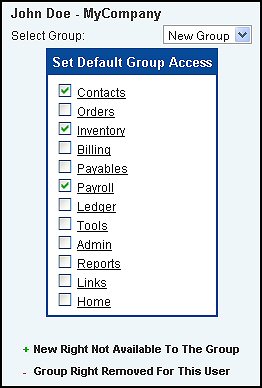
- Select the group name from the drop-down and click the Save button and close the window. The user is now assigned to this group.
|