Add, update (or delete) a General Ledger Account. Report Summarization and Cost Centers are also assigned on this screen. Accounts can be identified as specific for one company.
- From the Main Menu, select Ledger -> Chart of Accounts -> Edit GL Account or Ledger -> Chart of Accounts -> New GL Account.
- Your screen should look similar to this if EDIT:
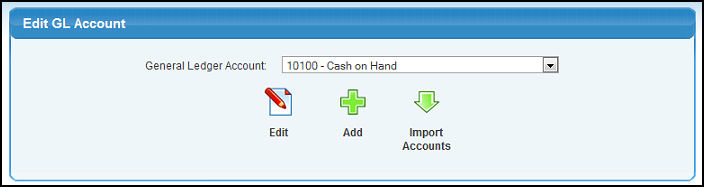
- To Import a list of accounts from the standard set provided, or to import your own list, click on Import Accounts
 button, and follow the steps outlined under Import Accounts. button, and follow the steps outlined under Import Accounts.
- To Add a new account, select it from the menu, or from the Edit Screen, click on the Add
 button. button.
- To Edit a new account, select the account from the General Ledger Account drop-down list and click on the Edit
 button. Deleted accounts will appear at the bottom of the list. button. Deleted accounts will appear at the bottom of the list.
Editing an Existing Account
- Your screen should look similar to this:
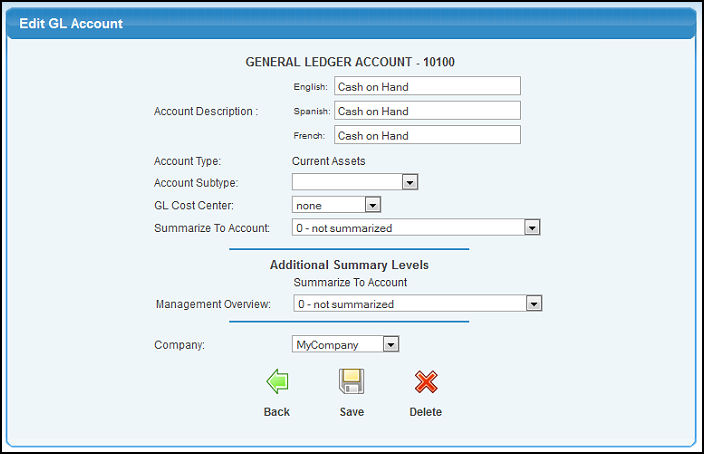
- Update any necessary data for the following categories:
- Account Description: Enter the description of the account. This will change in all past transactions if you are editing. If multiple languages are activated on your system their will be an account description field for each.
- Account Type: This is a display-only field showing the Account Type assigned to this account. See Account Types in the Related Topics section below.
- Account Subtype: Set the subtype for your GL account to either AR or AP, and then your GL account will show up as a new Receivables or Payables account when you create orders, invoices or AP bills.
- GL Cost Center: Select a Cost Center (if needed) to assign to this Account. Financial statements can be run for an individual Cost Center. See GL Cost Centers in the Related Topics section below. Note: You cannot assign a Cost Center to an intercompany account (one that can be used by all companies).
- Summarize to Account: By specifying another GL Account that this account can be summarized to, then when running financial statements using STANDARD summarizing, you can select "Summarized" for the report which will cause all accounts to sum into the summary account.
- Additional Summary Levels: If you have entered additional summary levels, you can select the GL Account this account should summarize into for each of these levels.
- Company: If you have multiple companies, then you will need to indicate if this account can be used by all companies, or only by a specific company.
- To return to the previous screen WITHOUT SAVING your changes, click on the Back
 button. button.
- To DELETE the account, click the Delete
 button. button.
- To SAVE your changes, click the Save
 button. Your screen should look similar to this: button. Your screen should look similar to this:
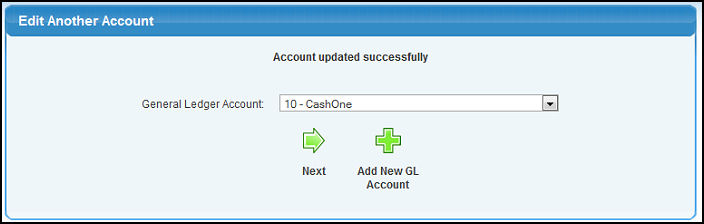
- You have to option to edit another account by selecting it from the drop-down list and clicking on the Next
 button. button.
- You can ADD a new general ledger account by clicking the Add New GL Account button.
Adding a New Account
- After clicking on the Add button on the edit screen or if you selected New GL Accounts from the menu, your screen should look similar to this:
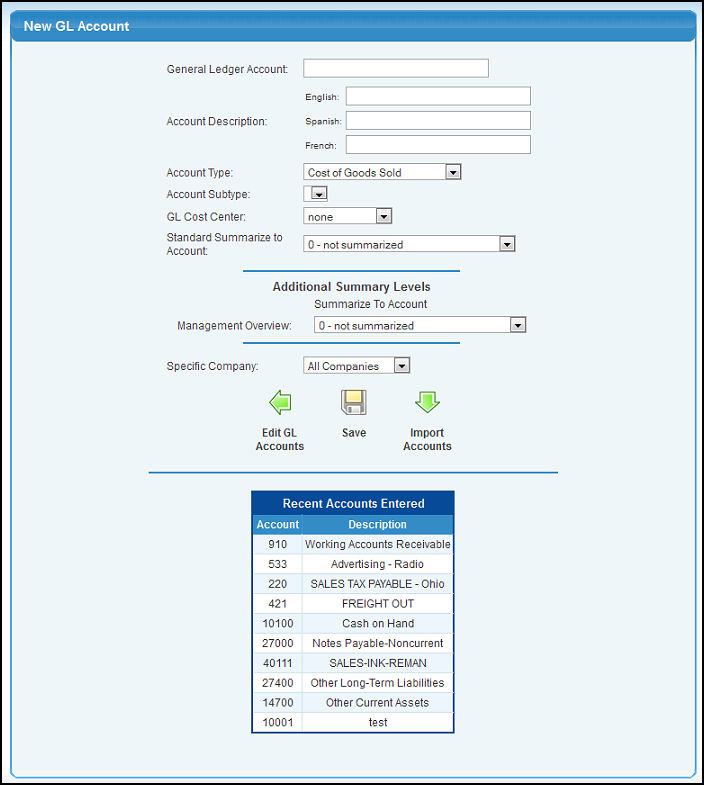
- You will see recently added accounts listed at the bottom of the screen. If you wish to import your chart of accounts now, click on the Import GL Accounts button. See Import Accounts in the Related Topics section below.
- Enter information in the following categories:
- General Ledger Account: Enter up to 20 characters to identify this General Ledger Account Number.
- Account Description: Enter the description of the account. If multiple languages are activated on your system their will be an account description field for each.
- Account Type: Select the Account Type from the drop-down list. WARNING: You cannot change this field after you have saved the account! See Account Types in the Related Topics section below.
- Account Subtype: Set the subtype for your GL account to either AR or AP, and then your GL account will show up as a new Receivables or Payables account when you create orders, invoices or AP bills.
- GL Cost Center: Select a Cost Center (if needed) to assign to this Account. Financial statements can be run for an individual Cost Center. See GL Cost Centers in the Related Topics section below.
- Standard Summarize to Account: By specifying another GL Account that this account can be summarized to, then when running financial statements using STANDARD summarizing, you can select "Summarized" for the report which will cause all accounts to sum into the summary account.
- Additional Summary Levels: If you have entered additional summary levels, you can select the GL Account this account should summarize into for each of these levels.
- Specific Company: If you have multiple companies, then you will need to indicate if this account can be used by all companies, or only by a specific company.
- To return to the GL Account Edit screen WITHOUT SAVING your account, click the Edit GL Accounts
 button. button.
- To SAVE your new account, click on the Save button.
|