>
This report shows all orders received during a given time-frame. You can also edit the order from this list. Summary and Detail reports are available.
- From the Main Menu, select Reports -> Orders -> Orders Received.
- Your screen should look similar to this:
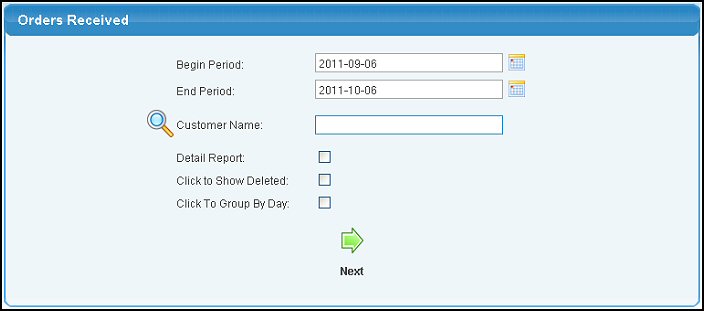
- Enter the following information to narrow your report:
- Begin Period and End Period: Select a date range for your report. Enter the dates manually or use the
 Calendar button to select a date from the calendar. Calendar button to select a date from the calendar.
- Customer Name: Leave blank to include all customers or select a Customer to include ONLY this Customer on the report. Enter the Customer Name in the (or any portion of the name) to bring up a drop-down of possible matches. If you want to search by phone, zip code, etc., use the
 Lookup button for detailed searches. Lookup button for detailed searches.
- Detail Report: Check this box if you want the report in Detail format, leave unchecked for a Summary report.
- Click to Show Deleted: Check this box if you want to show deleted orders received on the list.
- Click to Group by Day: Checking this box will create subtotals between days for dollars and orders.
- To bring up the report you selected, click on the
 Next button. Both types of reports are shown below with explanation of the information shown. Next button. Both types of reports are shown below with explanation of the information shown.
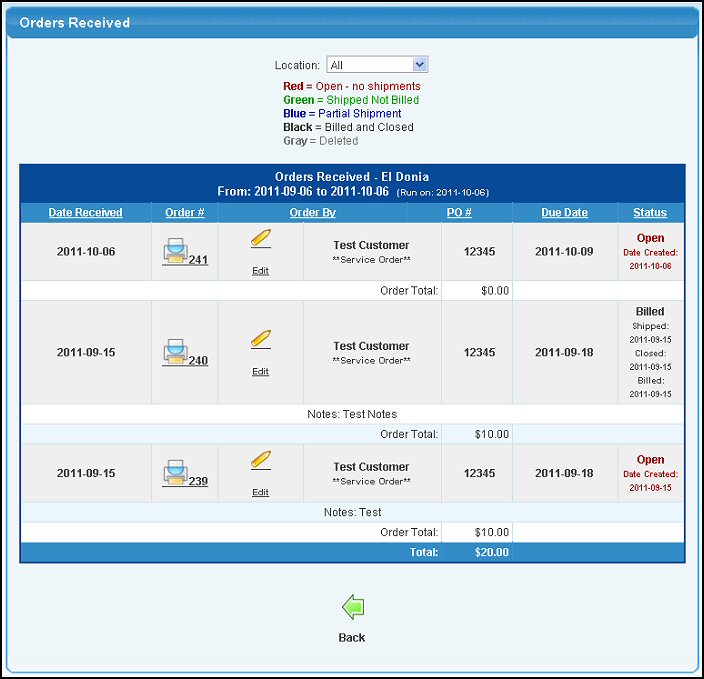

- To edit the order, click the
 Edit button. For further information on editing an Order, click on Update Fulfillment Order or Edit Service Order in the Related Topics section of this Help screen. Edit button. For further information on editing an Order, click on Update Fulfillment Order or Edit Service Order in the Related Topics section of this Help screen.
- To print a Pick Ticket for that order, click on the Order Number. For further information on Pick Tickets, click on Pick Ticket in the Related Topics section of this Help screen.
- To sort the list, click on the Order#, Order by, PO#, Due Date or Status column headers.
- To create a report for a specific Location (it comes up initially for ALL Locations), select a location from the drop-down box at the top of the report.
- To export the report in a Microsoft Excel® format, click on the Export button in the Quick Links section in the footer at the bottom of the page.
- To return to the previous screen, click
 Back button. Back button.
|