Once you have entered hours and calculated the payroll, you are ready
to write the checks. It is a good idea to run a check summary BEFORE printing the checks to make sure everything is OK.
- From the Main Menu, select Payroll -> Calculations/Checks -> Write Checks.
- Your screen should look similar to this:
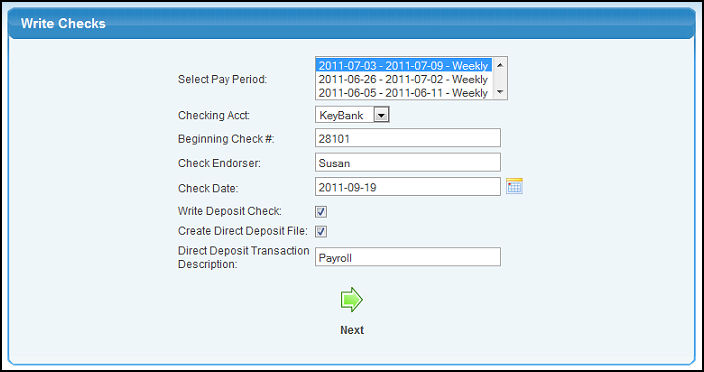
- Review data in the following categories:
- Period: Select the payroll Period from the list.
- Checking Account: Select the Checking Account from the pull-down list. (the default checking account will be auto-selected).
- Beginning Check #: This is the starting check# for this run (the program will keep track of what it thinks the next number should be, but you can override it if necessary).
- Check Endorser: Enter the name to print below the signature line on the check.
- Check Date: The date you want to put on the checks. The program will always display today's date here, but you can override it by entering it manually or you can select a date using the
 Calendar button. Calendar button.
- Write Deposit Check: If this box is checked a tax deposit check will be generated after the checks and will cover all federal taxes for the group of checks written.
- Create Direct Deposit File: (only if using Direct Deposit). If this box is checked, the Direct Deposit file will be created BUT NOT transmitted.
- Direct Deposit Transaction Description: Enter the text you want to be entered in the Transaction Description field of the Direct Deposit File. This description helps you identify this file. It is suggested you enter something like "Payroll mmddyyyy".
- To create the checks, click on the
 Next button. Your screen should look similar to this: Next button. Your screen should look similar to this:
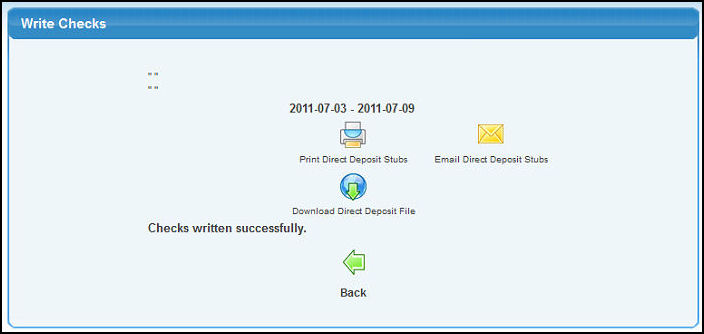
- To return to the previous screen, click on the
 Back button. Back button.
- To view/print checks, click the
 Print Checks button. The check format is Check on top followed by two identical stubs. Checks are created using Adobe Acrobat Reader®. You must have this software installed to view/print checks. Note: Only appears if there are physical checks to print. Print Checks button. The check format is Check on top followed by two identical stubs. Checks are created using Adobe Acrobat Reader®. You must have this software installed to view/print checks. Note: Only appears if there are physical checks to print.
- To view/print Direct Deposit stubs, click the Print Direct Deposit Stubs button. Direct Deposit stubs are created using Adobe Acrobat Reader®. You must have this software installed to view/print the Direct Deposit Stubs. Note: Only appears if there are direct deposit checks.
- To email Direct Deposit stubs, click the
 Email Direct Deposit Stubs button. Note: Only appears if there are direct deposit checks. Email Direct Deposit Stubs button. Note: Only appears if there are direct deposit checks.
- To download the Direct Deposit File, click on the
 Download Direct Deposit File button. Note: Only appears if there are direct deposit checks. For further instructions on processing a Direct Deposit file, see the Direct Deposit topic in the Related Topics section at the bottom of this Help screen. Download Direct Deposit File button. Note: Only appears if there are direct deposit checks. For further instructions on processing a Direct Deposit file, see the Direct Deposit topic in the Related Topics section at the bottom of this Help screen.
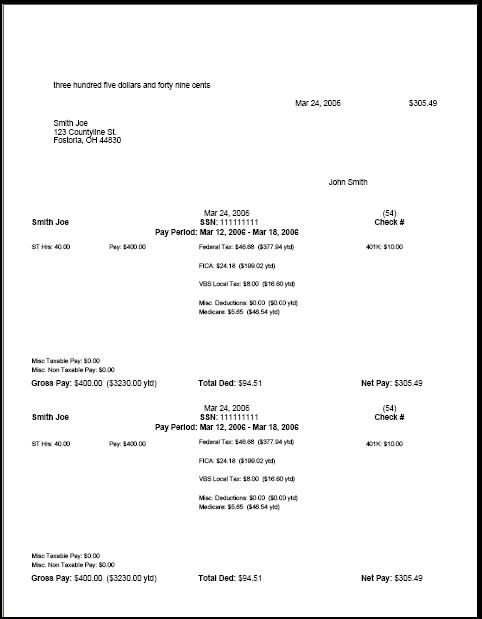
SAMPLE EMPLOYEE CHECK
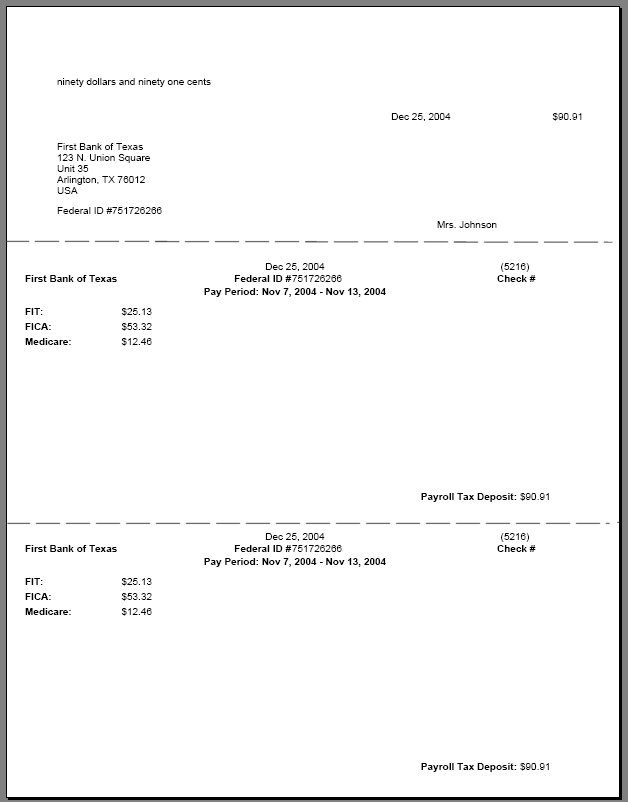
SAMPLE TAX DEPOSIT CHECK
|