Create, Edit and Fill Production orders to assemble composite items (such as kits). NOTE: You must first indicate an item is a composite item on the Edit Item screen by checking ‘Yes’ for “Composite Item”. Then re-access the Edit Item screen and go to “Add/Edit Component” and set the definition “Status” as "Active".
- From the Main Menu, select Inventory -> Manage Build Orders -> New or Edit Build Order.
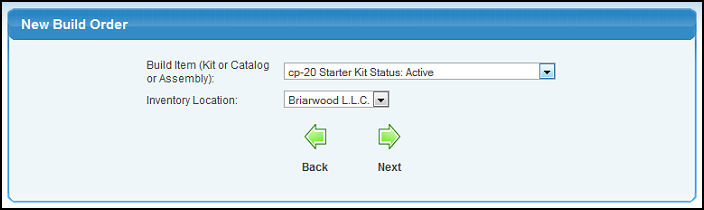
- If you selected New, your screen should look similar to this:
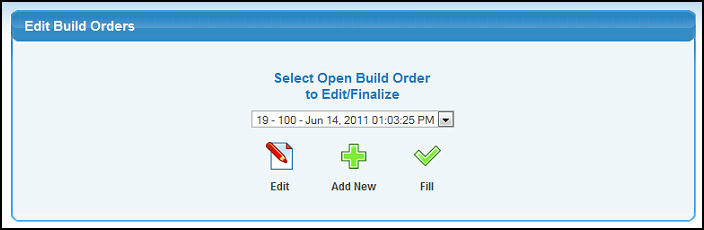
- If you selected Edit, your screen should look similar to this:
- Enter the following information to begin your Build Order:
- Build Item (Kit or Catalog or Assembly): Select the Build Item from the pull-down list (this list consists on any items that were checked as a COMPOSITE ITEM in the Item Add/Update area). For more information on adding Inventory Items, see Item Add in the Related Topics section at the bottom of this Help screen.
- Inventory Location: Select the Inventory Location from the pull-down list. NOTE: The Build Item needs to have this location attached to it before you can do an order for this location. (from Item Update screen, select Add/Update Locations).
- To return to the previous screen, click on the
 Back button. Back button.
- To continue with the Build Order, click on the
 Next button. Your screen should look similar to this: Next button. Your screen should look similar to this:
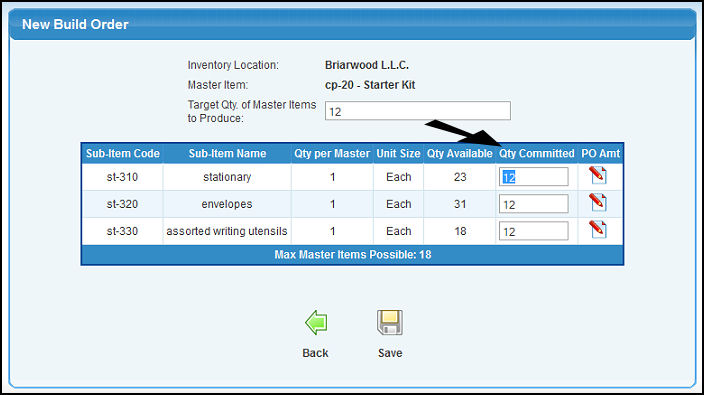
- Enter the following information in the "boxed" fields:
- Target Qty of Master Items to Produce: Enter the number of completed Master Items you want to construct at the top of the screen. When you TAB off of this number, the Quantity Committed boxes will be automatically filled. The numbers in Qty Committed can be over-ridden, but default to the number of units you entered as required for each of the component pieces in Add/Edit Component (from the Item New/Edit menu selection).
- PO Amt: Click on the
 edit button for each item in the list you would like to order. Here you can determine which vendor to order from. Clicking on the edit button will bring up this screen: edit button for each item in the list you would like to order. Here you can determine which vendor to order from. Clicking on the edit button will bring up this screen:
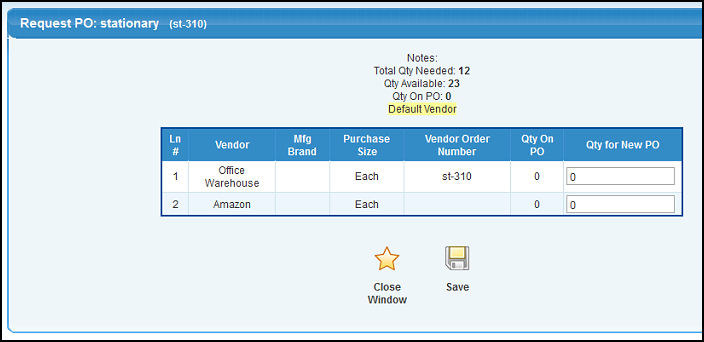
- Qty for New PO: If there is not enough on-hand to complete this order, the system will suggest you order it, and you will see an amount under PO. If you leave a number in this column for any orders, you can then use the Create PO for BOM Orders section to auto-generate any needed PO's.
- When the Total Not Yet Decided is ZERO, you can click on the
 Save button. You must repeat this process for each component item. Save button. You must repeat this process for each component item.
- To return to the previous screen WITHOUT saving any changes, click on the Back button.
- To save the new Build Order, click on the Save button.
- Select the Build Order you would like to edit from the Select Open Build Order to Edit/Finalize pull-down list.
- Click the Edit button. You will see a message in red displayed if the PO already has been created. Your screen should look similar to this:
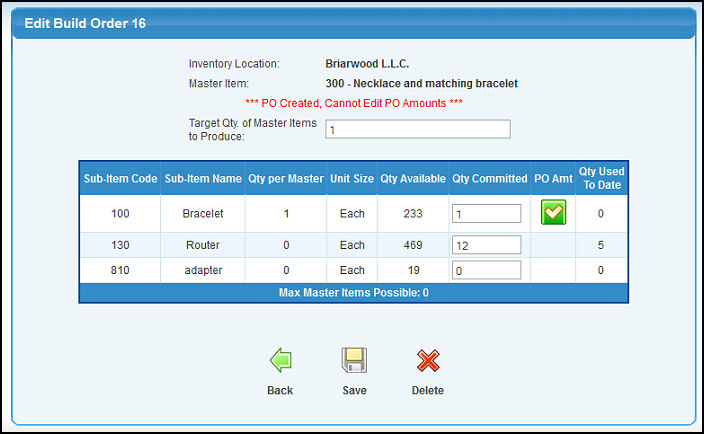
- Enter the following information in the "boxed" fields:
- Target Qty of Master Items to Produce: Enter the number of completed Master Items you will construct at the top of the screen. When you TAB off of this number, the Quantity Committed boxes will be automatically updated.
- Qty Committed: You can edit the Qty Committed (amount expected to be used when making this kit). If you change the quantity committed, you have the option to click on the Edit button to modify the vendor distribution. You will see a green check mark if the PO request has been distributed across available vendors. The Edit button will bring up this screen:
- Qty for New PO: If there is not enough on-hand to complete this order, the system will suggest you order it, and you will see an amount under PO. If you leave a number in this column for any orders, you can then use the Create PO for BOM Orders section to auto-generate any needed PO's.
- When the Total Not Yet Decided is ZERO, you can click on the Save button. You must repeat this process for each component item.
- To save the changes click on the Save button.
- To return to the previous screen WITHOUT saving any changes, click on the Back button.
- To erase the Build Order (only any remaining UNCOMPLETED orders), click on the
 Delete button. Delete button.
- Select the Build Order you would like to fill from the Select Open Build Order to Edit/Finalize pull-down list.
- Click the
 Fill button. Your screen should look similar to this: Fill button. Your screen should look similar to this:
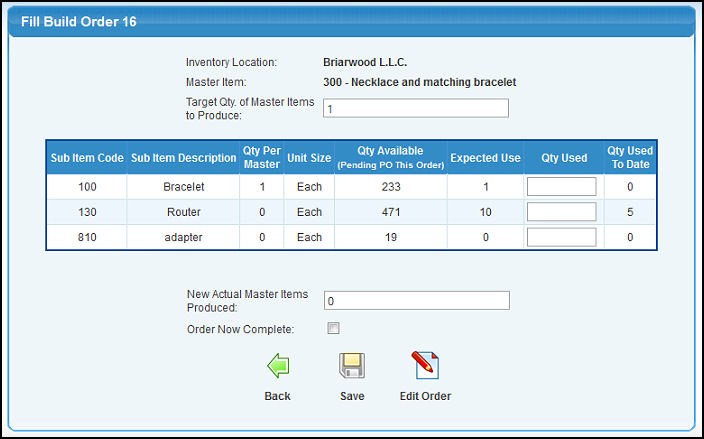
- Enter the following information in the "boxed" fields:
- Qty Used: Enter the actual amount of items of each type used.
- New Actual Master Items Produced: Enter the quantity of final GOOD items produced.
- Order Now Complete: If the order has been fully completed, check this box to close the order.
- To save the changes click on the Save button.
- To return to the previous screen WITHOUT saving any changes, click on the Back button.
- To edit the Build Order, click on the Edit Order button.
|