Add or Update your Customers for use in Receivables, Orders or Printshop Orders.
- From the Main Menu, select Contacts -> Customers -> New Customer or View/Edit Customer.
- If choosing View/Edit Customer, your screen should look similar to this:
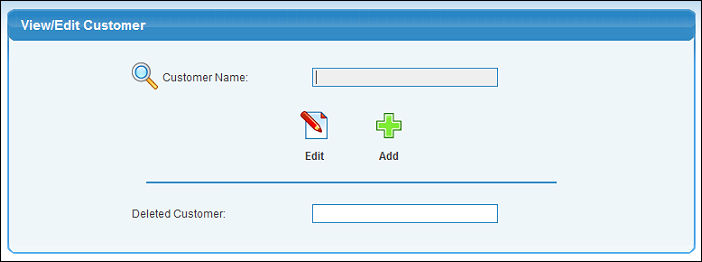
- Customer Name: Enter Customer Name (or any portion of the name) to bring up a drop-down of possible matches. If you want to search by phone, zip code, etc., use the
 Lookup button for detailed searches. Lookup button for detailed searches.
- To Add a New Customer, click on the
 Add button.
To Edit the Customer, click on the Add button.
To Edit the Customer, click on the  Edit button. Edit button.
- Deleted Customer: Enter Customer Name (or any portion of the name) to bring up a drop-down of possible matches. Use this lookup, then click on the Edit button above to view or undelete a deleted customer.
- If choosing Edit, your screen should look like the following:
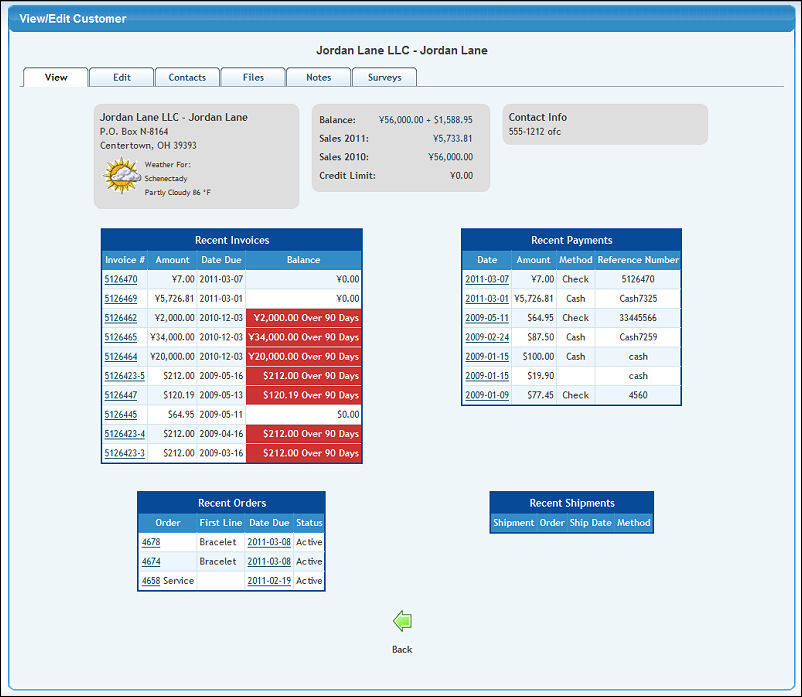
- The View tab appears by default and provides a useful summary of customer information including their balance and recent activity.
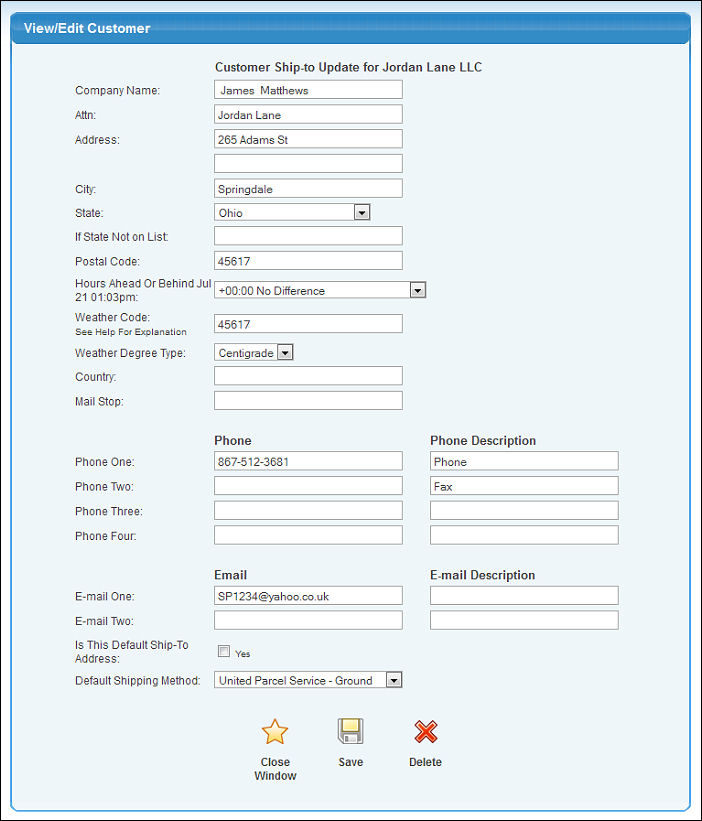
- Clicking on the Edit tab or adding a new customer will display a screen similar to this:
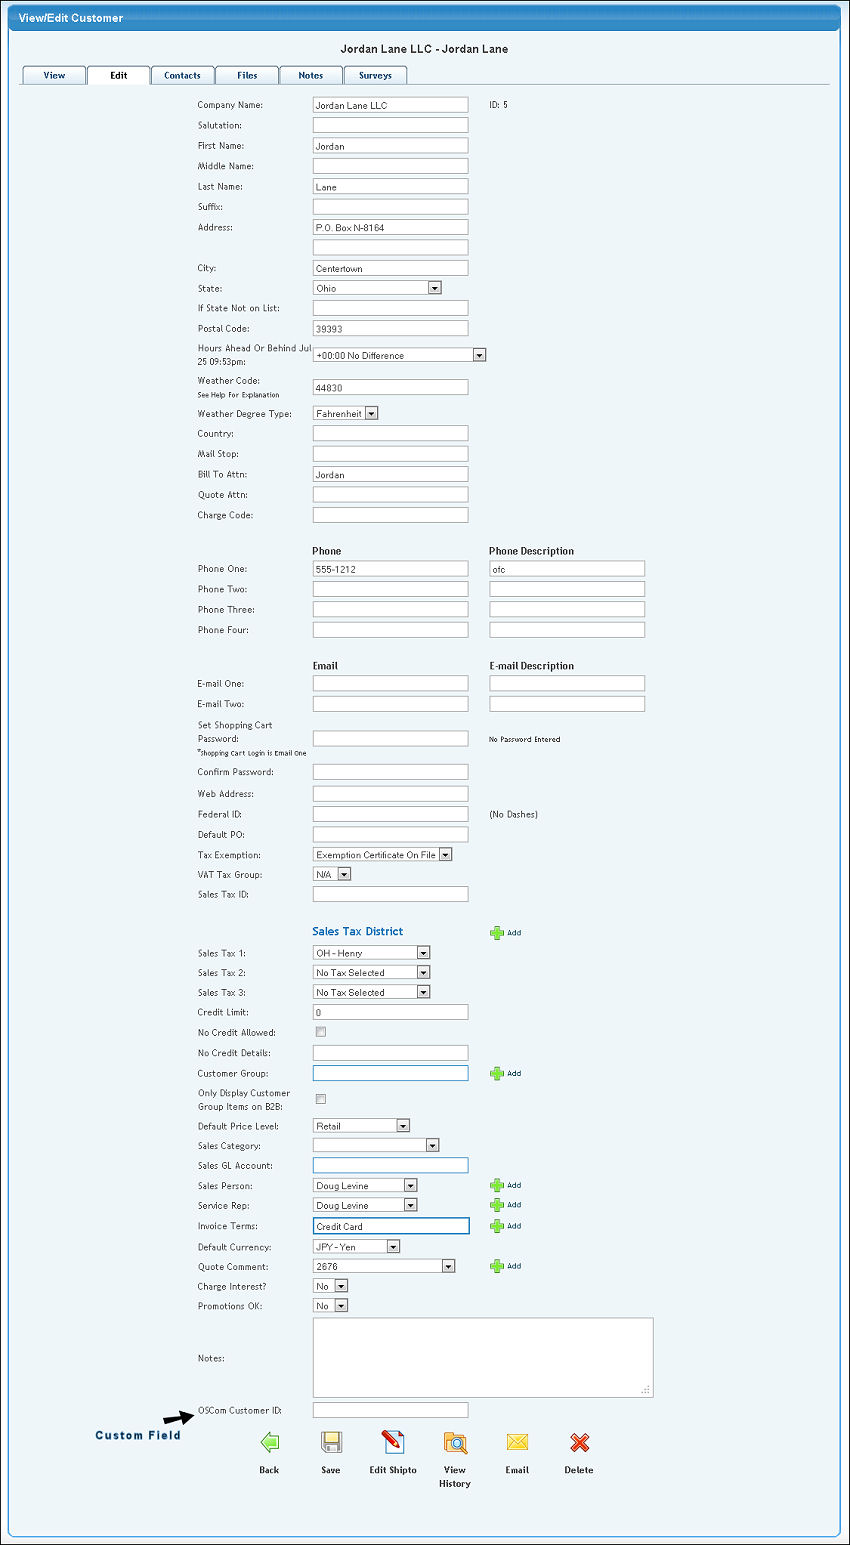
- Enter data into the following categories:
- Company Name: If this is a company, enter the company name here. NOTE: You MUST enter either a company name or a person's first and last names.
- Salutation: If this customer is a person, and you want invoices, etc. to use their title as well as name, fill in the salution (this might be Dr., or Ms. etc.)
- First Name: If this customer is a person, or you want to enter a person's name as well as the company name, enter their first name here.
- Middle Name: If this customer is a person, or you want to enter a person's name as well as the company name, enter here.
- Last Name: If this customer is a person, or you want to enter a person's name as well as the company name, enter here.
- Suffix: If this customer is a person, and this person has suffix (like Jr., PhD., etc.) enter here.
- Address: You have two lines for input of the full address.
- City: Customer city.
- State: Select state/province from the pull-down list. If you do not see the state, go to Admin -> Setup Admin -> States.
- If State Not on List: If your state is not available in the drop down list enter it here, otherwise leave it blank. If you type in a state the state pull-down must be blank.
- Postal Code: Customer zip or postal code.
- Hours Ahead Or Behind Current Date: Only Available if Weather Add-On is activated. The number of hours the customer location is ahead or behind of your location. Select from the drop-down list (which also shows equivalent time).
- Weather Code: Only Available if Weather Add-On is activated. Enter a valid US Zip Code or International Yahoo Location Code to display local weather on the User's Home Page.
To locate a Location code, go to http://www.edg3.co.uk/snippets/weather-location-codes/ and select your location.
- Weather Degree Type: Only Available if Weather Add-On is activated. Select Celsius or Fahrenheit to match the degree unit of measure for the location selected above.
- Country: Only needed if you operate in more than one country.
- Mail Stop: If the person to whom mail should be directed is part of a company with an internal mail service, you will probably need a mail stop code in order for the mail to get through their system quickly.
- Bill To Attn: The name of the person (or department) to whom you should send invoices and statements.
- Quote Attn: The name of the person (or department) to whom quotes should be sent.
- Charge Code: This is a customer provided number for their use when making payments.
- Phone/Phone Description: You can enter up to four different phone numbers for this customer. The description part is so you can tell what this phone number is (office, cell, fax, etc.).
- Email/Email Description: You can enter up to two different email addresses for this customer. The description part is so you can tell what this email address is (purchasing, billing).
- Set Shopping Cart Password: This is the customer's logon password for their shopping cart account. You will not see this prompt on this screen unless the company has been set as having a shopping cart.
- Confirm Password: Enter the Shopping cart password a second time for verification (to make sure it was typed correctly).
- Web Address: If your customer has a web-site, put the address here (ex: www.companyname.com).
- Federal ID: Federal Tax ID Number. Enter WITHOUT dashes between numbers.
- Default PO: Purchase Order to be automatically entered when an order is created for this customer. The Purchase Order can be overridden during Order Entry.
- Tax Exemption: The customer will be either NOT tax exempt, or you will select from a pull-down list of reasons as to why this customer is exempt. Even if you mark a customer as exempt, if you enter tax districts, then you can make some invoices taxable.
- VAT Tax Group: If your company is set to use VAT or Consumption taxes, then you can define groups for tax reports. You will not see this item if your company does NOT use VAT/Consumption taxing. Select a group from the dropdown.
- Sales Tax ID: Tax ID issued which allows customer to collect sales taxes (needed as part of the tax exemption process).
- SALES TAX DISTRICT: NOTE: You will not see this section if you have indicated that you charge tax depending on the Ship-to Location. You can assign up to three different taxes to be applied to a customer. If you do not see the tax districts you want under the pull-down lists, then use the Add button to the right of the header for this section to add a new one. See Sales/VAT Tax in the Related Topics section at the bottom of the screen for more information on adding taxes.
- Credit Limit: If you leave this field blank or zero, it will assume there is NO limit. Otherwise, when entering orders, if the customer credit limit has been exceeded by previously unpaid bills, you will see a warning.
- No Credit Allowed: Check this box if you do NOT want to extend credit to the customer.
- No Credit Details: Enter reason for no customer credit.
- Customer Group: Select a Customer Group from the drop-down list. Customer groups are used for defining which special prices certain items will have from inventory. It can also be used to determine what items can be selected when a customer is placing orders on the B2B (Business to Business) site.
- Only Display Customer Group Items on B2B: In conjunction with the Customer Group selected above, if this box is checked, then ONLY items in inventory which belong to this group can be selected by this customer from the B2B site Order module.
- Default Price Level: When the inventory pricing is set up, you can have various pricing levels based on the type of sale. Select the pricing level to normally use for sales to this customer.
- Sales Category: This is the DEFAULT sales category for this customer. When actually placing orders, this category can be overridden. The category selected during ordering can affect the looks of the documents printed (order confirmation, invoice) and can be used for sorting on reports.
- Sales GL Account: This should be the default General Ledger Sales Account to be used when making sales to this customer. In the Admin area under Setup-Receivables, you can select if you would rather use the inventory item default sales account rather than that of the customer.
- Sales Person: Select who is the usual salesperson for this customer from the pull-down list. This can be overridden at order entry. To add a new salesperson, click on the Add button to the right of this field.
- Service Rep: Select who is the usual service rep for this customer from the pull-down list. This can be overridden at order entry. To add a new service rep, click on the Add button to the right of this field.
- Invoice Terms: Select the default invoice payment terms from the pull-down list. This can be overridden at order entry. To add a new set of terms, click on the Add button to the right of this field.
- Default Currency: This field will only display if you have the multi-currency feature activated. This is the default currency for the customer, which can be overridden.
- Quote Comment: Select a standard message to appear on quotes from the pull-down list. To add a new comment, click on the Add button to the right of this field.
- Charge Interest?: Select Yes or No to allowing interest to be calculated for this customer on any overdue invoices.
- Promotions OK?: Select whether on not this customer should be included in the possible list of customers to receive automatic emails (generated under the ADMIN section of the program).
- Notes: These notes will appear on Order Entry, so they should contain special notes about customer likes and dislikes in terms of shipments, etc.
- OSCom Customer ID: This is an example of a custom field which can be defined if you have the Custom Fields add-on.
- To exit WITHOUT saving changes, click on the
 Back button. Back button.
- To Save the changes, click on the
 Save button. Save button.
- (Only if UPDATING) To enter or update Ship-to Addresses, click on the Edit Shipto button.
- (Only if UPDATING) To view the purchasing history of this customer, click on the
 View History button. View History button.
- (Only if UPDATING) To send an email, click the
 Email button. Email button.
- (Only if UPDATING) To remove this customer, click on the
 Delete button. NOTE: The customer history will still be viewable, even if the customer no longer shows on lists for new orders, etc. Delete button. NOTE: The customer history will still be viewable, even if the customer no longer shows on lists for new orders, etc.
A customer may have as many Ship-to Addresses as needed.
- After selecting Edit Shipto, this screen will appear (one Ship-to Address is automatically created the same as the general customer address information):
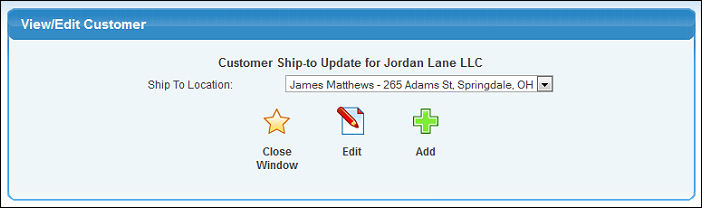
- To exit the Ship-to Address entry section, click on the
 Close Window button. Close Window button.
- To create a new Ship-to Address for this customer, click on the Add button.
- Select a Ship-to Address to edit from the pull-down list, then click on the Edit button to edit the entry.
- Whether adding a new address, or editing an existing one, your screen should look similar to this:
- Enter data into the following categories:
- Company Name: Enter the Name to be shipped to.
- Attn: Enter the name to whose attention the shipment should be sent.
- Address: You have two lines to enter a complete address.
- City: Customer city.
- State: Select state/province from the pull-down list. If you do not see the state, go to Admin -> Setup Admin -> States.
- If State Not on List: If your state is not available in the drop down list enter it here, otherwise leave it blank. If you type in a state the state pull-down must be blank.
- Postal Code: Customer zip or postal code.
- Hours Ahead Or Behind Current Date: Only Available if Weather Add-On is activated. The number of hours the customer location is ahead or behind of your location. Select from the drop-down list (which also shows equivalent time).
- Weather Code: Only Available if Weather Add-On is activated. Enter a valid US Zip Code or International Yahoo Location Code to display local weather on the User's Home Page.
To locate a Location code, go to http://www.edg3.co.uk/snippets/weather-location-codes/ and select your location.
- Weather Degree Type: Only Available if Weather Add-On is activated. Select Celsius or Fahrenheit to match the degree unit of measure for the location selected above.
- Country: Only needed if you operate in more than one country.
- Mail Stop: If the person to whom mail should be directed is part of a company with an internal mail service, you will probably need a mail stop code in order for the mail to get through their system quickly.
- Phone/Phone Description: You can enter up to four different phone numbers for this Ship-to Customer. The description part is so you can tell what this phone number is (office, cell, fax, etc.).
- Email/Email Description: You can enter up to two different email addresses for this Ship-to Customer. The description part is so you can tell what this email address is (purchasing, billing).
- Is This Default Ship-To Address: Place a check in this box to have this address appear as the default. It can be overridden during the shipping process.
- Default Ship Method: Select from the drop-down list of possible shipping methods. This can be overridden at order entry.
- To return to the Ship-to selection screen WITHOUT saving changes, click on the Close Window button.
- To save your entries, click on the Save button.
- To remove this Ship-to Address for the customer, click on the Delete button. This button does NOT delete the Customer.
- If you selected View History, your screen will look similar to this:
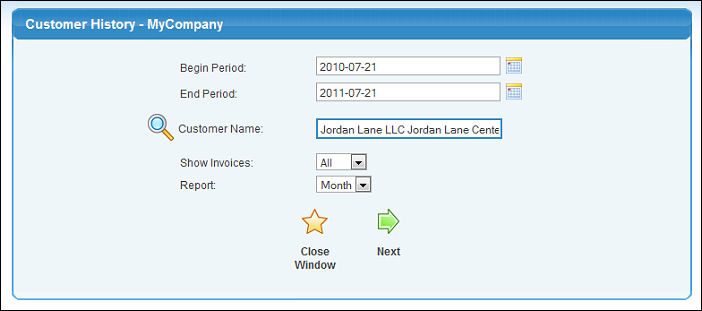
- Enter data into the following categories to narrow your report:
- Begin and End Period: The time period over which to view the history. Enter the dates manually or use the
 Calendar button to select dates from the calendar. Calendar button to select dates from the calendar.
- Customer Name: This field will already be filled in with the customer you were editing.
- Show Invoices: Select whether to show only OPEN invoices or ALL invoices for report.
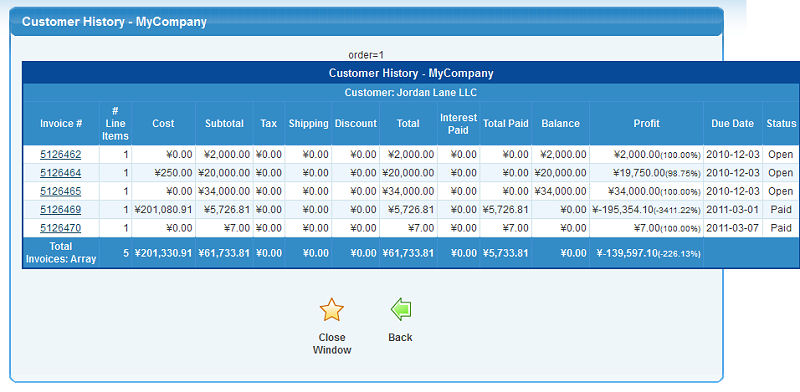
- Report: You can select the report to print by day, month, year, or in detail.
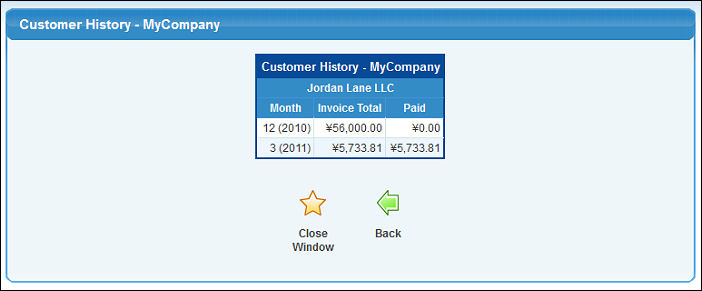
- To view the History Report, click on the
 Next button. You have the following options: Next button. You have the following options:
- To return to the previous screen, click the Back button.
- Click on the Close Window button to return to the Customer Add/Update screen.
Contacts
- Clicking on the Contacts tab will display a screen similar to the following:
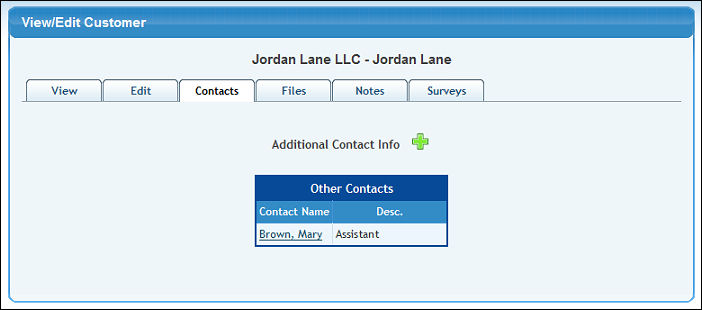
- Click to the right of Additional Contact Info to add a contact or click a contact name to edit. With either option your screen should look similar to the following:
- Select Contact: Choose an existing contact from the drop-down menu or click Add to add another contact for this customer.
- Fields are provided for Email, Phone and Address information. Click Save to save your changes or Close Window to close without saving changes.
Files
- Clicking on the Files tab will display a screen similar to the following:
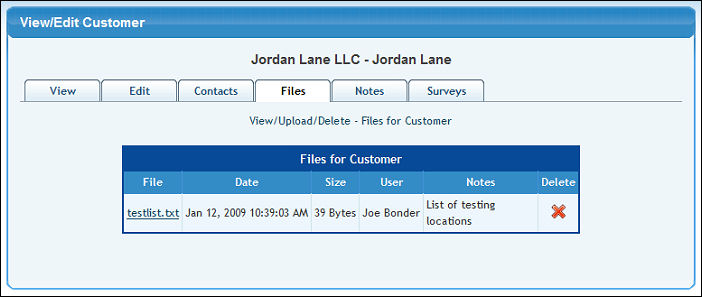
- For more information see Attaching Files in the Related Topics section at the bottom of this screen.
Notes
- Clicking on the Notes tab will display a screen similar to the following:
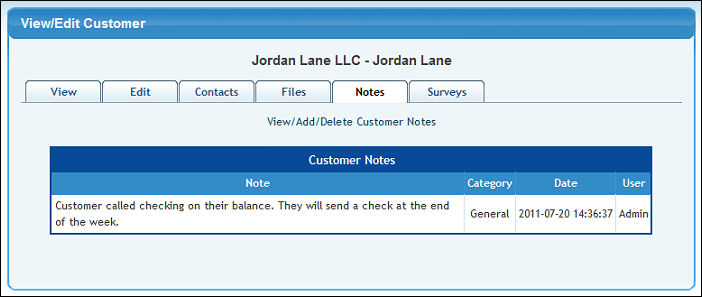
- The Customer Notes Add-On must be activated to access this feature. You can attach any number of dated notes concerning this customer. The customer will never see these comments, so they can be used for collection information, etc. For more information see Attaching Notes in the Related Topics section at the bottom of this screen.
Surveys
- Clicking on the Surveys tab will display a screen similar to the following:
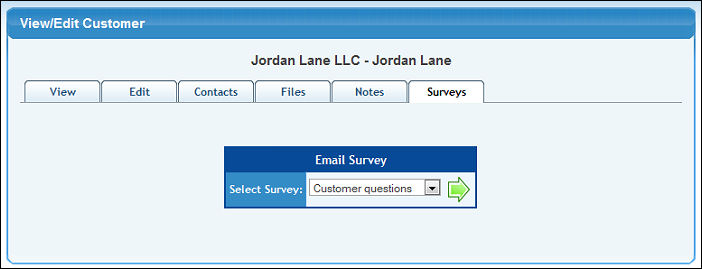
- The Survey Manager Add-On must be activated to access this feature.
If you have an active survey this box will display. For more information on creating surveys, click Survey Manager in the related topics section at the bottom of this screen.
|