Edit vendor invoices and distribution amounts whether the invoice was entered in payables or brought into payables automatically by one of the other modules.
- From the Main Menu, select Payables -> Vendor Bills -> Edit Vendor Bill .
- Your screen should look similar to this:
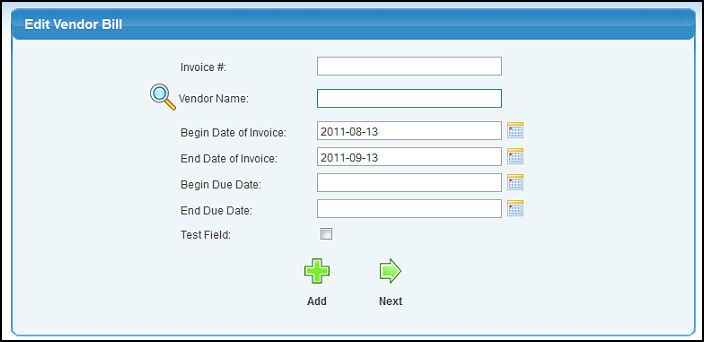
- Enter search data in one or more of the following categories:
- Invoice #: The invoice number from the vendor's invoice. If you do not know this, leave it blank. If you DO know this, you can leave all the other information blank.
- Vendor Name: (Leave blank to search all Vendors) Enter Vendor Name (or any portion of the name) to bring up a drop-down of possible matches. If you want to search by phone, zip code, etc., use the
 Lookup button for detailed searches. Lookup button for detailed searches.
- Begin and End Date of Invoice. You can either enter the date manually or click the
 Calendar button to bring up a calendar. Calendar button to bring up a calendar.
- Begin And End Due Date. You can either enter the date manually or click the Calendar button to bring up a calendar.
- To view invoices matching your selections, click the
 Next button. If only one invoice matches your selections, you will skip this screen. If there are more than one, your screen should look similar to this: Next button. If only one invoice matches your selections, you will skip this screen. If there are more than one, your screen should look similar to this:
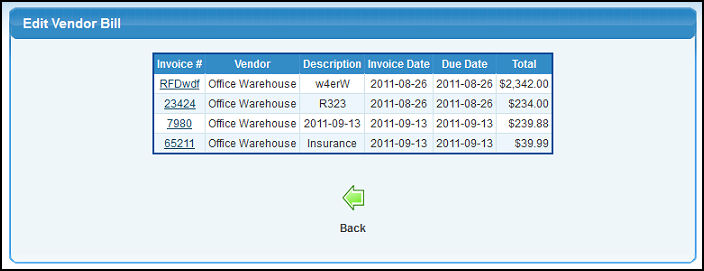
- To EDIT an Invoice, click on the Invoice #. Your screen should look similar to this:
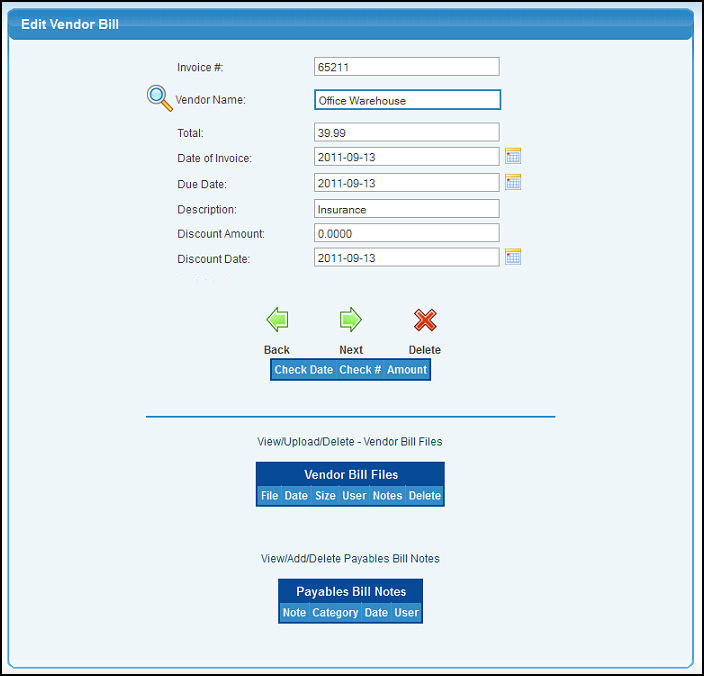
- You can modify any or all of the following:
- Invoice #: The invoice number of the bill.
- Vendor Name: Enter Vendor Name (or any portion of the name) to bring up a drop-down of possible matches. If you want to search by phone, zip code, etc., use the Lookup button for detailed searches.
- Total (amount due): Include the shipping or tax.
- Date of Invoice: You can either enter the date manually or click the Calendar
button to bring up a calendar.
- Due Date: You can either enter the date manually or click the Calendar
button to bring up a calendar.
- Description: Purpose of the bill.
- Discount Amount: The discount amount if the bill is paid by the discount date.
- Discount Date. You can either enter the date manually or click the Calendar button to bring up a calendar.
- To delete this Bill, click the
 Delete button. Delete button.
- To continue with the update on this bill, click on the Next button. Your screen should look similar to this:
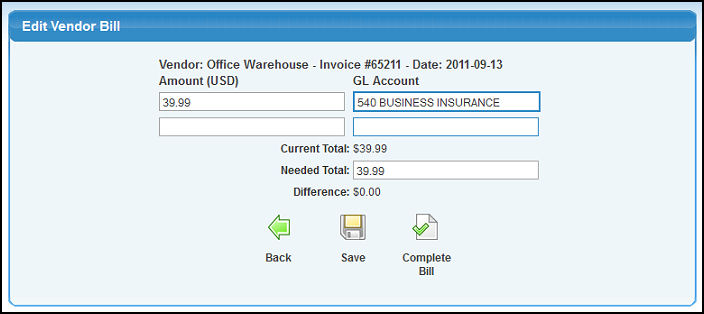
- If needed, modify the General Ledger Accounts and amounts listed. To add another distribution, enter it in the blank line provided, then click on the
 Save button. This will open up another blank line. Save button. This will open up another blank line.
- To save your changes, click on the Save button.
- To finish the update, click the
 Complete Bill button. You will receive a confirmation screen similar to this: Complete Bill button. You will receive a confirmation screen similar to this:
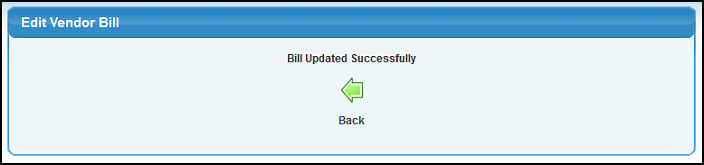
- To return to the Bill Add/Update screen, click on the
 Back button. Back button.
|