Enter POS Sales or Fulfillment Orders from this screen. POS orders are normally paid for and the order is completed right then while Fulfillment Orders are completed later.
- From the Main Menu, select Orders -> Point of Sale, or Billing -> Invoices -> Point of Sale.
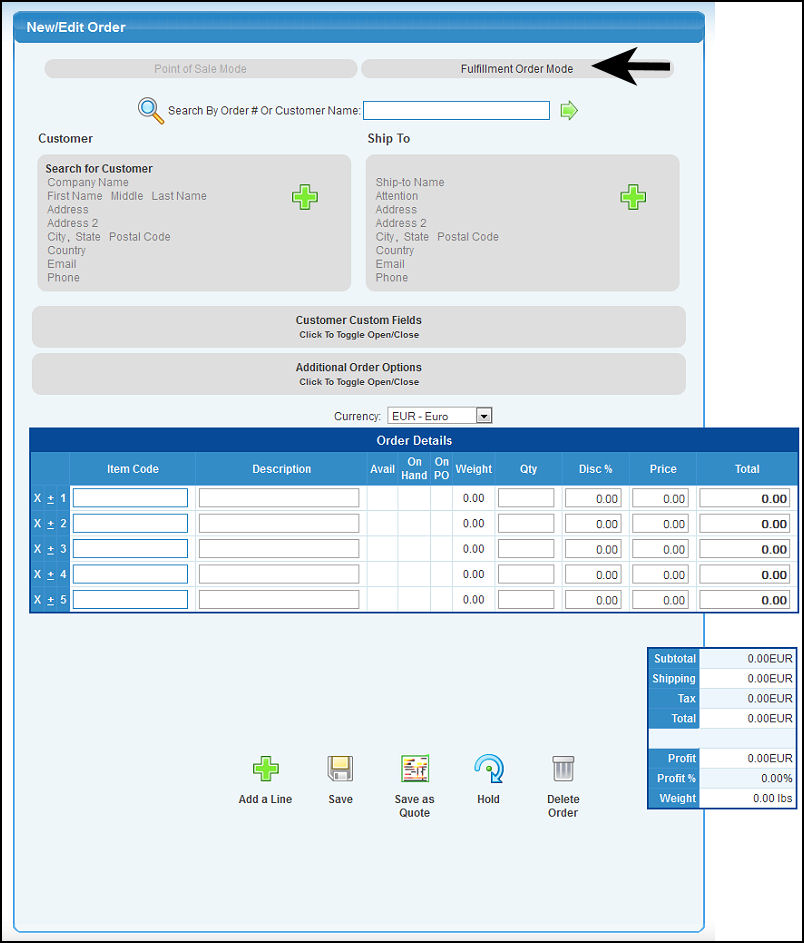
- Your screen should look similar to this depending on the company options you have chosen:
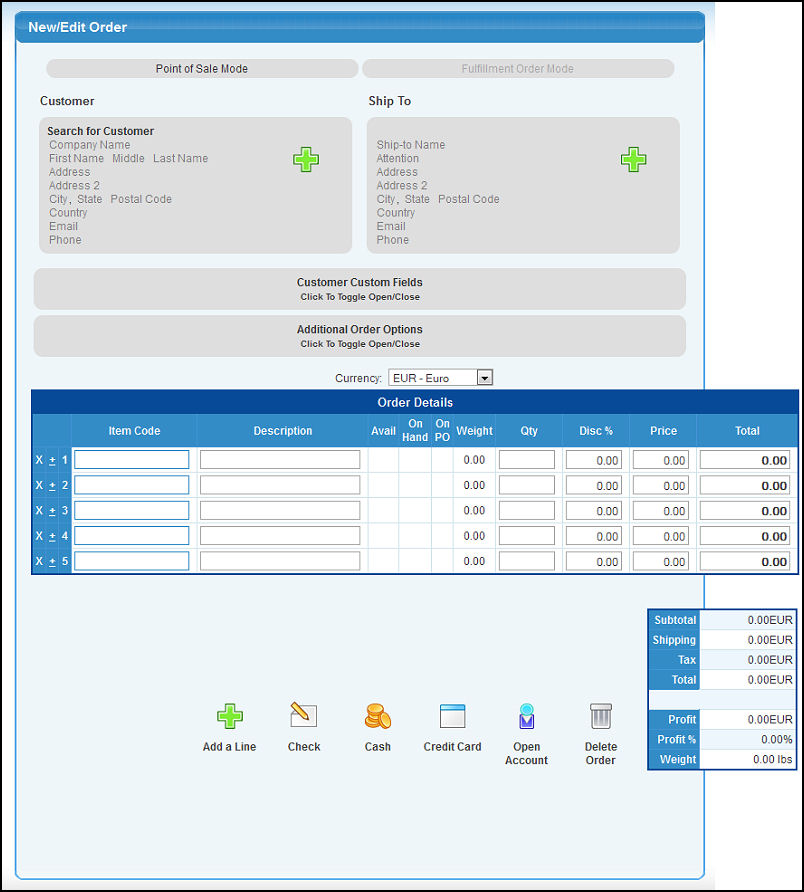
- Their are two different modes you can select. Point of Sale Mode is selected by default. Directly to the right is Fulfillment Order Mode.
- Customer box: Here you can search for an existing customer by typing in their name (or partial name) to bring up a list of possible matches. To enter a new customer, click or tab through the field names (Company Name, Name, Address, etc.) and it will change to a text box for you to enter in the information.
- If you want to clear the customer information you have entered and start over, click on the
 New Customer button to clear the data. New Customer button to clear the data.
- Ship To box: Directly to the right of the customer box is the Ship To box. If the shipping address is different than the customer address, you can add the information by clicking on the field names. If you need to clear the ship to information, click on the New Ship to button.
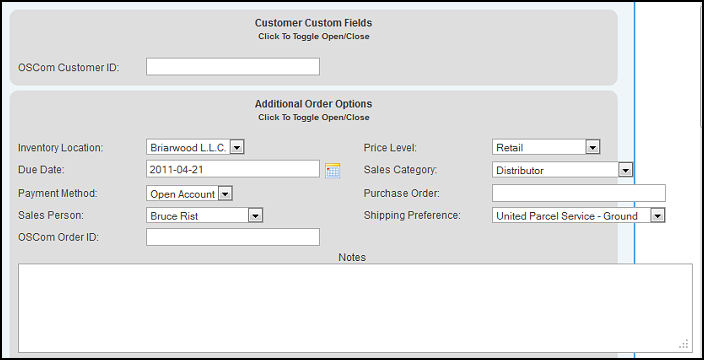
- Customer Custom Fields and Additional Order Options: Clicking on these links will bring up either custom fields (if you have any set up for this customer), or additional information you can enter for the order. It should look similar to this:
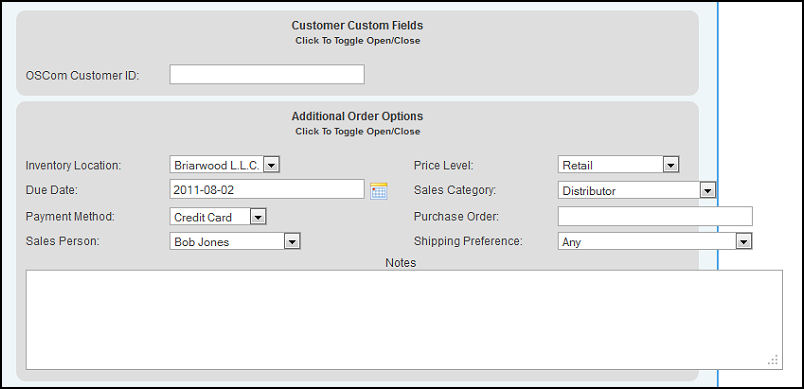
- Currency: This field will display if multi-currency is activated. Select the order currency.
- Order Details: Use this section to enter purchase items:
- Item Code - In the top box enter in the inventory item name (or partial name) to bring up a drop-down of possible matches. If you need to change the item after entering it, click on the Item Code.
- Description - You can either edit the description if it is incorrect after entering the Item Code, or add a description if it is a non-inventory item.
- Avail - If the item is in inventory, the amount available will display here.
- On Hand - If the item is in inventory, the quantity on hand will display here.
- On PO - If the item is in inventory, the quantity that are on purchase orders will display here.
- Qty - Enter in the quantity you are going to sell
- Disc % - Enter in the discount percent if applicable.
- Price - This will automatically fill in if it is an inventory item. If it is not an inventory item or if it is incorrect, enter the price here.
- Total - The total price for this line will display here. This can be edited if you know the final price you want to charge and the price will be updated to reflect the change.
- If you need to delete a line, click on the "X" to the left of the item code.
- To bring up additional order options for that line, click on the "±". Your screen should look similar to this:
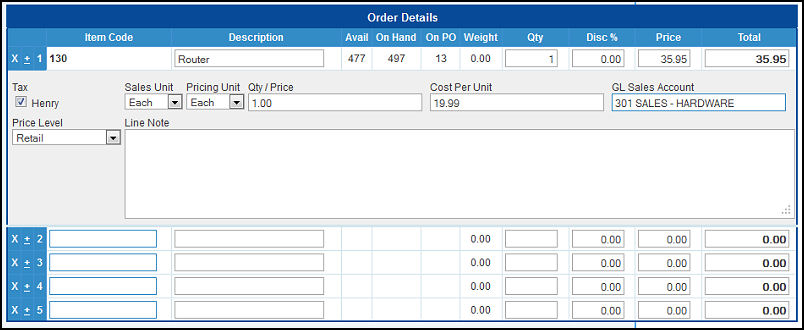
- Edit any information that is not correct. You can also add a line note for this item if you wish.
- Click on the "±" again to close the options.
- If you need to add more lines, click on the Add a Line button.
- To continue with the sale, select either the Check, Cash or Credit Card button. To delete the order, select the
 Delete Order button. Delete Order button.
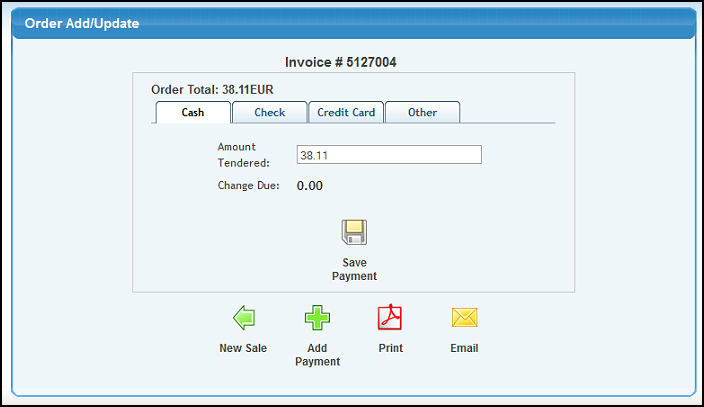
- Depending on which payment method was selected, your screen should look similar to this:
- If you want to change the payment method, click on the corresponding tab.
- When the desired payment method is selected and the payment information is entered, click the
 Save Payment button. Save Payment button.
- After saving your screen should look similar to this:
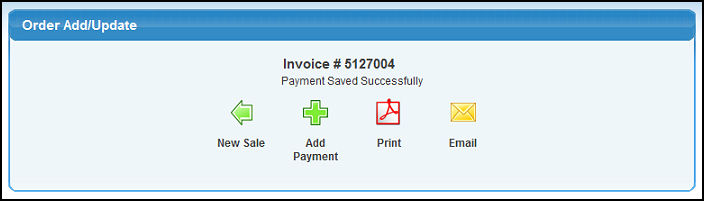
- To return to the main POS screen, click the
 New Sale button. New Sale button.
- To add a payment for this order, click the Add Payment button.
- You can also print or email the order by clicking the
 Print or Print or  Email buttons. Email buttons.
- At the top of the POS screen above the Ship To section, click the Fulfillment Order Mode link. There will be a pop-up notifying you that the system will create a fulfillment order and no invoice. Click OK to continue. Your screen should look similar to this depending on the company options you have chosen:
- To search for an existing order enter the customer name (or partial name) to bring up a drop-down of possible matches. To lookup the order by a different field, click the
 Item Lookup button on the left. Click on the order number to continue. Item Lookup button on the left. Click on the order number to continue.
- Customer box: Here you can search for an existing customer by typing in their name (or partial name) to bring up a list of possible matches. To enter a new customer, click or tab through the field names (Company Name, Name, Address, etc.) and it will change to a text box for you to enter in the information.
- If you want to clear the customer information you have entered and start over, click on the New Customer button to clear the data.
- Ship To box: Directly to the right of the customer box is the Shipto box. If the shipping address is different than the customer address, you can add the information by clicking on the field names. If you need to clear the ship to information, click on the New Ship to button.
- Customer Custom Fields and Additional Order Options: Clicking on these links will bring up either custom fields (if you have any set up for this customer), or additional information you can enter for the order. It should look similar to this:
- Order Details: Use this section to enter purchase items:
- Item Code - Enter in the inventory item name (or partial name) to bring up a drop-down of possible matches. If you need to change the item after entering it, click on the Item Code.
- Description - You can either edit the description if it is incorrect after entering the Item Code, or add a description if it is a non-inventory item.
- Avail - If the item is in inventory, the amount available will display here.
- On Hand - If the item is in inventory, the quantity on hand will display here.
- On PO - If the item is in inventory, the quantity that are on purchase orders will display here.
- Qty - Enter in the quantity you are going to sell
- Disc % - Enter in the discount percent if applicable.
- Price - This will automatically fill in if it is an inventory item. If it is not an inventory item or if it is incorrect, enter the price here.
- Total - The total price for this line will display here. This can be edited if you know the final price you want to charge and the price will be updated to reflect the change.
- If you need to delete a line, click on the "X" to the left of the item code.
- To bring up additional order options for that line, click on the "±". Your screen should look similar to this:
- Edit any information that is not correct. You can also at a line note for this item is you wish.
- Click on the "±" again to close the options.
- If you need to add more lines, click on the Add a Line button.
- Click on the Save button to save the order.
- Click on
 Save as Quote if you are not yet ready for it to be an order. Save as Quote if you are not yet ready for it to be an order.
- Click on
 Hold to save the order without proceeding to the next screen. Hold to save the order without proceeding to the next screen.
- To delete the order, click on the Delete Order button.
- If you selected Save, your screen should look similar to the following:
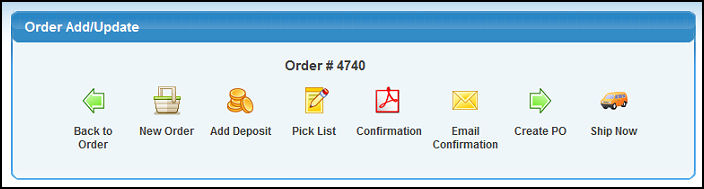
- Select
 Back to Order to return to the order. Back to Order to return to the order.
- Select
 New Order to begin a new order. New Order to begin a new order.
- Select
 Add Deposit to apply a payment to this order. Add Deposit to apply a payment to this order.
- Select
 Pick List to print out a pick list to retrieve the item from inventory. Pick List to print out a pick list to retrieve the item from inventory.
- Select Confirmation for a printout of the order.
- Select Email Confirmation to email the order.
- Select
 Create PO to create a purchase order for items on this order. Create PO to create a purchase order for items on this order.
- Select
 Ship Now if this order is ready to be shipped. Ship Now if this order is ready to be shipped.
|