For any given period of time, you can view quantities of an item sold or used.
- From the Main Menu, select Reports -> Inventory -> Item Usage History.
- Your screen should look similar to this:
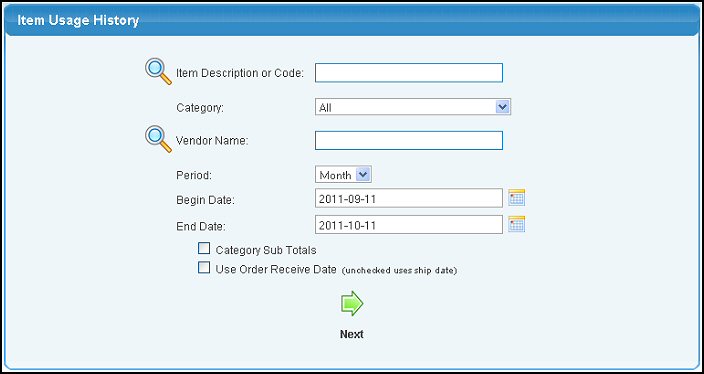
- Enter the following information to narrow your report:
- Item Description or Code: Leave blank or if you want your report for a specific Inventory Item, enter Item Name (or any portion of the name) to bring up a drop-down of possible matches. If you want to search by description, type of item, vendor, category, etc., use the
 Lookup button for detailed searches. Lookup button for detailed searches.
- Category: Select ALL to include all Item Categories or select a Category from the pull-down list. For information on setting up Item Categories, see Item Categories in the Related Topics section at the bottom of this Help topic.
- Vendor Name: Leave BLANK for all Vendors or enter Vendor Name (or any portion of the name) to bring up a drop-down of possible matches. If you want to search by phone, zip code, etc., use the Lookup button for detailed searches.
- Period: Choose to summarize on Month or Year using the pull-down list.
- Begin and End Dates: Select beginning and ending dates for sales/usage to be included in this report. You can either enter the dates manually or click the
 Calendar buttons to bring up a calendar. Calendar buttons to bring up a calendar.
- Category Subtotals: Check the box if you want to see subtotals at the end of each category.
- Use Order Receive Date: Check the box if your date range should use the Order Receive Date (rather than the ship date).
- To view your report, click on the
 Next button. Your screen should look similar to this: Next button. Your screen should look similar to this:
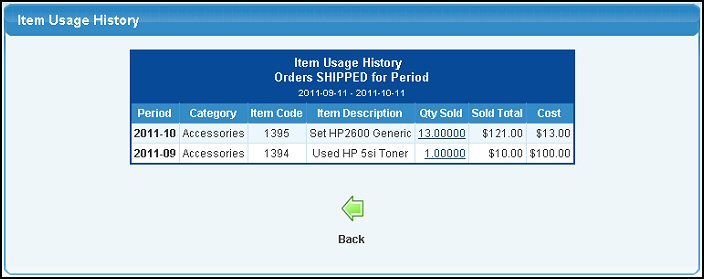
- To return to the previous screen, click the
 Back button. Back button.
- To view Shipment details for an Item, click on the number in the Qty Sold column. Your screen should look similar to this:
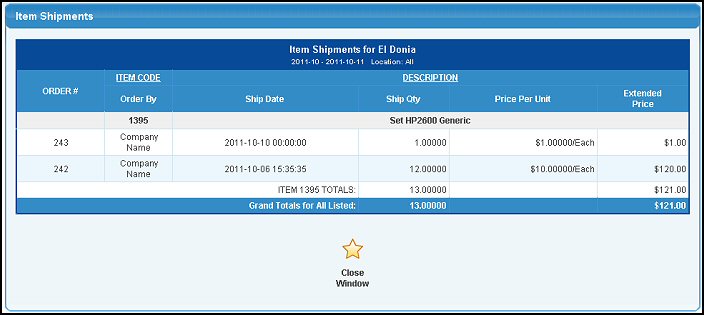
- To export your report to a Microsoft Excel® format, click on the Export button in the Quick Links section of the footer at the bottom of the page.
- To return to the report, click on the
 Close Window button. Close Window button.
|