Create a list of vendors supplying an item, what their
charges are, part numbers, price breakpoints, etc. (To facilitate purchasing)
- From the Main Menu, select Inventory -> Inventory Items -> Items by Vendor.
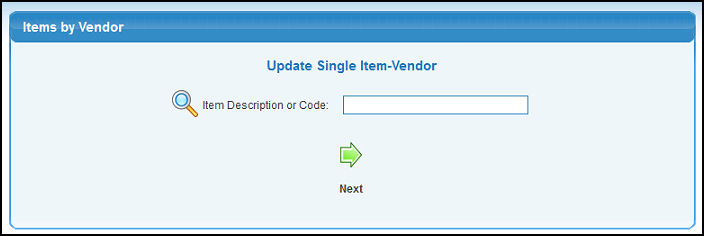
- Your screen should look similar to this:

- Item Description or Code: Enter Item Description (or any portion of the name) to bring up a drop-down of possible matches. If you want to search by description, type of item, vendor, category, etc., use the
 Lookup button for detailed searches. Lookup button for detailed searches.
- After selecting an item, click on the
 Next button to select a vendor to be a supplier for that item. You will see the Existing Vendor screen if a Vendor already exists or the New Vendor screen, if no Vendors are set up for this Inventory Item. Next button to select a vendor to be a supplier for that item. You will see the Existing Vendor screen if a Vendor already exists or the New Vendor screen, if no Vendors are set up for this Inventory Item.
- Since the vendor already exists for this Inventory Item, their name will be automatically displayed. Your screen should look similar to this:

- Select a Vendor from the pull-down list. You can have several Vendors for an Inventory Item.
- To return to the previous screen, click on the
 Back button. Back button.
- To edit the Vendor information, click on the
 Edit button and proceed to the Editing Vendor Information section of this Help text below to continue: Edit button and proceed to the Editing Vendor Information section of this Help text below to continue:
- To add a new Vendor, click on the
 Add button and proceed to the New Vendor section of this Help text below to continue: Add button and proceed to the New Vendor section of this Help text below to continue:
- If you are assigning a new Vendor or no Vendors exist for this Inventory Item, your screen should look similar to this:

- Vendor Name: Enter Vendor Name (or any portion of the name) to bring up a drop-down of possible matches. If you want to search by name, address, or contact information, use the
 Lookup button for detailed searches. You can Add a new vendor using the Lookup button for detailed searches. You can Add a new vendor using the  Add button to the right of the screen. See Vendor Add/Update in the Related Topics section at the bottom of this Help section. Add button to the right of the screen. See Vendor Add/Update in the Related Topics section at the bottom of this Help section.
- When you have selected a vendor, click on the
 Next button. Your screen should look similar to this: Next button. Your screen should look similar to this:
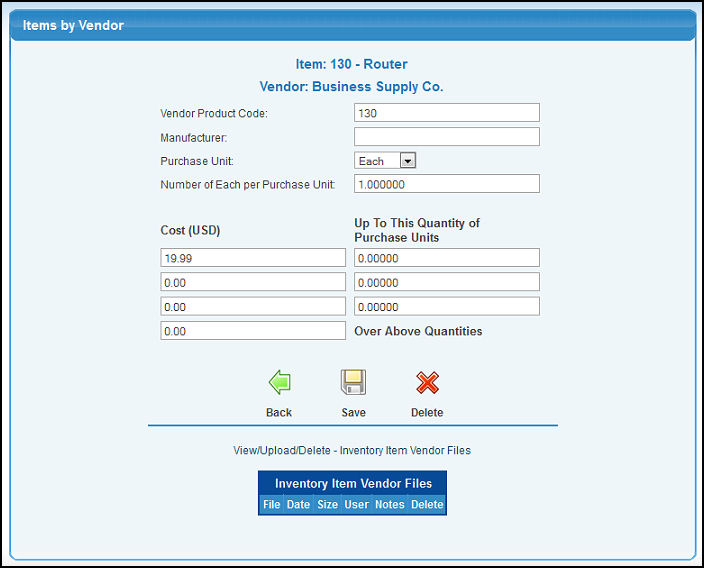
- Whether adding a new Vendor or editing an existing one, your screen should look similar to this:

- Enter the following information:
- Vendor Product Code: The part number the vendor uses (used when writing purchase orders to this vendor).
- Manufacturer: The name of the Manufacturer or the Brand if that is important information for this product.
- Purchase Unit: Select a unit name from the drop-down list (ex: stock in each, price by the dozen, purchase by the gross).
- Number of Each per Purchase Unit: Needed to do the conversions when purchasing.
- Cost - Up to this Quantity: Usual prices charged by this vendor at different quantities purchased.
- Inventory Item Vendor Files: Graphic files can be attached to this Vendor. See the Attaching Files topic in the Related Topics section at the bottom of this Help section.
- Click the
 Save button to save the new item. Save button to save the new item.
- If updating, you can click on the
 Delete button to delete this vendor as a supplier of this item. Delete button to delete this vendor as a supplier of this item.
- If you selected to Save the changes, your screen should look similar to
this:

- To select a different Inventory Item, click on the
 Select Another Item button. Select Another Item button.
- To select return to the Vendor selection screen for this same Inventory Item, click on the
 Add/Update Another Vendor Same Item button. Add/Update Another Vendor Same Item button.
|

 Lookup button for detailed searches.
 Next button to select a vendor to be a supplier for that item. You will see the Existing Vendor screen if a Vendor already exists or the New Vendor screen, if no Vendors are set up for this Inventory Item.
 Back button.
 Edit button and proceed to the Editing Vendor Information section of this Help text below to continue:
 Add button and proceed to the New Vendor section of this Help text below to continue:

 Save button to save the new item.
 Delete button to delete this vendor as a supplier of this item.