| Using NolaPro > Billing > Invoices | ||
Enter Payments
Enter payments received from a customer.
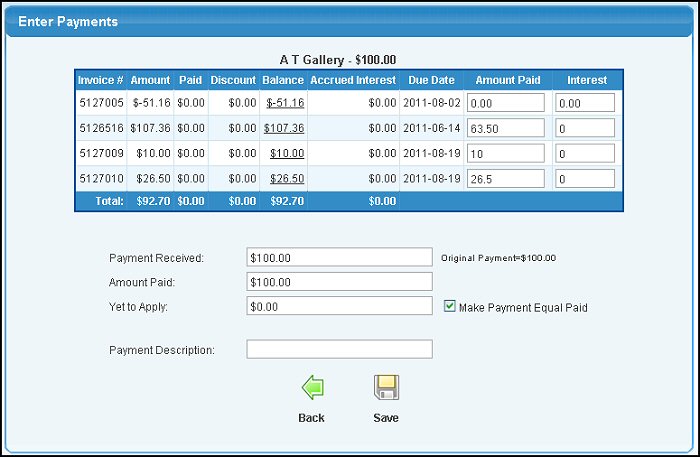
The system defaults to automatically figure out what amounts should apply to what invoices. If you have any credits for this customer, it will add them into the payment amount and apply them to invoices as well. If the amount you received EXCEEDS the invoice amounts, then you will need to enter data in the overpayment description area, and also check what you want done with the overpayment (change the payment received amount to equal the amount applied, or to create a credit memo for the customer). If you do not like the selection the system made for you, you can change the amount paid on any invoice, and also enter interest paid by invoice. As you change payments and interest amounts paid, the totals at the bottom of the screen will change so you can see if you have applied the entire amount received (or over-applied). NOTE: If you indicate in Admin -> Setup Receivables -> Company Options General (tab) that you do not want the computer to auto-distribute the payment to the oldest invoice then you will need to always select which invoices are being paid. NOTE: When the Yet to Apply amount becomes 0.00 you have correctly balanced the payment to the invoices. | ||
|
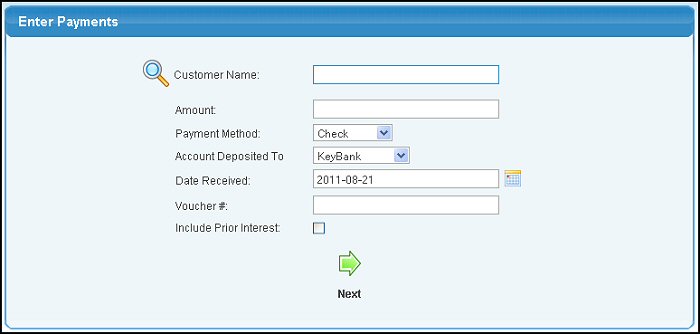
 Next button to continue. Your screen should look similar to this: