Search Categories are for use with the Shopping Cart. It allows you to specify items as belonging to any number of groups, so when shoppers want to find something, it may appear under several different searches.
- From the Main Menu, select Admin -> Setup - Inventory -> Search Categories.
- Your screen should look similar to this:
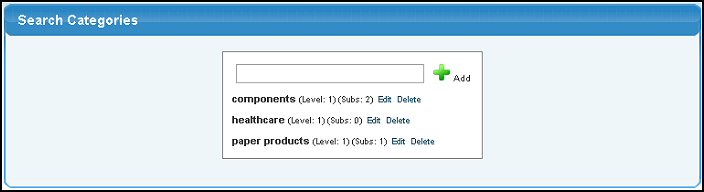
Existing search categories and levels appear on the screen for reference. You can set a "hierarchy" or a "parallel list" of search categories in Inventory Setup. A "hierarchy" setting allows you to set up categories with subcatgories underneath (called children) further subdividing the "parent" category. A "parallel list" is an independent list of categories and items can be attached to several of these categories at once. See Inventory General Setup in the Related Topics section at the bottom of this Help screen for instructions on setting this option.
- Select one of these actions:
- To EDIT a Search Category, click on the word Edit to the right of the Search Category you want to edit.
- To see the Subcategories beneath this main Category, click on any of the Search Category names.
- To ADD a new Search Category (Level 1 or Parent), enter the name of the new Search Category or Subcategory in the empty box and click on the
 Add button. Add button.
- To DELETE a Search Category, click on the word Delete to the right of the Search Category you want to delete. You cannot delete a Search Category with Subcategories (children) underneath it.
- Whichever action you choose, your next screen will look similar to this:
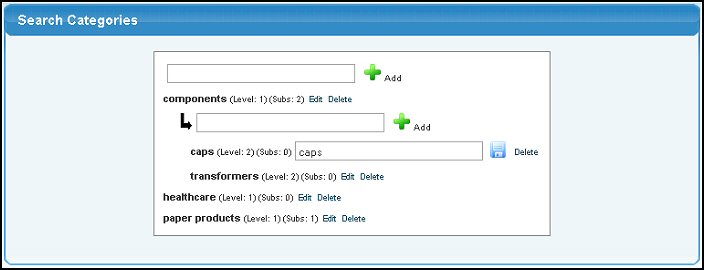
- To EDIT a Subcategory, click on the name of the Subcategory in bold. Edit the name of the category. NOTE: You can assign these search categories and levels to individual items.
- To add a Subcategory, enter the Subcategory name in the empty box and click on the Add button.
- To DELETE a Subcategory, click on the word Delete to the right of the Subcategory you want to delete.
- To update the information, click on the
 Save button. Save button.
|