Edit Invoices
- From Main Menu select Billing -> Invoices -> Edit Invoice. Your screen should look similar to this:
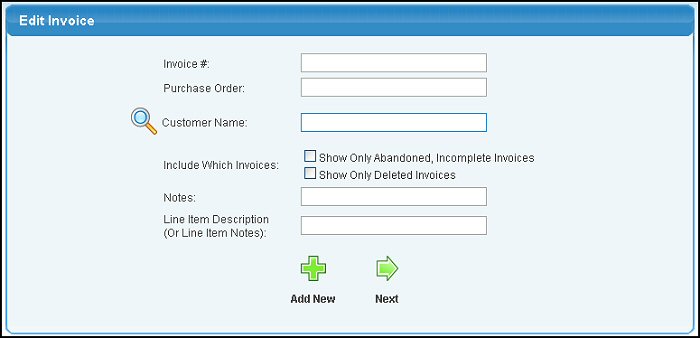
- Enter any limited data in the following categories (you need to enter at least CUSTOMER, but entering as much as you know will limit the search to a reasonable list. If you know the invoice number, that is the ONLY data you need to enter to edit that invoice):
- Enter the Invoice Number.
- Enter the Purchase Order.
- Enter the Customer Name (or partial name) to bring up a list of possible matches. Use the
 button to search for the customer name by another field type. button to search for the customer name by another field type.
- Include Which Invoices Check to show only abandoned, incomplete invoices or deleted invoices.
- Enter Notes, if necessary.
- Enter Line Item Description keywords.
- Click the
 Next button to proceed. If more than one invoice matches the entries you made, your
screen should look similar to this: Next button to proceed. If more than one invoice matches the entries you made, your
screen should look similar to this:
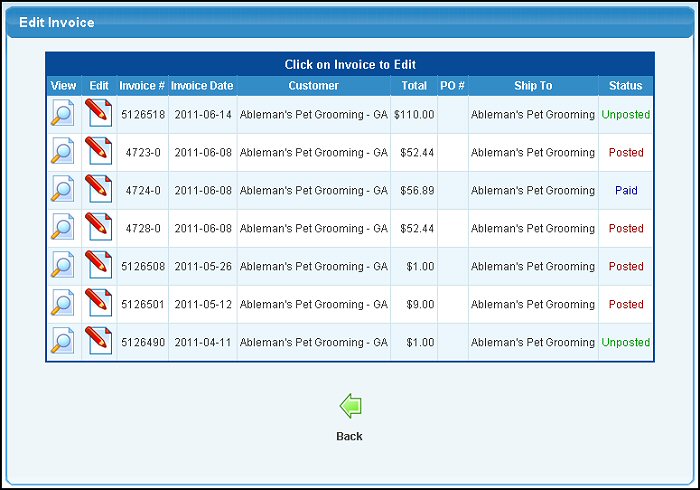
- Click on the View or Edit button for the desired invoice.
- If only one invoice matched your selections on the first screen, or you have selected an invoice number to be edited on the second screen, your screen should now look similar to this:
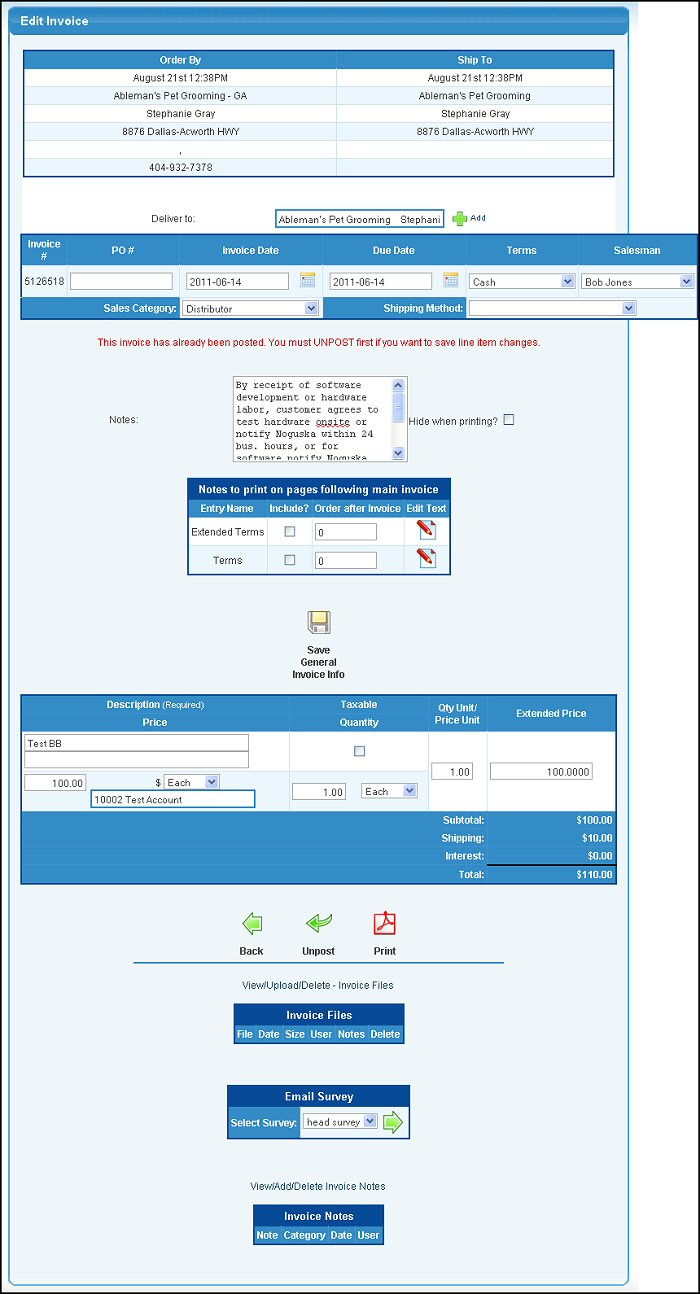
- If this invoice has been POSTED, then the FIRST thing you need to do before being allowed to make changes, is to UNPOST. Click on the
 Unpost button. Unpost button.
- An UNPOSTED display will now appear and you can now make modifications to the invoice in any or all of the following
categories:
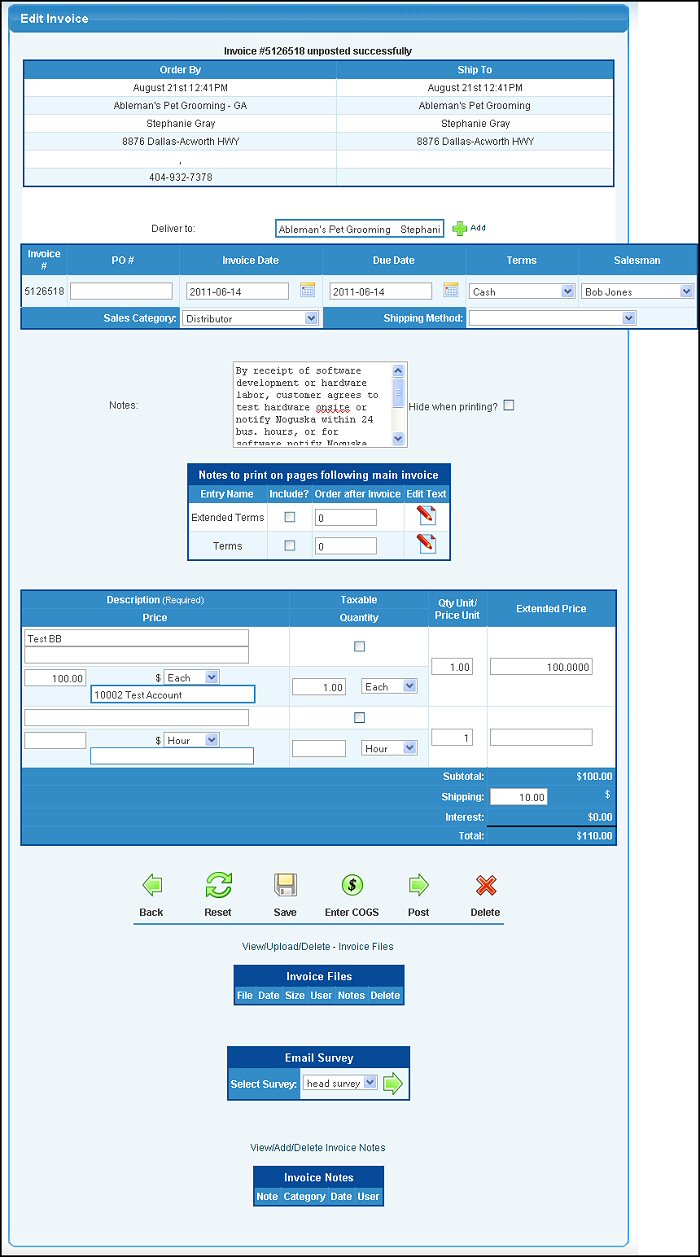
- Deliver to: Enter a ship-to address (or partial address) to bring up a list of possible matches. Enter a new ship-to address by clicking on the
 Add button. Add button.
- PO#: Change or enter your Purchase Order#.
- Invoice Date: Change the Invoice date, or use the calendar button to pull up a calendar to choose date from.
- Due Date: Change the Due Date, or use the calendar button to pull up a calendar to choose date from.
- Terms: Select terms from the pull-down list.
- Salesman: Select Salesman from the pull-down list.
- Sales Category: Select Sales Category from pull-down list.
- Shipping Method: Select Shipping Method from pull-down list.
- Notes: Enter Notes, if necessary.
- Hide When Printing?: Select to Hide Notes when printing by checking the box.
- Select any Invoice Notes to print on the invoice by placing a checkmark in the Include? column. This will only appear if you have the Invoice Notes add-on activated and notes defined. See Invoice Notes in the Related Topics section at the bottom of this screen for more information.
- Order after Invoice indicates the order the notes will appear. Enter the number to indicate desired order.
- EDIT the Invoice Notes text by clicking on the
 Edit button in the Edit Text column. Note: You must first have the Invoice Notes Add-on and a note added for the edit button to show. Edit button in the Edit Text column. Note: You must first have the Invoice Notes Add-on and a note added for the edit button to show.
- For each item on the invoice (one blank line is provided to add new, but if more than one is needed, SAVE after entering the first one, and another blank line will appear.):
1) Description: Enter Item Description
2) Price: Enter Item Price
3) Unit Name for Price: Select from pull-down list.
4) GL Sales Account: Enter an account name (or partial name) to bring up a list of possible matches.
5) Taxable: Checking the box means that this line is taxable.
6) Quantity: Number of items of the Sales Unit Name units.
7) Sales Unit Name: Select from the pull-down list.
8) Qty. Unit/Price Unit:This is how many of the sales quantity units are contained in each pricing unit.
9) Shipping: Enter the amount of the shipping charges.
- At the bottom is an area where you can attach documentation about this invoice (an agreement, a picture of the piece you are to produce, etc.).
To add a new attachment, click on View/Upload/Delete. To see how this entire process works, click on the link below for Attaching Files.
- Below the file attachments is a survey section if you have the Survey Manager Add-On installed and an active survey. For more information see the Survey Manager section in the related topics at the bottom of the page.
- Below the file survey section you can enter Dated Notes about the invoice if you have the Invoice Notes Add-On activated.
- Click on the
 Back button to return to the previous screen. Back button to return to the previous screen.
- Click the
 Save button to save changes. Save button to save changes.
- Click on the Post button to re-post the invoice.
- Clicking the
 Reset button will only back out UNSAVED data. Reset button will only back out UNSAVED data.
- Clicking on the
 Delete button will remove the invoice. NOTE: If this invoice was generated by a fulfillment or service order, deleting the invoice will re-open the order. If you want to delete the order as well, you will need to do that in the orders section. Delete button will remove the invoice. NOTE: If this invoice was generated by a fulfillment or service order, deleting the invoice will re-open the order. If you want to delete the order as well, you will need to do that in the orders section.
- If you want to edit COST OF GOODS for this invoice, click on the
 Enter COGS button, which brings up this screen. Enter COGS button, which brings up this screen.

If this invoice was generated via BILLING Add Invoice, then you will enter the COGS information in the top area. If it was passed into billing from the Order Entry area, and there are inventory items on the order, then the bottom part of the COGS screen will be filled in.
a) Enter Cost of Goods in appropriate box.
b) Select GL account.
c) If this is an inventory entry, you can also change the Inventory GL Account.
d) Click the Save button to save the entry and open up another line for entering more costs.
- When you have entered all the costs you want (and SAVED them), exit by clicking on the
 Close Window button. Close Window button.
- The final invoice screen looks similar to this:
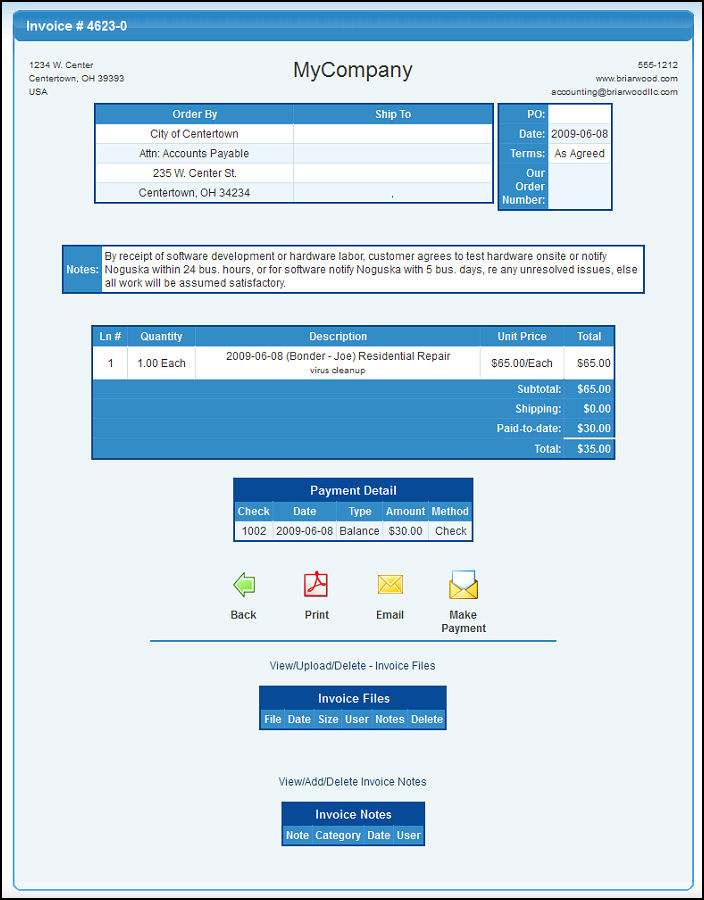
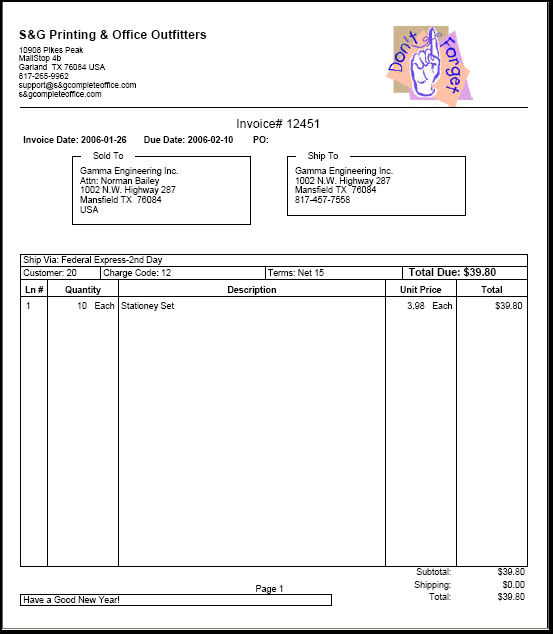
- Click on the
 Print button
to Print a .pdf version of this invoice. Print button
to Print a .pdf version of this invoice.
- Click on the
 Email button to send a copy of this invoice via your default email account. Email button to send a copy of this invoice via your default email account.
- Click on the
 Make Payment button to enter a payment for the invoice. Make Payment button to enter a payment for the invoice.
- When finished, click on the
Back button to pull up the invoice summary.
- Click on the View/Upload/Delete Invoice Files to attach graphics or documents related to this invoice.
- If you have the Survey Manager Add-On activated with an active survey, it will display here. For more information, see Survey Manager in the related topics at the bottom of the page.
- If you have the Invoice Notes Add-On activated, you will be able to attach dated notes related to this invoice.
|