Use this section to enter all machine groups to be used for pricing schemes in your estimating. Actual machines will be entered under Machines.
From the Main Menu select Printing then Print Shop Setup then Machine Families. Your screen will look similar to this: 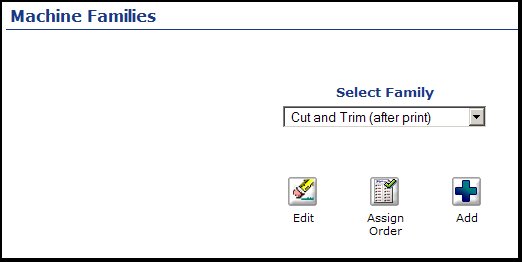
- To update an existing family, select from the pull down list. Then click on the
 Edit button to update the selected family. Edit button to update the selected family.
- To assign a display order for families, click on the
 Assign button. Your screen will change to appear as follows: Assign button. Your screen will change to appear as follows: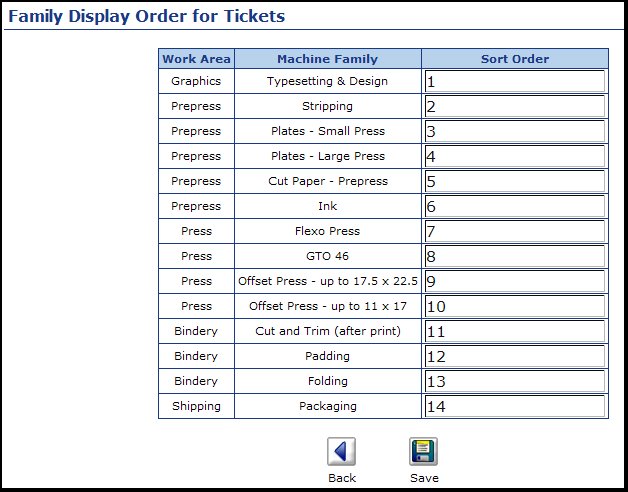
The purpose of this section is to set the order in which these family functions will appear on order tickets, and in order entry. The smallest numbers will appear at the top, the largest at the bottom of the ticket.
- To add a new family, Click on the
 Add button. Add button.
- Whether adding or updating, your next screen will look similar to this:
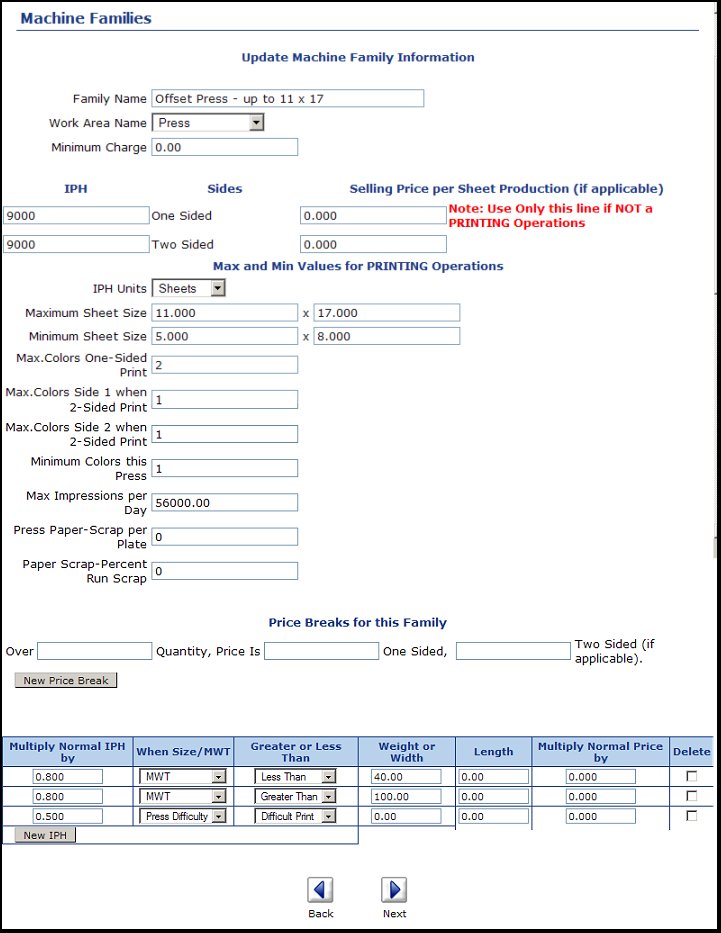
- Family Name: The name of the family as it will appear during other inputs (such as order entry).
- Work Area: Select the appropriate work area from the pull-down list. (Work areas are entered elsewhere in Setup area).
- Minimum Charge: Enter the minimum amount to be charged when using this family of machines.
- IPH: This figure is used when calculating time when based on running rates.
- One Sided: Normal running rates for non-print or for print side one
- Two Sided: For a print function enter the running rate for two-sided print.
- Selling Price per Sheet : Only enter pricing here if you want prices to calculated on a piece rate! This is an alternate way of calculating charges is to enter a per-unit price to be charged for work in this family. This method of calculating is frequently used for high-speed copiers.
- One Sided: Enter a price here for side one per piece.
- Two Sided: Enter a price here for two-sided per piece.
- IPH Units: Select running rates to be based on Sheets, Linear Feet, Square Feet, or MSI.
- If you want to limit allowed operations based on the press selected during order entry, you will need to enter that information here.
- Max Impressions per day: This number is used when calculating some of the scheduling and loading reports.
- Stock Scrap per Plate: For Print Only! Number of sheets (or MSI or Linear Feet -- based on IPH units) that will occur for each plate used.
- Stock Scrap Run Percent: For Print Only! Percentage of scrap created during processing.
- Price Breaks: If you have entered PER UNIT PRICING under Selling Price per Sheet, then you can enter as many price breaks as needed in this section. Click on the New Price Break button to add another price-break level.
- Over: If over this quantity.
- Price One-Side: Use this price.
- Price Two-side: Use this price
- IPH changes: For run-time based calculations, you can enter values that will change the running rates or prices -- depending on size or weight of the stock to be run. To change the TIME, enter a factor under "Multiply Normal IPH by" (for example to slow a rate by 70%, enter a .7 here). To change the PRICE by a factor when affected by these parameters, enter the factor under "Multiply Normal Price By" (to increase the price by 25%, enter a 1.25 here).
- Click on the
 Next button to continue entering /editing information for this family. The next screen will look similar to this: Next button to continue entering /editing information for this family. The next screen will look similar to this:
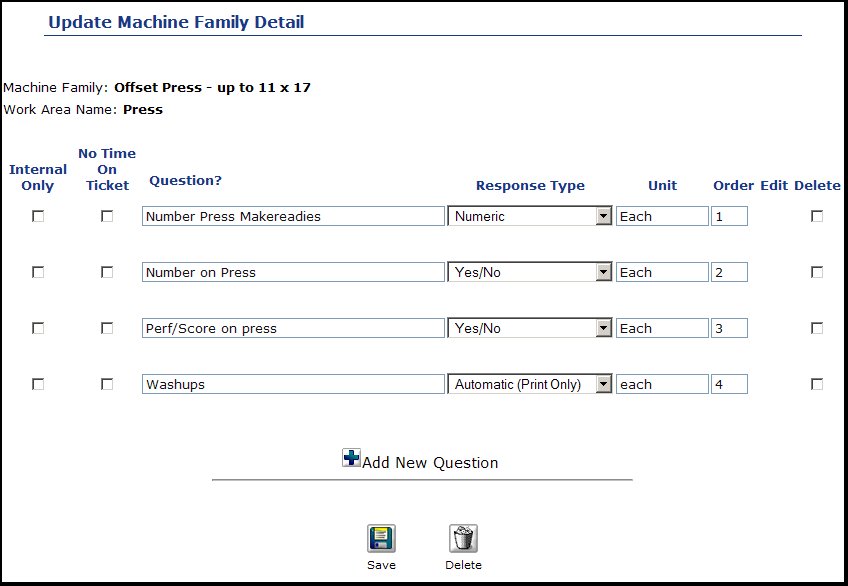
- Internal Only: Checking this box makes sure that this question does not appear on the CUSTOMER order-entry screens, only on INTERNAL use order-entry screens. Checkmark any questions that the customer would not understand how to answer correctly or that are for internal refererence only.
- No Time on Ticket: Check here if no hours calculated should be shown on the job ticket.
- Question: This is the prompt that will appear on the order entry screen for this function.
- Response Type: Select the type of prompt/fill-in you want for this question. Choices are:
- Numeric answer: - If your question was Number of Cuts, the answer you would expect is a number.
- Yes/No: - This will display a check-box on the order entry next to this question. A question like "Proof Required?" would probably want a checkbox to indicate Yes or No.
- Text: - "text" expects a typed answer (which will not be used in any calculation). This might be used next to Ink Color question.
- Selection list: - Will display a pull-down list next to the question (which limits answers to only those acceptable).
- Selection list plus text: - Will display the pull-down list choice, but also give the order-entry person a place to type additional information.
- Unit of Measure: This is displayed to make order entry easier to understand.
- Display Order: The order in which the questions will appear during order entry.
- Edit Button: clicking here will change the screen to allow you to enter the items to be displayed for Selection List pull-downs.
- Delete: checkmark the Delete box to remove a question no longer needed.
- To add a new question, click on the Add button.
- To save the changes, click on the
 Save Button. Save Button.
- EDITING A SELECTION LIST: If you clicked on the Edit button above after selecting a response type of Selection List or Selection List plus Text, the screen will change as follows:
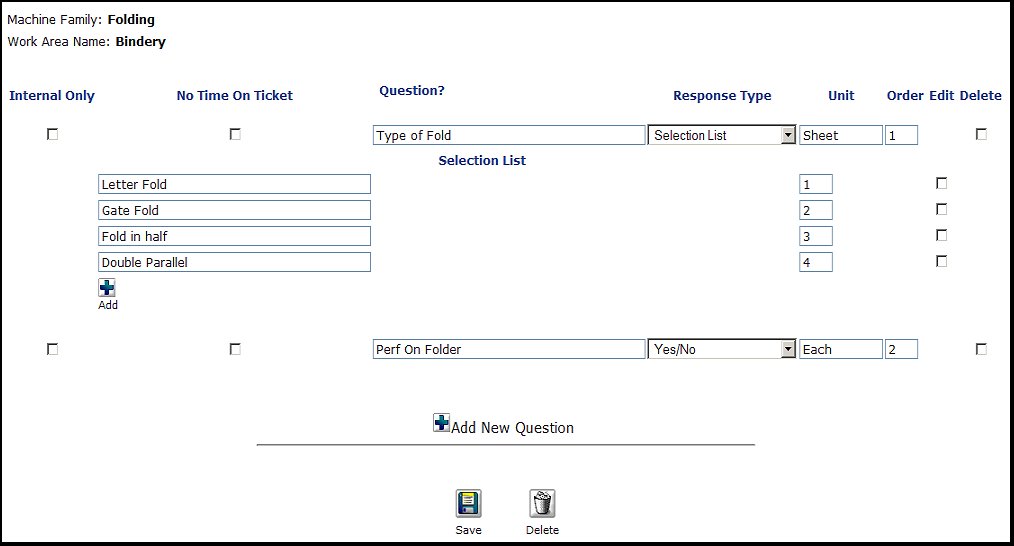
- You can update the text to appear in the selection list, or to add a new one, click on the small Add button.
- The selection list also has a display order in which the items on the list will appear during order entry.
- Check the Delete box to remove an item from the selection drop-down list.
|