|
|
This report shows inventory sales during a given time frame.
- From the Main Menu, select Reports -> Inventory -> Inventory Sales History.
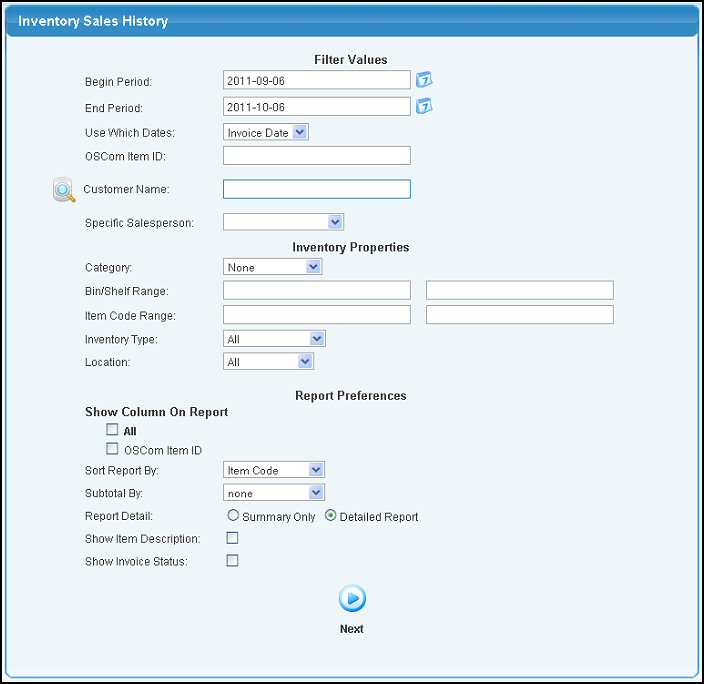
- Your screen should look similar to this:

- Enter information into the following categories to narrow your report:
- Begin and End Period: Enter a date range to be included in your report. Manually enter both dates or click on the
 Calendar button to select dates from the calendar. Calendar button to select dates from the calendar.
- Use Which Dates: Choose to use the invoice date or paid date for the period chosen.
- Length and OSCom Item ID are examples of custom fields that might apply to items if you have the Custom Fields add-on.
- Customer Name: Leave this field blank if you want to include all Customers or to report on a specific customer, enter Customer Name (or any portion of the name) to bring up a drop-down of possible matches. If you want to search by phone, zip code, etc., use the
 Lookup button for detailed searches. Lookup button for detailed searches.
- Specific Salesperson: If you only want to include items sold by a specific salesperson, select their name from the pull-down list.
- Category: Select a category from the pull-down list to include only those inventory items.
- Bin/Shelf Range: Enter a beginning and ending bin/shelf range in the first and second boxes, respectively, to only include items in that range.
- Item Code Range: Enter a beginning and ending item code in the first and second boxes, respectively, to only include items in that range.
- Inventory Type: If you only want to include a certain inventory type, select in from the pull-down list.
- Location: Select a Location from the pull-down list to report activity from a specific location or select ALL to report activity from all locations.
- Show Column on Report: OSCom Item ID is an example of a custom field that might be applied to an item. Checking the box next to custom fields will include the values from those fields in columns on the report.
- Sort Report By: Select the field to sort the report by from the pull-down list.
- Subtotal By: If you want to subtotal your report, select a field from the pull-down list.
- Report Detail: Selecting Summary Only will only include the totals. Detailed Report will include details.
- Show Item Description: Check this box to show the item description in the report.
- Show Invoice Status: Check this box to show the invoice status in the report.
- To display the report, click on the
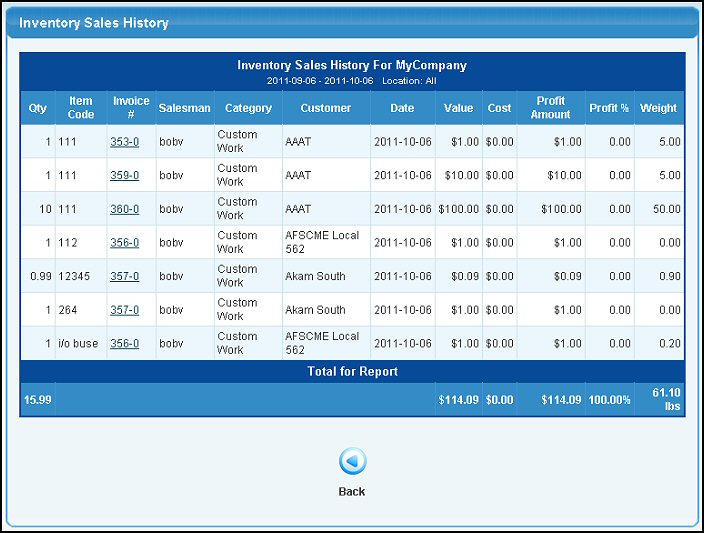
 Next button. Your screen will look similar to this is you selected Detailed Report: Next button. Your screen will look similar to this is you selected Detailed Report:

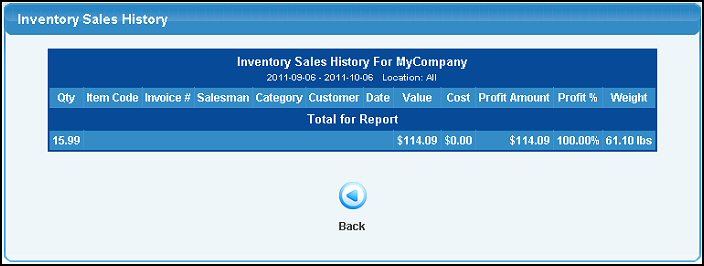
- If you selected Summary Only, your screen should look similar to this:

- To export any of these reports to a file in Microsoft Excel® format, click on the Export button in the Quick Links section of the footer at the bottom of the page.
- To return to the previous screen, click on the
 Back button. Back button.
| |
|