|
|
Use this area to create standard notes that can be attached to orders and invoices to better define terms, conditions, etc.
- From the Main Menu, select Admin -> Setup Receivables -> Invoice Notes.
- Your screen should look similar to this:
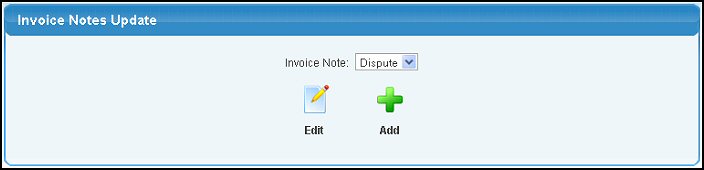
- Select the Invoice Note to be edited from the pull-down
list.
- Click the
 Edit button. Your screen should look similar to this: Edit button. Your screen should look similar to this:
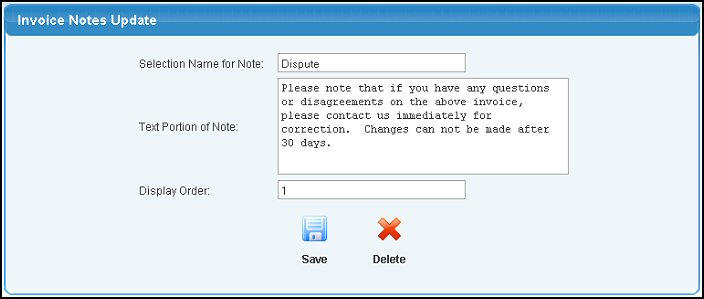
- Selection Name for the Note: This is the short name which you will see in order entry and invoice entry.
- Text Portion of Note: Update the Full text of the note.
- Display Order: This will determine the order in which the notes appear on the drop-down during order entry and invoice entry. A smaller number will appear before a larger number.
- Click the
 Save button to save changes. Save button to save changes.
- Click the
 Delete button to delete the Note. Delete button to delete the Note.
- Click the
 Add button. Your screen should look similar to this: Add button. Your screen should look similar to this:
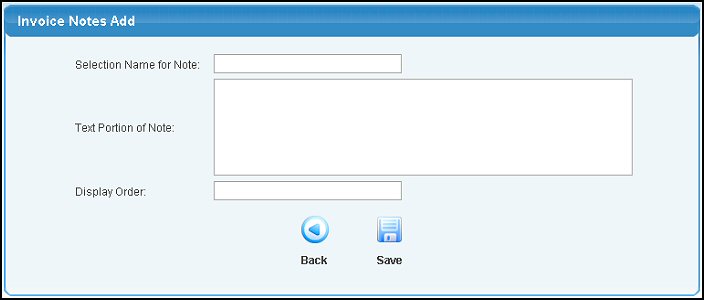
- Selection Name for the Note: This is the short name which you will see in order entry and invoice entry.
- Text Portion of Note: Update the Full text of the note.
- Display Order: This will determine the order in which the notes appear on the drop-down during order entry and invoice entry. A smaller number will appear before a larger number.
- Click the Save button to save the Customer Group.
- Click the
 Back button to return to the previous screen without saving. Back button to return to the previous screen without saving.
| |
|