Use this chapter to edit or add a sales tax for Federal, State, City or Other tax districts.
- From the Main Menu, select Admin -> Setup Receivables -> Sales Taxes.
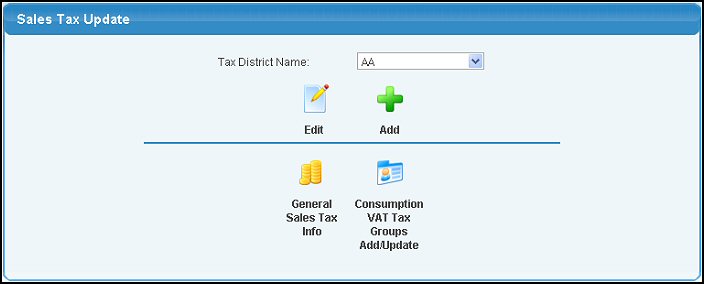
- Your screen should look similar to this:

- Select the Tax District Name from the pull-down list.
- Click the
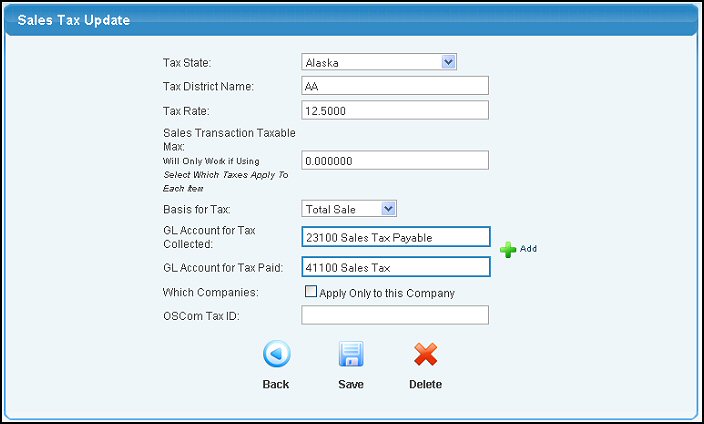
 Edit button. Your screen should look similar to this: Edit button. Your screen should look similar to this:

- Enter information in the following categories:
- Tax State: Select the state (or province) from the drop-down box. This is essential for the SHOPPING CART to function correctly.
- Tax District Name: This is where you put Federal, your State, your City, your Local or your County.
- Tax Rate: This is the tax rate for the Tax District. (ex: tax is 7.5%, then enter 7.5 here).
- Sales Transaction Taxable Max: Enter the maximum dollar amount of the transaction that can be taxed.
- Basis for Tax: Select from the pull-down list. Examples:
Total Sales or Materials only. Total Sales is the most common basis.
- GL Account for Tax Collected: This is the payables account the sales tax will accrue to for GL financial reports. Enter an account name in the first box (or a portion of the name) to bring up a drop-down of possible matches. Alternately you can enter in the account ID number directly in the box on the right. Click on the
 Add button if you need to add a GL Account. Add button if you need to add a GL Account.
- GL Account for Tax Paid: This field will only show if you have VAT taxes enabled. The account the tax will be paid from.
- Which Companies: Leaving the check-box unchecked will make this tax district appear for all companies (if you have set up more than one company). Check the box to make this tax ONLY apply to the currently selected company.
- OSCom Tax ID: This is a sample of a custom field that can be created by the administrator.
- Click the
 Save button to save changes. Save button to save changes.
- Click the
 Delete button to delete the Tax. Delete button to delete the Tax.
- Click the
 Back button to return to previous screen without saving the changes. Back button to return to previous screen without saving the changes.
- Click the
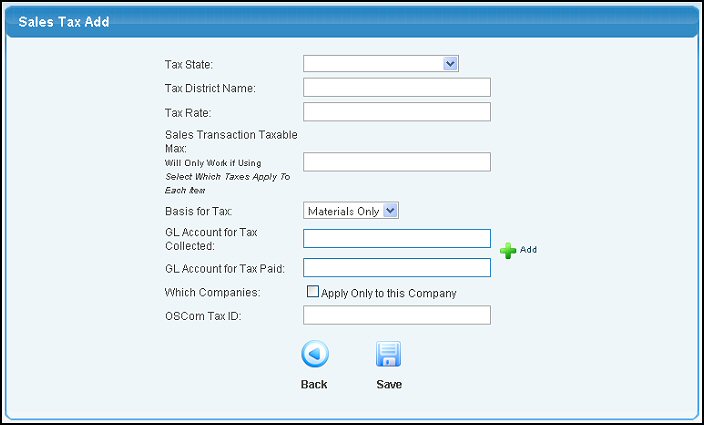
 Add button from the first screen. Your screen should look similar to this: Add button from the first screen. Your screen should look similar to this:

- Enter information in the following categories:
- Tax State: Select the state (or province) from the drop-down box. This is essential for the SHOPPING CART to function correctly.
- Tax District Name: This is where you put Federal, your State, your City, your Local or your County.
- Tax Rate: This is the tax rate for the Tax District. (ex: tax is 7.5%, then enter 7.5 here).
- Sales Transaction Taxable Max: Enter the maximum dollar amount of the transaction that can be taxed.
- Basis for Tax: Select from the pull-down list. Examples: Total Sales or Materials only. Total Sales is the most common basis.
- GL Account for Tax Collected: Enter the account name (or partial name) to bring up a list of possible matches. This is the
payables account the sales tax will accrue to for GL financial reports.
- GL Account for Tax Paid: This field will only show if you have VAT taxes enabled. The account the tax will be paid from.
- Which Companies: Leaving the check-box unchecked will make this tax district appear for all companies (if you have set up more than one company). Check the box to make this tax ONLY apply to the currently selected company.
- OSCom Tax ID: This is a sample of a custom field that can be created by the administrator.
- Click the
 Save button to add the Sales Tax. Save button to add the Sales Tax.
- Click the
 Back button to return to the previous screen without saving the changes. Back button to return to the previous screen without saving the changes.
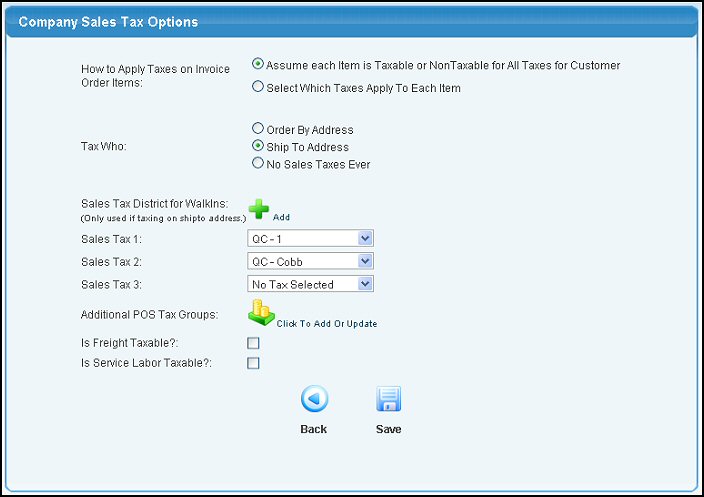
Click on the General Sales Tax Info button on the first screen. Your screen should look similar to this:

- How to Apply Taxes on Invoice Order Items: You have the choice to tax all items on an invoice according to the taxes attached to the Company or to individually tax each line item on the invoice or order.
- Tax Who: Select to tax on the basis of the Order-by Address, the Ship-To Address, or to never apply sales taxes.
- Sales Tax Districts for WALK-INS: NOTE: These tax districts are only used if the "Tax Who:" field is set to Ship-To Address. You may select up to three(3) tax districts from the pull-down boxes. If you need to add a district, click the
 Add button. Add button.
- Additional POS Tax Groups: If you have the POS Tax Groups Add-On, you can create a set of sales taxes and a default inventory location and then assign those settings to users. This is helpful if you run a couple different stores and these stores are treated as separate inventory locations inside NolaPro.
- Is Freight Taxable?: Check the box if it IS taxable.
- Is Labor Taxable?: Check the box if it IS taxable.
Click the  Save button to save changes. Save button to save changes.
Click the  Back button to return without saving to the main Company Options page. Back button to return without saving to the main Company Options page.
If you do not have VAT tax type selected under your company information, you will not have this option. Your screen should look similar to this:

Select a group to be edited from the drop-down list and click on the  Edit button, or to add a new group, click on the Edit button, or to add a new group, click on the  Add button. Add button.
Your next screen should look similar to this:

Enter or edit the name of the group and click on the  Save button. Save button.
If you are editing, you can delete the group by clicking on the  Delete button. Delete button.
| 

 Add button if you need to add a GL Account.


 Edit button, or to add a new group, click on the
 Save button.
 Delete button.