|
|
You can enter hours daily for each day's work, or you can
enter them once for each pay period. Remember that if you
log hours more than once for the same pay period, the hours
will ADD TOGETHER. So, to remove hours if you entered too many,
you can enter negative hours in a separate pass through Log Hours.
- From the Main Menu, select Payroll -> Calculations/Checks -> Log Hours.
- Your screen should look similar to this:
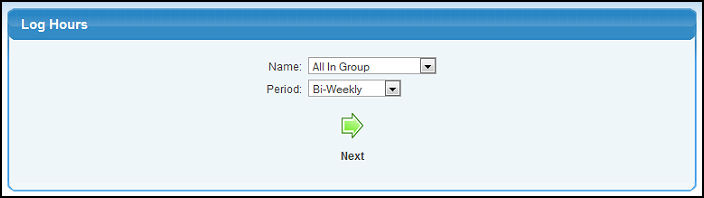
- Make selections in the following categories:
- Name: Select an Employee Name from the pull-down list or select ALL IN GROUP to do all employees in the pay period selected.
- Period: Select the Period from the pull-down list (bi-weekly, monthly, semi-monthly, or weekly).
- To continue, click on the
 Next button. Your screen should look similar to this: Next button. Your screen should look similar to this:
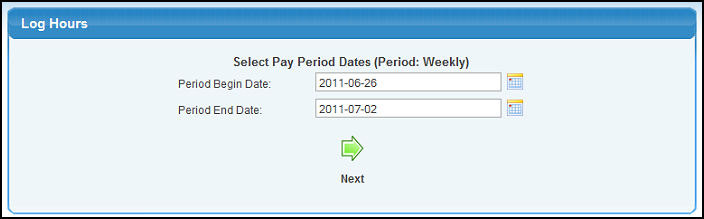
- Period Begin Date and Period End Date: These are the pay period begin and end dates -- not the date on which the check is written. You can either enter the date manually or click on the
 Calendar button to select the date from a calendar. Calendar button to select the date from a calendar.
- To continue, click on the Next button. Your screen should look similar to this:
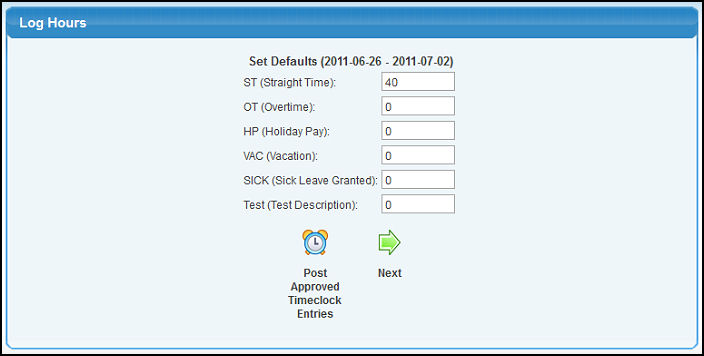
- Enter DEFAULT Number of hours in each of the displayed pay types (the pay types are the ones you entered in Payroll -> Setup - Payroll -> Pay Types). If most people worked a 40-hour week, for example, you could enter 40 next to Straight Time Hours and that number of hours would default in each employee entry page. You can override that number, but it can save time if most of your people have the same hours.
- Selecting the
 Post Approved Timeclock Entries button will post any approved entries made (from the Payroll -> Timeclock Processing -> Approve Times section). NOTE: This only shows if you have the timeclock add-on. Post Approved Timeclock Entries button will post any approved entries made (from the Payroll -> Timeclock Processing -> Approve Times section). NOTE: This only shows if you have the timeclock add-on.
- To continue, click on the Next button. Your screen should look similar to this:
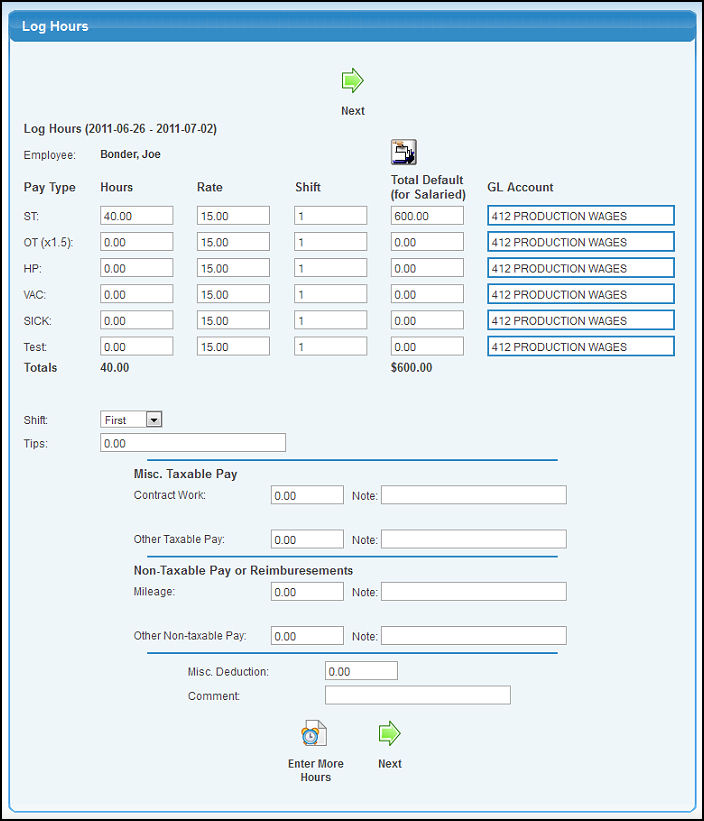
- Verify that the entries in the following categories are correct, you may edit if necessary:
- Hours: Number of Hours for this pay period. NOTE: The hours entered as the default on the previous screen will be displayed here.
- Pay Rate: Employee's Pay Rate for this Pay Type. You can override this pay rate, if needed.
- Shift: The shift multiplier for this Pay Type (the shift number, selected below will auto-fill these fields when it changes).
- Total Default: Wages (Hours x Pay Rate).
- GL Account: Enter the GL Account by entering the name (or partial name) to bring up a drop-down of possible matches. Alternately you can enter the account number into the box directly below. If you have some pay at one account and some in another for the same person, after entering hours for one account, click on the clock to enter more hours with another account for the same person.
- Shift: Select shift from pull-down list. This will affect all pay on the current screen. If you have some pay at one shift and some in another for the same person, after entering hours for one shift, click on the clock to enter more hours with another shift for the same person.
- Tips: If your employees report tips, place that entry here.
- Other Taxable Pay: Enter any additional wages that will be taxable. Directly to the right is a Note field to enter in an explanation for the taxable pay entry.
- Note: Enter an explanation for Misc. Taxable Pay entry.
NOTE: Specific categories can be setup to display in the Non-Taxable Pay or Reimbursements section by going to Payroll -> Setup Payroll -> General Factors. At the bottom of this page is a category for Non-Taxable Pay. Here you can enter in the category name and the GL Account associated with it.
- Misc. Nontaxable Pay: Enter any amounts to appear on the paycheck that are not wages and therefore non-taxables. (Example: Expense Reimbursements).
- Note: Enter an explanation for the Misc. Non-Taxable Pay entry.
- Misc. Deduction: Enter any miscellaneous deduction amounts (Example: repayment of an advance).
- Comment: Enter an explanation for the Misc. Deduction entry.
- To enter more hours for this employee, click on the
 Enter More Hours button. Enter More Hours button.
- To save your changes and continue to the next employee, click on the Next button.
- Repeat these steps for this screen until all selected employees are complete. Your final screen after all employees hours are entered should look similar to this:
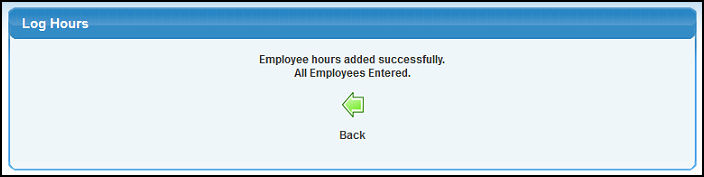
- To return to the main screen, click on the
 Back button. Back button.
| |
|