|
|
You can run this report to view a single payroll, not-yet-calculated, or not-yet printed payrolls to check calculations before committing them to checks/direct deposits. It also allows you to void or reprint a check/direct deposit transaction, if necessary.
- From the Main Menu, select Payroll -> Calculations/Checks -> Check Summary or Reports -> Payroll -> Check Summary.
- Your screen should look similar to this:
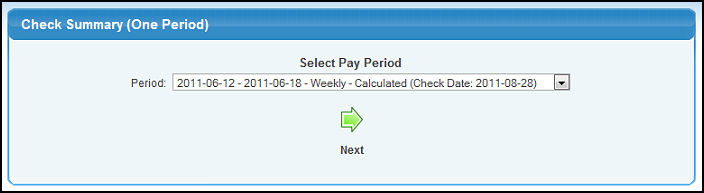
- Select Pay Period from the pull-down list.
- To produce the report, click on the
 Next button. This report shows all pay, deduction, etc. information about each employee with a grand total at the bottom. It will also display tax deposit check information. Note: If you have payroll runs that are CALCULATED, but NOT PAID in your payroll system, the YTD totals for each employee will NOT include these pay runs. Checks must be printed before they are reflected in the YTD numbers. Your screen should look similar to this: Next button. This report shows all pay, deduction, etc. information about each employee with a grand total at the bottom. It will also display tax deposit check information. Note: If you have payroll runs that are CALCULATED, but NOT PAID in your payroll system, the YTD totals for each employee will NOT include these pay runs. Checks must be printed before they are reflected in the YTD numbers. Your screen should look similar to this:
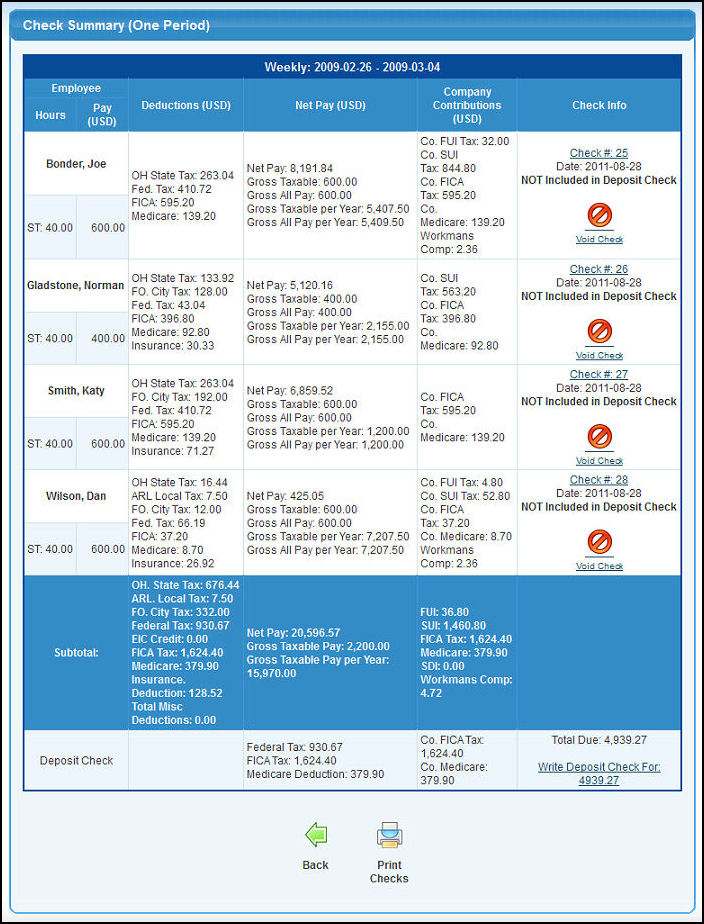
- To return to the previous screen to select a different period, click on the
 Back button. Back button.
- To reprint the exact same check, click on the Check Number.
- To print all the checks, click on the
 Print Checks button. Print Checks button.
- To print all of the direct deposit stubs, click on the Print Direct Deposit Stubs button. Note: This will only appear if there are direct deposit stubs.
- To email the direct deposit stubs, click on the
 Email Direct Deposit Stubs button. Note: This will only appear if there are direct deposit stubs. Email Direct Deposit Stubs button. Note: This will only appear if there are direct deposit stubs.
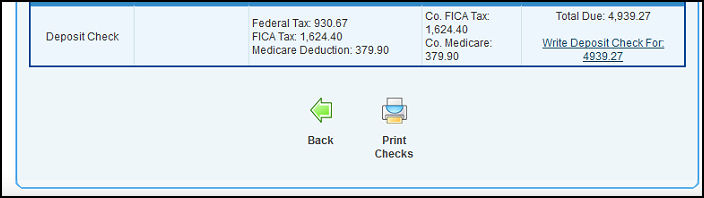
- If the amount of the tax deposit check is less than the amount of tax which should have been deposited, the bottom of your screen might look like this, which allows you to click on the message to create a tax deposit check for the remaining amount due:
- To void a Check or Direct Deposit transaction, click on the
 Void Check button found on the Check Summary screen (you will not see this button if the checks have not yet been written). Your screen should look similar to this: Void Check button found on the Check Summary screen (you will not see this button if the checks have not yet been written). Your screen should look similar to this:

- You have three(3) different choices on this screen:
- To void the Employee's check and the check calculations leaving just the hours and pay information intact, click on the Void Check and Calculations button. This will allow you to make changes to pay, recalculate, and re-write checks.
- To void the Employee's check, calculations and ALL Pay Data for that pay period, click on the Void Check, Calculations, AND All Pay Data button. This removes everything, so you can start fresh with entering hours, etc.
- Reprint as Check#: Enter the new Check # if you wish to assign a new check number and reprint the check (without changing the data), then and click the Reprint button to print the new check.
- To void a Check or Direct Deposit transaction, click on the Void Transaction button found on the Check Summary screen (you will not see this button if the checks have not yet been written). Your screen should look similar to this:
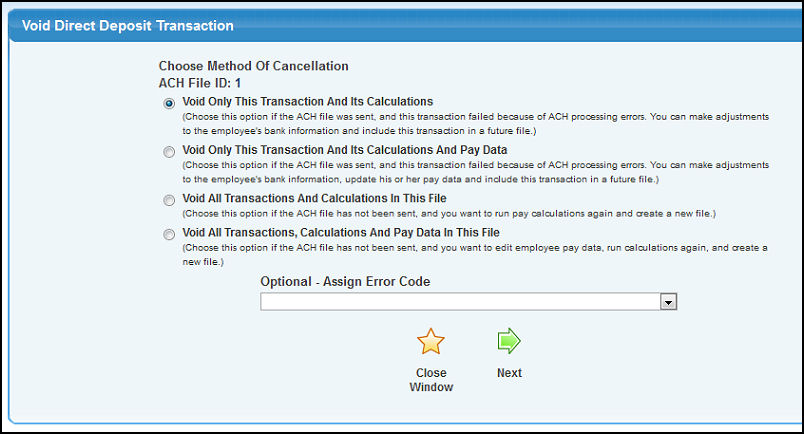
- You have four (4) different choices on this screen:
- To void ONLY this transaction and its calculations leaving just the hours and pay information intact, select this radio button, then click on the Next button. This will allow you to make changes to pay, recalculate, and re-write checks.
- To void ONLY this transaction, its calculations AND ALL Pay Data for that pay period, select this radio button, then click on the Next button. This removes everything, so you can start fresh with entering hours, etc.
- To void ALL Transactions and calculations in this Direct Deposit file, select this radio button, then click on the Next button to process the void.
- To void ALL Transactions, Calculations and ALL Pay Data for this pay period for all employees in this Direct Deposit file, select this radio button, then click on the Next button to process the void.
- Optional - Assign Error Code: If you want to select a reason code (provided by your bank if it was processed and returned an error), select a code from the drop down list before doing the void step.
- To return to the previous screen, click on the
 Close Window button. Close Window button.
| |
|