|
|
Add Payment Plans (regularly scheduled amounts to be invoiced)
- From Main Menu select Billing -> Payment Plans -> New Plan. Your screen should look similar to this:
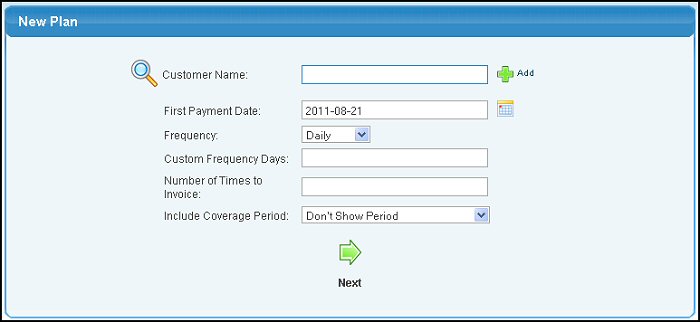
- Fill in the Customer Name. This will cause a large box with the customer information to display. You will see a screen similar to this:
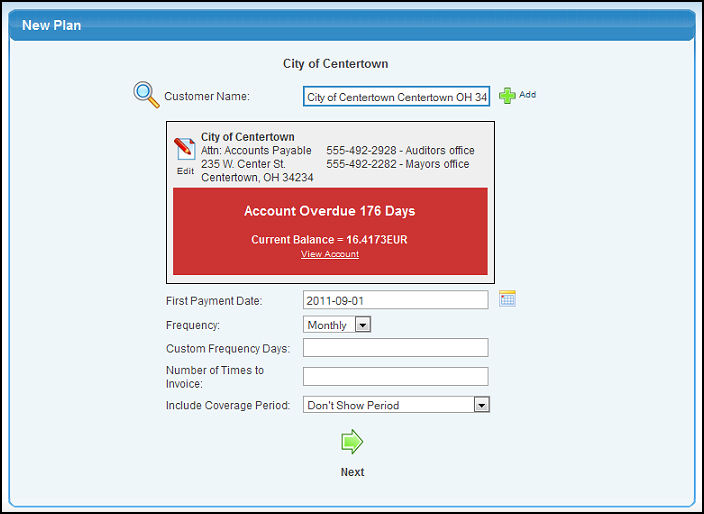
- First Payment Date: The date of the first invoice to be generated for this payment plan. Click on the calendar button for help in selecting a date.
- Frequency: Select from Daily, Weekly, Monthly, Quarterly, Yearly or Custom. Custom allows you to enter the actual number of days between invoices.
- Custom Frequency Days: ONLY enter if selection on drop-down for Frequency is CUSTOM.
- Number of Times to Invoice: This is a count-down number that will change each time a new invoice is generated. When this number reaches zero it will stop creating new invoices. To have the system keep sending invoices until you tell it to stop, enter a -1 (negative one) here.
- Include Coverage Period: A message is printed on the Invoice generated indicating the period of time the invoice covers. Select from Don't Show Period, Show Period: Invoice Date = Start, or Show Period: Invoice Date = End in the drop-down box.
- Click on the
 Next button to continue. Your next screen should look similar to this: Next button to continue. Your next screen should look similar to this:
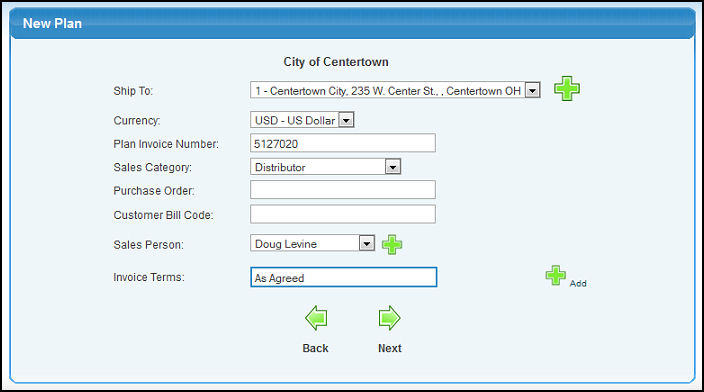
- Ship To: Select a ship-to address from the drop-down selection (or enter a new ship-to address by clicking on the
 Add button to the right of the drop-down). Add button to the right of the drop-down).
- Currency: This field will appear if multi-currency is activated. Choose currency for invoice. Invoice payment must also be in this currency.
- Plan Invoice Number: This is the BASE number for invoices to be generated. Actual invoices will combine this with -01, -02, -03, etc.
- Sales Category: Select Sales Category from pull-down list.
- Purchase Order: If the customer has issued a PO Number for this purchase, enter that number here so it will appear on their invoices.
- Customer Bill Code: If the customer needs you to put his account code on invoices, enter that number here. (This defaults to the number entered in customer entry).
- Sales Person: Select the salesperson responsible for the sale from the drop-down box.
- Invoice Terms: Select the invoice terms to be used on invoices issued for this payment plan. The default will be the terms entered in the customer entry section.
- To start all over, click on the
 Back button. Back button.
- Click on
 Next button to move to the next screen: Next button to move to the next screen:
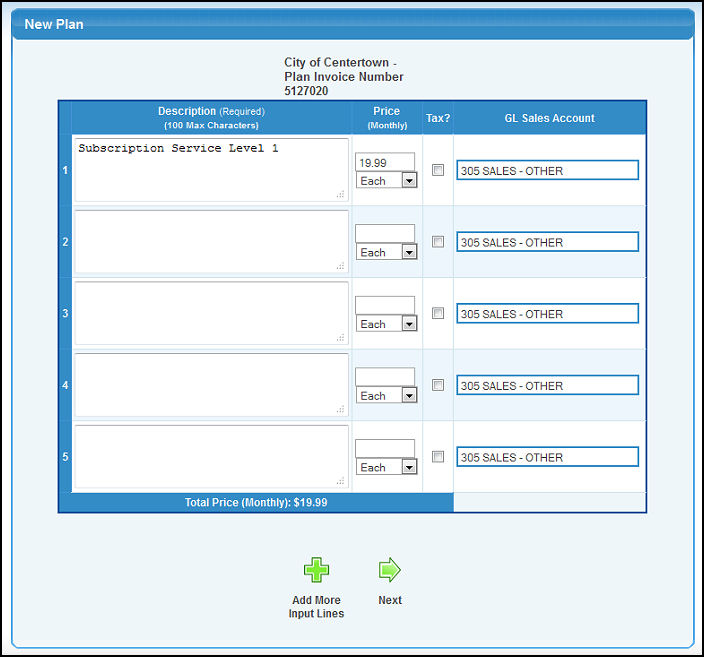
- Description:
Enter the description. If you need more space than is available on one block, simply move to the next description block to continue.
- Price (period):
What shows in place of period will be what you selected on the previous screen. Enter the amount to be billed each invoice.
- Unit:
Below the price entry is the unit name description. Select the appropriate unit from the drop-down box.
- Tax?:
If this is a taxable item, check the box, if not taxable, leave unchecked. The taxable status will default to the customer usual tax status.
- GL Sales Account:
Select the account in General Ledger that this sale should post into.
- If you need more lines than the five originally displayed, click on the
 Add More Input Lines button to display more input lines. Add More Input Lines button to display more input lines.
- When you have completed your entries, click on the
 Next button. This will bring up a screen similar to this: Next button. This will bring up a screen similar to this:

- Taxes:
If you selected that this is a taxable item, then you will see a list of the taxes assigned to this customer, along with the amount of tax calculated. You can over-ride the tax if you wish. This is the amount of tax PER BILLING period.
- If you want to enter the COST OF GOODS for this invoice, click on the
 Enter COGS button, which brings up this screen. Enter COGS button, which brings up this screen.
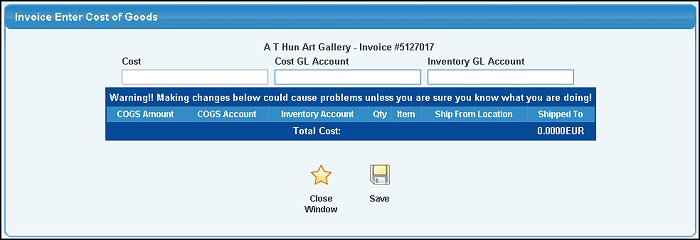
- Enter Cost of Goods in appropriate box.
- Enter Cost and Inventory GL accounts in the appropriate boxes.
- Click the
 Save button to save the entry and open up another line for entering more costs. Save button to save the entry and open up another line for entering more costs.
- When you have entered all the costs you want (and SAVED them), exit by clicking on the
 Close Window button. Close Window button.
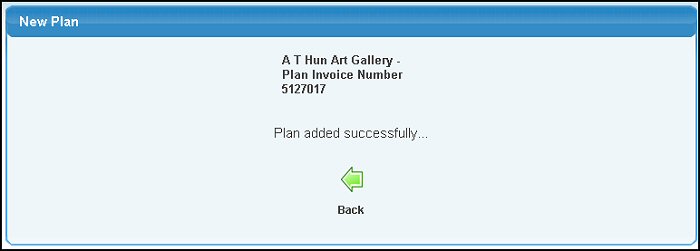
- When you have entered everything required, click on the
 Next button to finalize this payment plan entry, which brings up this screen, which has a BACK button to re-start on another Payment plan: Next button to finalize this payment plan entry, which brings up this screen, which has a BACK button to re-start on another Payment plan:
| |
|