NolaPro has a variety of Add-Ons available to enhance your standard NolaPro package. Use this screen to purchase and activate your selected Add-Ons.
- From the Main Menu, select Tools -> Add-Ons.
- Your screen should look similar to this:
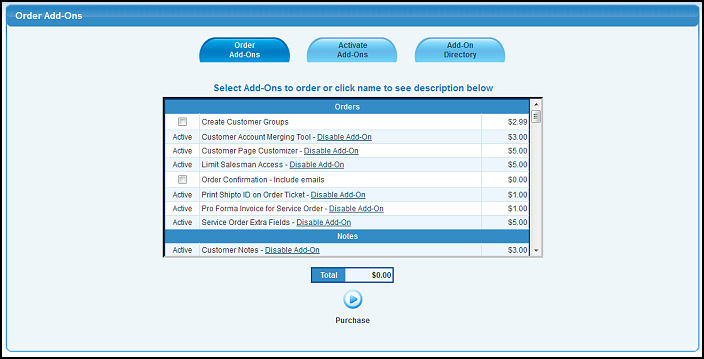
- To purchase an Add-On: Click on the box next to the add-on(s) you would like to purchase and click “Purchase”. Your screen should look similar to this:
Note: Active Add-Ons can be disabled by clicking the disable link after the add-on name. It can be reactivated simply by clicking the link again.
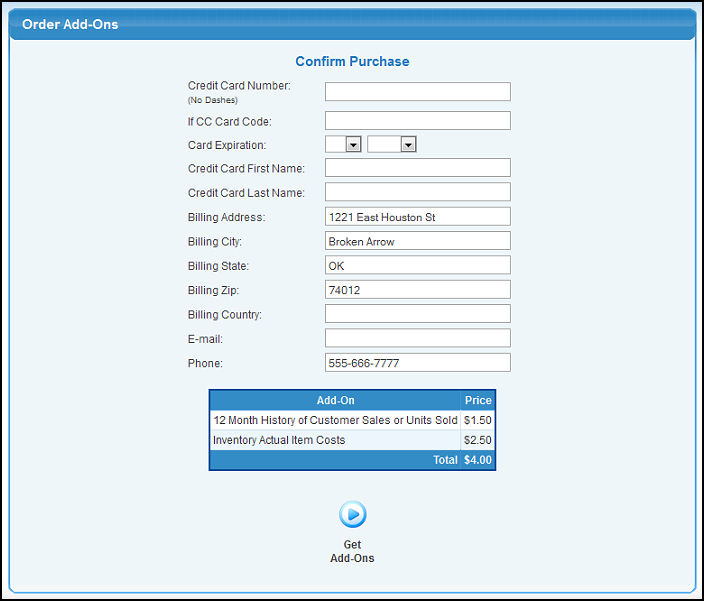
- Enter in your billing information and click
 Get Add-Ons to complete your purchase. The Add-On(s) will be automatically activated in NolaPro. Get Add-Ons to complete your purchase. The Add-On(s) will be automatically activated in NolaPro.
Activate Code from NolaPro Store
- If you have purchased your Add-On(s) from the NolaPro Store and received the activation code by email, click the Activate Add-Ons tab at the top of the page and your screen should look similar to the following:
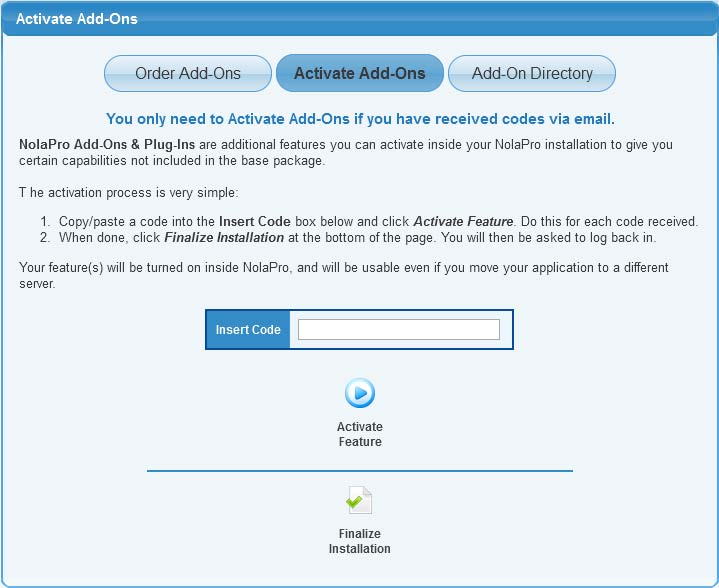
- Copy the Activation Serial Number emailed to you into the Insert Code box.
- Click on the Activate Feature button. When the feature has been activated, that line will change to show the serial number, and the shopping cart icon for that item will go away.
- When you have finished activating your serial numbers, click the
 Finalize Installation button to complete the installation and add the new features to your existing NolaPro menu. Simply log back in to use the new features! Finalize Installation button to complete the installation and add the new features to your existing NolaPro menu. Simply log back in to use the new features!
Add-On Directory
- This screen displays the location to enable or access your add-on once it has been activated. Click on the Add-On Directory tab at the top of the screen and your screen should look similar to the following:
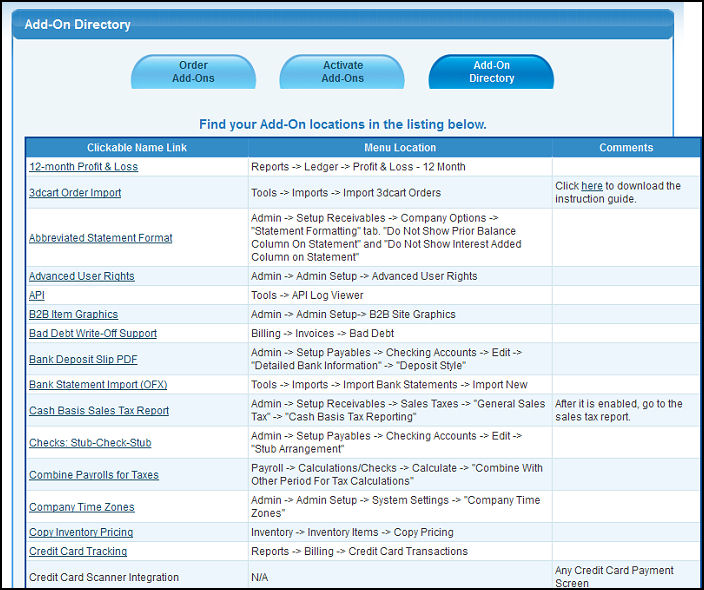
- Click on the Clickable Name Link to go to the screen for that Add-On.
|