Select which bills to approve for payment, on what dates. (This will show only if you selected the Bills Must Be PreApproved Before Payment option in Admin -> Setup – Payables -> General Setup).
- From the Main Menu, select Payables -> Checks -> Write Checks.
- Your screen should look similar to this:
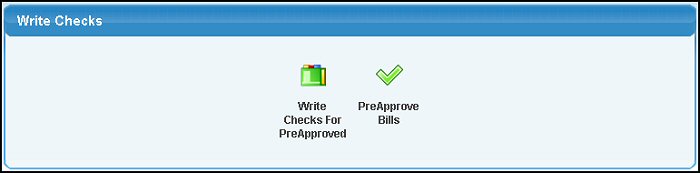
Click on the  PreApprove Bills button. PreApprove Bills button.
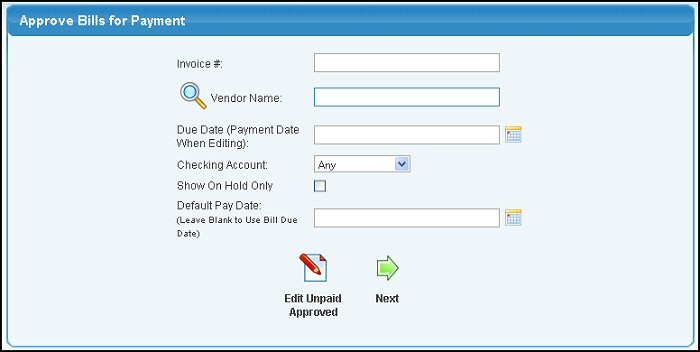
- Enter data in the following categories:
- Invoice #: If you do not want a specific invoice to be paid, leave it blank.
- Vendor Name: Fill in if you want to pay invoices for a specific vendor. Enter Vendor Name (or any portion of the name) to bring up a drop-down of possible matches. If you want to search by phone, zip code, etc., use the
 Lookup button for detailed searches. Lookup button for detailed searches.
- Due Date: If you want to include only those invoices due by a certain date (say, within the next 7 days), you can either enter the date manually or click the
 Calendar button to bring up a calendar. Calendar button to bring up a calendar.
- Checking Account: If you have MORE THAN ONE checking account defined for payables, select the one you want from the pull-down list. (You will not see this prompt if you have only one checking account).
- Show On Hold Only: To limit the results to bills that have been put ON HOLD, check this box.
- Default Pay Date: Select the date to be put on your pre-approvals. Leaving the date field blank will make the pay date be the invoice due date.
- To edit previous approvals that are not yet paid, click on the
 Edit Unpaid Approved button. Edit Unpaid Approved button.
- To approve bills for payment, click on the
 Next button. Next button.
If you selected the NEXT button, your screen will look like this:
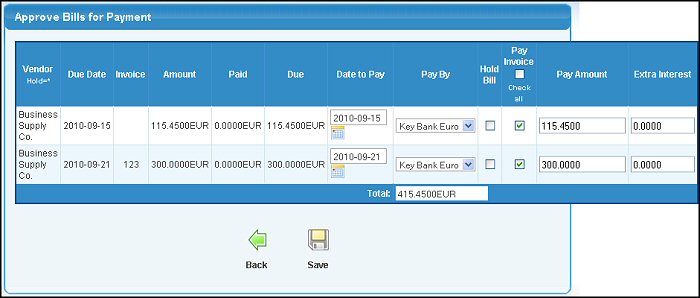
Clicking on the Check All check box in the header column will select or unselect all items showing on the page for payment.
- Date to Pay: This will default to the date selected on the previous screen (or the due date if no date was entered). If you want some other date for this invoice to be paid you can change this.
- Pay By: This is the payment method or checking account that should be used when paying this bill.
- Hold Bill: If you check this box, this BILL will be placed on HOLD status, and the Pay Invoice checkbox will be unchecked.
- Pay Invoice: Check this box if you WANT this invoice to be approved for payment at this time (all invoices are checked to be paid by default). To check or uncheck ALL invoices shown, check or uncheck the Check All box at the top of the Pay Invoice column. NOTE: The total amount being paid will show up at the bottom of the screen in the Total box.
- Pay Amount: This auto-fills in with the amount of the bill.
- Extra Interest: You can add additional interest to paid at the same time as the invoice by entering the amount in this column.
- To cancel the approval process and return to the previous screen, click on the
 Back button. Back button.
- Once you have selected the invoices to approve, click the
 Save button to save your entries. Save button to save your entries.
NOTE: If vendor has several bills to be grouped onto one check, make sure the pay date is the same for all.
If you selected the EDIT button, your screen will look like this:
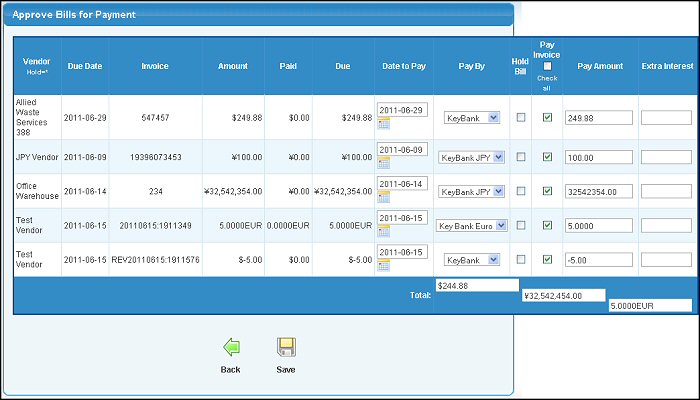
Clicking on the PAY ALL check box in the header column will select or unselect all items showing on the page for payment.
- Date to Pay: Date on which this invoice should be paid.
- Pay By: This is the payment method or checking account that should be used when paying this bill.
- Hold Bill: If you check this box, this BILL will be placed on HOLD status, and the Pay Invoice checkbox will be unchecked.
- Pay Invoice: Check this box if you WANT this invoice to be approved for payment at this time. To check or uncheck ALL invoices shown, check or uncheck the Check All box at the top of the Pay Invoice column. NOTE: The total amount being paid will show up at the bottom of the screen in the Total box.
- Pay Amount: This auto-fills in with the amount of the bill.
- Extra Interest: You can add additional interest to paid at the same time as the invoice by entering the amount in this column.
- To cancel the approval edit and return to the previous screen, click on the Back button.
- Once you have edited the approvals, click the Save button to save your entries.
|