Create your Inventory Categories from another application via a comma-separated (CSV), a tab-delimited, or a pipe(|)-delimited file, in preparation for importing Inventory Items into NolaPro. Follow the restrictions noted in red and place the fields in the order shown below.
- From the Main Menu, select Tools -> Imports -> Import Inv Categories.
- Your screen should look similar to this:
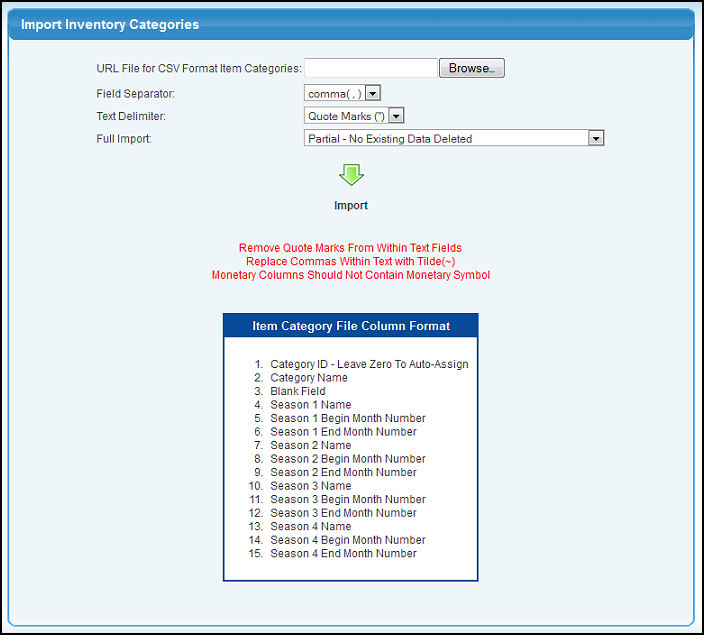
- URL File For CSV Format Items: Enter the path to the file you would like to import. You can either manually type the file path or click the Browse button to find an outside source.
- Field Separator: Select how the fields are delimited from the drop-down list.
- Text Delimiter: Select between text surrounded by quote marks, and no quotes around text fields.
- Full Import: Choose whether the records being imported are to replace anything currently in the system, or whether they are a partial import -- which will not delete any existing data. NOTE: A Full Import will delete ALL category data for ALL Companies.
- To import the file, click the
 Import button. Import button.
NOTE: The order of the fields to be imported, and which fields are to be imported will depend on certain settings in your system. For this reason, be sure to follow your ON-SCREEN information as to fields and order of fields.
|