|
|
Edit Build Order definitions -- what items a particular kit or catalog is to be made up of (to add an item as a build order, you must go to item update and check the appropriate box).
- From the Main Menu, select Inventory -> Manage Build Orders -> Edit BOM Definitions.
- Your screen should look similar to this:
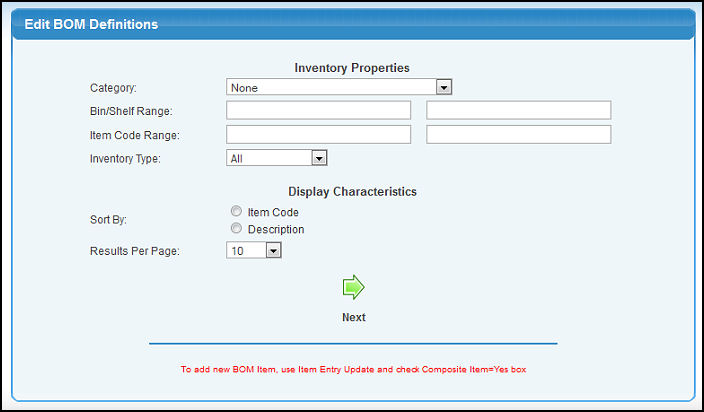
- Enter the following information to narrow your search:
- Category: To limit the results to a single category, make a selection here. None will show all categories.
- Bin/Shelf Range: To limit the results to a bin/shelf code range, enter the beginning and ending codes.
- Item Code Range: To limit the results to a range of item codes, enter the beginning and ending codes.
- Inventory Type: To limit the results to a single inventory type, select a type from the drop-down list. All will show all types.
- Sort by: Select how you would like the report sorted.
- Results Per Page: If you feel you will have a very large number of items on the report, you can set the results per page to a reasonable number.
- To view your report, click on the
 Next button. Your screen should look similar to this: Next button. Your screen should look similar to this:
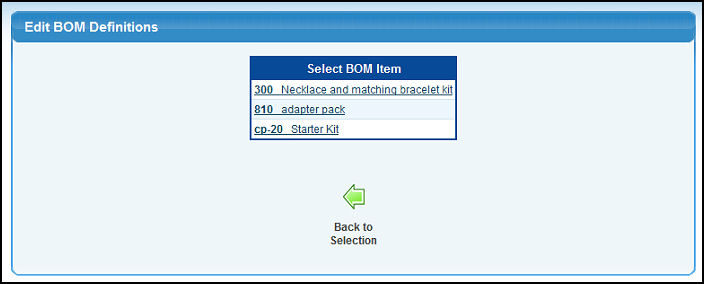
- Click on the item to bring up the details of the definition.
- To return to the previous screen, click the
 Back to Selection button. Back to Selection button.
If you selected an item to edit, your screen should look similar to this:
- Status: Select the current status of the component from the drop-down list, then click on the
 Save button next to the status. Save button next to the status.
- Import Data: To import this component data from another system, click on the IMPORT DATA button and follow the instructions. This field will only appear if no component items have been assigned.
- Add Items to this list:
- Item Description or Code: Enter the Item Name (or any portion of the name) to bring up a drop-down of possible matches. If you want to search by type of item, vendor, category, etc., use the
 Lookup button for detailed searches. Lookup button for detailed searches.
- Before/After: Select whether this should be inserted BEFORE or AFTER row # XX. Click the
 Add button to insert the new item. Add button to insert the new item.
- Delete Items from this list:
- Delete: Click the
 Delete button to remove an item from the list. Delete button to remove an item from the list.
- Edit Items on this list:
- Edit: Click on the
 Edit button to put that line item into edit mode and your screen should look similar to the following: Edit button to put that line item into edit mode and your screen should look similar to the following:
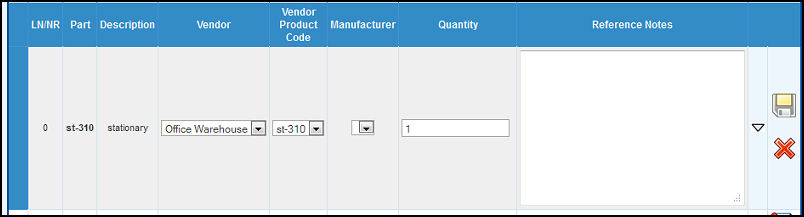
- Vendor: Select a vendor to be used when building this composite item.
- Vendor Product Code: The code number used by this vendor for this item.
- Manufacturer: Select a specific manufacturer (brand) required when creating this composite item.
- Quantity: Number of pieces of this item to be used for each composite item.
- Reference Notes: Special Instructions, for example placement instructions.
- Save: When the edit is complete, click on the Save button to finalize the edit.
- To return to the Item Definition selection screen, click on the Back button.
| |
|