|
|
|
To initially setup your Inventory system, you may need to enter the starting on-hand quantities, and NOT have them affect the General Ledger in any way. This program is the tool to accomplish this task.
- From the Main Menu, select Admin -> Setup - Inventory -> Item Beginning Balances.
- Your screen should look similar to this:
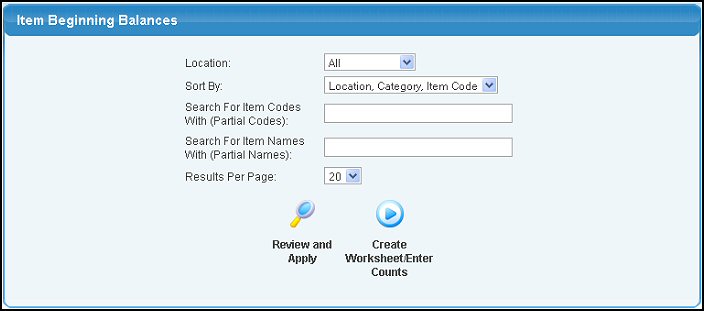
- Enter the information in the following categories to narrow your selections:
- Location: (if you only have one location, you will not see this pull-down). Select ALL Locations or choose a specific Location from the pull-down list.
- Sort By: Select how you would like the report sorted from the choices shown in the pull-down list.
- Search for Item Codes/Search for Item Description: Enter an Item Number (or part of a number) in the Search for Item Code box or enter an Item description (or part of a description) in the Search for Item Description box.
- Results Per Page: Select the number of results you would like to see per page from the pull-down list.
- NOTE: To verify and apply any quantities already entered, click on the
 Review and Apply button. (See details further down). Review and Apply button. (See details further down).
- To enter the beginning balances, click the
 Create Worksheet/Enter Counts button. Your screen should look similar to this: Create Worksheet/Enter Counts button. Your screen should look similar to this:
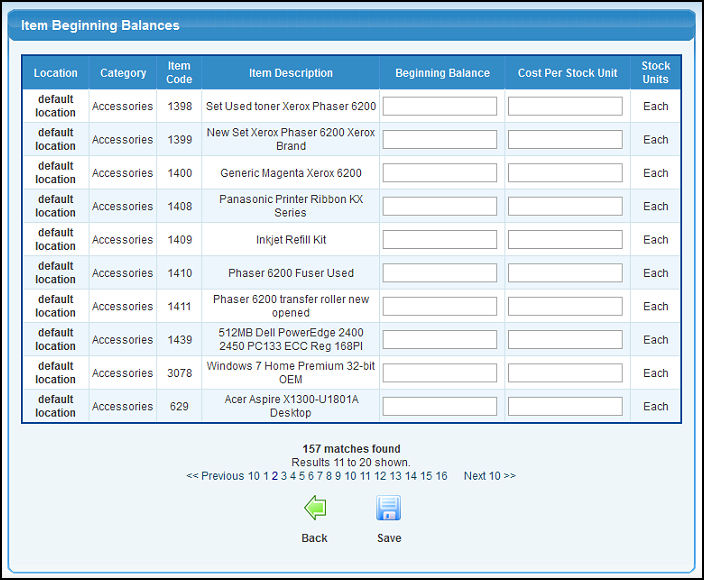
- Enter the data in the following categories to load your beginning balances:
- Beginning Balance: Enter the beginning balance in the appropriate column.
- Cost Per Stock Unit: The stock unit description appears to the right of this box, so BE SURE to enter the costs FOR THIS UNIT.
- To see the next page (or a specific page) of results, click on the Next (##) link OR click on any of the numbers (pages) shown at the bottom of the screen.
- To search again WITHOUT saving your changes, click on the
 Back button. Back button.
- To save your changes, click on the
 Save button. Your screen should look similar to this: Save button. Your screen should look similar to this:
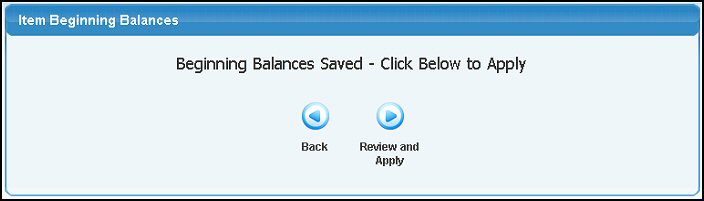
- To search again, click on the Back
button.
- To verify and apply the quantities entered, click on the Review and Apply button. Your screen should look similar to this:
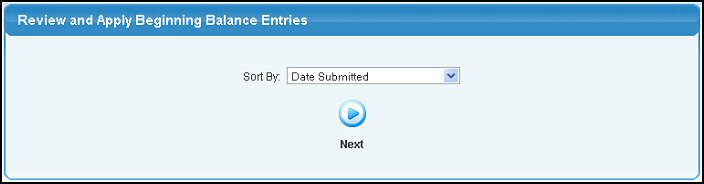
- Select how you would like to sort the data from the pull-down list.
- Click on the Next button. Your screen should look similar to this:
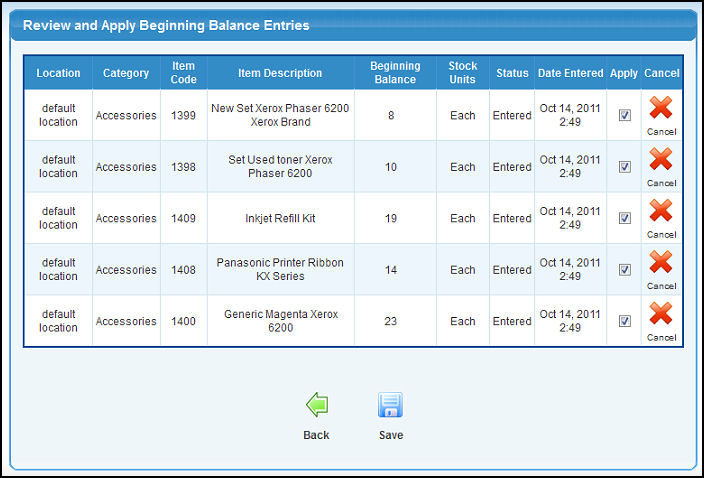
- If you are NOT applying the beginning balance for this specific item, click on the
 Cancel button. Cancel button.
- Check the Apply box for the items you would like to have update the inventory.
- To actually update the inventory for the beginning balances, click on the Save button.
- To return to the previous screen WITHOUT saving your changes, click on the Back button.
| |
|