|
|
Create Invoices for beginning balances (or for each open invoice) when first starting your NolaPro system. Invoices entered in this section will NOT have a net affect on the General Ledger.
- From Main Menu, select Admin -> Setup Receivables -> Beginning Balances.
- Your screen should look similar to this:
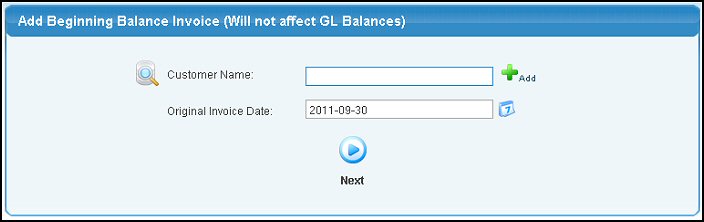
- Customer Name: Enter Customer Name (or any portion of the name) to bring up a drop-down of possible matches. If you want to search by phone, zip code, etc., use the
 Lookup button for detailed searches. If this is a new customer, click on the Lookup button for detailed searches. If this is a new customer, click on the  Add button to the right of this field, enter the new customer, then use the Lookup button to select. Add button to the right of this field, enter the new customer, then use the Lookup button to select.
- When you have entered the customer name or number, the screen will redraw in order to show you current credit information about this customer:
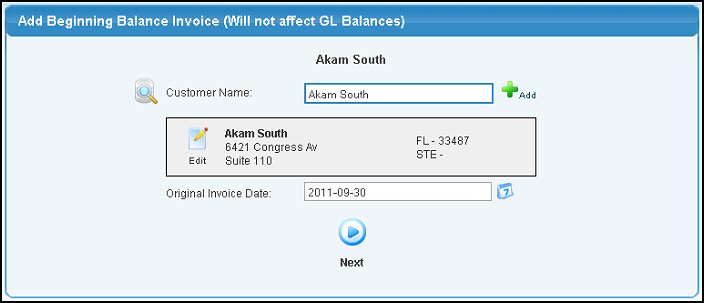
- You can EDIT the customer information by clicking on the
 Edit button next to the customer name. If credit messages are displayed, you can click on the words View Account to see more information about this customer. Edit button next to the customer name. If credit messages are displayed, you can click on the words View Account to see more information about this customer.
- Original Invoice Date: This is either the current date (for a single invoice representing many in your older system) or the actual date of the original invoice. You can either enter the date manually or click on
 Calendar button to bring up a calendar. Calendar button to bring up a calendar.
- Click the
 Next button to proceed. Your screen should look similar to this: Next button to proceed. Your screen should look similar to this:
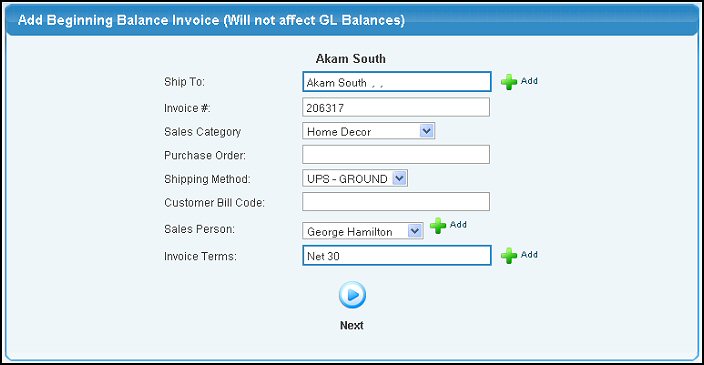
- Enter the information in the following categories:
- Ship To Address: Enter an address (or partial address) to bring up a list of possible matches or add a new one using the Add button.
- Invoice Number: The next sequential Invoice Number is automatically displayed.
- Sales Category: Select the Sales Category for this Invoice (this will originally show the default Sales Category for this customer).
- Purchase Order, if one is given.
- Shipping Method: Select a shipping method from the pull-down list (this will originally show the default Shipping Method for this customer).
- Customer Bill Code: (For customer's internal accounting)
- Sales Person: Select a Salesperson from the pull-down list (this will originally show the default entry for this customer).
- Invoice Terms: Enter invoice terms (or a portion of the term name) to bring up a drop-down of possible matches. Click on the Add button to enter a new invoice term.
- Click the Next button. Your screen should look similar to this:
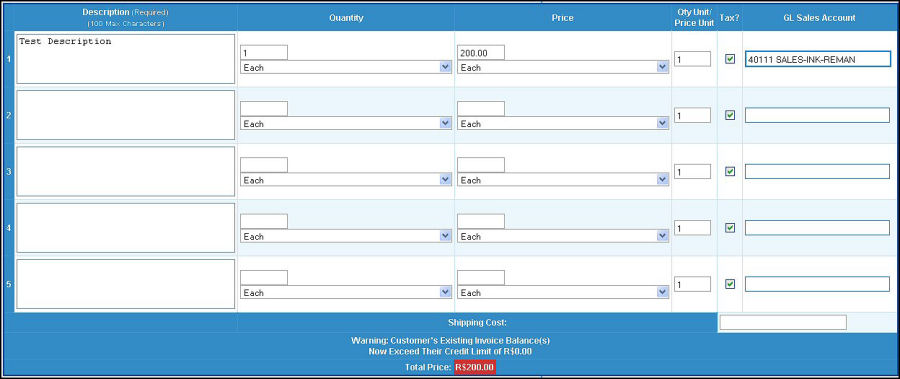
You can enter as many lines of details as needed for each invoice. Additional lines are opened up by clicking on the "Add More Input Lines" button at the bottom of the screen. Also at the bottom of the screen you will see the invoice total change with each new line entered.
- Enter the data into the following categories:
- Description: Full description.
- Quantity: The quantity column has both quantity and units. The quantity entered in this column should be the quantity of the units listed directly below.
- Sales Quantity Unit Name: Select the sales unit name from the drop-down list.
- Price: The Price column has both a price and units entry. The price entered should be the price of each of the units selected directly below.
- Price Unit Name: Select the price unit name from the drop-down list.
- Qty Unit/Price Unit: This field MUST have a value. It is the number of sales units (in the Quantity column) contained in a Sales Unit (in the Price column). The extended price will not work out correctly if this is incorrect.
- Tax: This box will come up checked (for charge tax on this item) or unchecked (non-taxable item) depending on the default setting for this customer. If you want to CHANGE the normal tax status for any line on the invoice, simply change the checked status showing.
- GL Sales Account: This account will first appear with the default Sales Account from the customer. You may change it for any line item on the invoice by simply picking a different one from the drop-down list.
- To Add more input lines on this invoice, click the Add More Input Lines button.
- To proceed to the final screen, click on the Next button. Your screen should look similar to this:
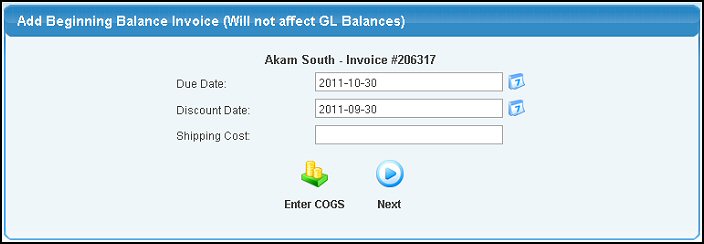
- Due Date: Enter the invoice due date or select from the calendar using the button. This will auto-calculate the due date based on the customer terms, however you can change this date if desired.
- Discount Date: Enter the date after which no discounts will apply or select from the calendar using the button. This will auto-calculate based on the customer terms, however you can change this date if desired.
- Tax (if applicable): Enter the amount of tax applied to this invoice. If more than one taxing district is required, each one will display separately.
- Shipping Cost: Shipping charges (non-taxed) to add to invoice.
- Complete the invoice by clicking on the Next button.
- If you want to enter the COST OF GOODS for this invoice, click on the
 Enter COGS button, which brings up this screen. Enter COGS button, which brings up this screen.
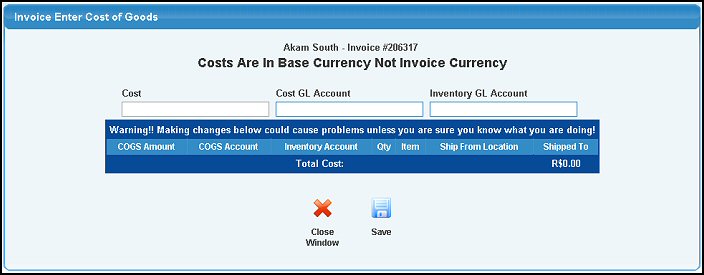
- Enter Cost of Goods in appropriate box.
- Enter the GL account (or partial account) to bring up a list of possible matches for Cost and Inventory accounts.
- Click the
 Save button to save the entry and open up another line for entering more costs. Save button to save the entry and open up another line for entering more costs.
- When you have entered all the costs you want (and SAVED them), exit by clicking on the
 Close Window button. Close Window button.
- A screen will be displayed showing the Invoice number and a confirmation that it was added successfully. Click the
 Back button to add more invoices. Back button to add more invoices.
| |
|