|
|
Deductions that apply to all or groups of employees all having the same deduction calculation rather than specific employees. This same deduction group label would also need to be attached to the employee files of those belonging to
this group.
- From the Main Menu, select Admin -> Setup - Payroll -> General Deductions.
- Your screen should look similar to this:
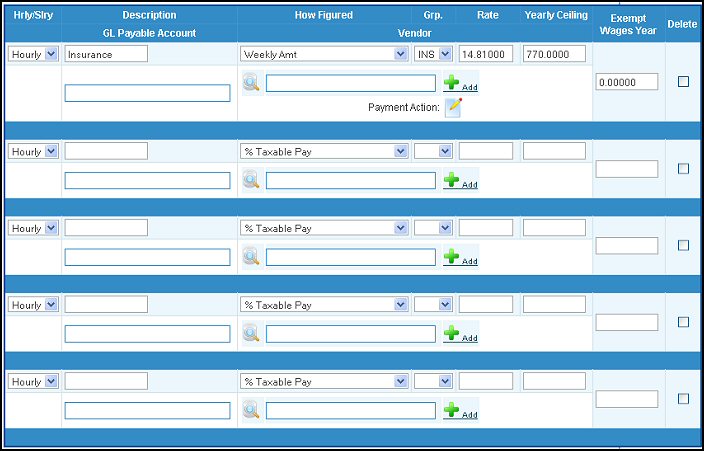
- Enter data in the following categories:
- Hrly/Slry: Select Hourly or Salary from the pull-down list. This is the employee group that is affected by the deduction amount. If the deduction affects BOTH hourly and salaried workers, you will need to create two entries.
- Description: Enter the Description of this deduction as you want it to show on check summaries, etc.
- How Figured: Select calculation method from the pull-down list. NOTE: Weekly amounts will auto-calculate the amount if the actual payroll is bi-weekly or monthly, etc. Also, if using the AMOUNT WEEK 1, this will be applied in the payroll period that includes the 1st of the month.
- Grp.: Select employee group from the pull-down list. Each employee can be designated as being part of one group. If you want a deduction amount only to affect a specific group, then enter the group name here, and make
sure the same group name is selected in each employee record.
- Rate: Enter the percentage rate or flat rate amount (depending on choice in HOW FIGURED).
- Yearly Ceiling: If this deduction is only taken up to a certain maximum amount of pay and then no more for the year, enter the maximum amount allowed. A zero ceiling entry means there is NO ceiling.
- GL Payable Account: Enter the GL Account, Name or any portion of the number, name or description to see a drop-down list of matching account numbers. Highlight the account to enter it into the field. A space bar will bring up ALL accounts valid for this field, HOWEVER this is not recommended due to limitations on the length of the list that can be viewed.
- Vendor: Enter Vendor name or use the
 Lookup button to search for the Vendor Number. NOTE: To Add A New Vendor, click on the Lookup button to search for the Vendor Number. NOTE: To Add A New Vendor, click on the  ADD button and follow the steps under Add Vendor section. ADD button and follow the steps under Add Vendor section.
- Payment Action: Only seen when editing, this is how you can set up what happens to the amount -- does it create a payables entry? And if so, what information is to print on the description of the payable? Clicking on this button, brings up the following screen:
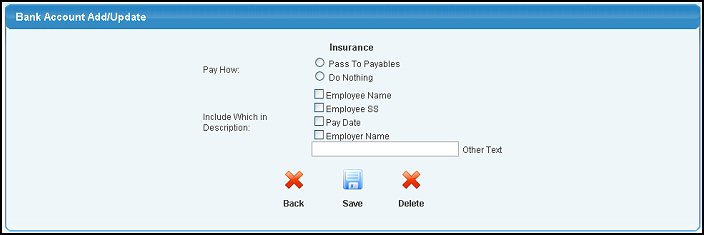
- Pay How: Select if you want to pass the information to payables (select Do Nothing if you want this to be a manual process).
- Include Which in Description: Select which of the standard information you want to show on the description of the payables entry, or enter your own text.
- When done, you can
 Delete the information, Delete the information,  Save the information, or click on the Save the information, or click on the  Back button to close the window without saving any changes made. Back button to close the window without saving any changes made.
- Exempt Wages Year: Enter the exempt yearly wages for the deduction, if applicable.
- Delete: To remove the deduction from the Payroll System, check this box.
- To return to the previous screen WITHOUT saving your changes, click on the
 Back button. Back button.
- To save your changes, click on the Save button.
| |
|